
Upload Excels to SQL Server and Archive them with Date and Time
In my first blog post, I will talk about one of the processes that I use almost every day.
This is how we can archive the data of different Excel files in a SQL Server database, all this through SQL Server Integration Services (SSIS) rename them with the date and time in which they have been processed.
We will follow the following steps to configure this process:
1. Creation of the Project Bases
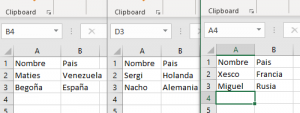
First, we will need the Excel files with more or less the same data structure between them (it is perfect for archiving evolutions of some process, records of some kind …). In this case, I created three files with two equal columns:
Also, we will previously create a table on our server with the fields to fill that are as similar or identical to the Excel ones. Although it is true that during the process we can perform the mapping to relate the columns with different names.
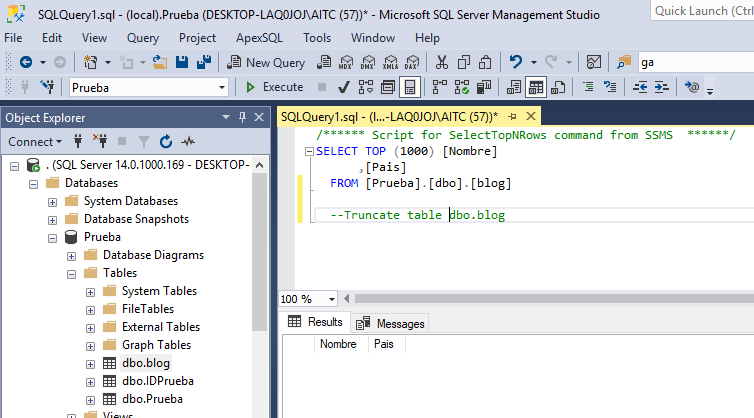
In this case we will use the “Prueba“ database and the dbo.Blog table:
2. Directory Creation
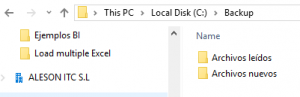
In this phase, we will create two directories:
- First, the source on which the SSIS project will read the information (Archivos nuevos).
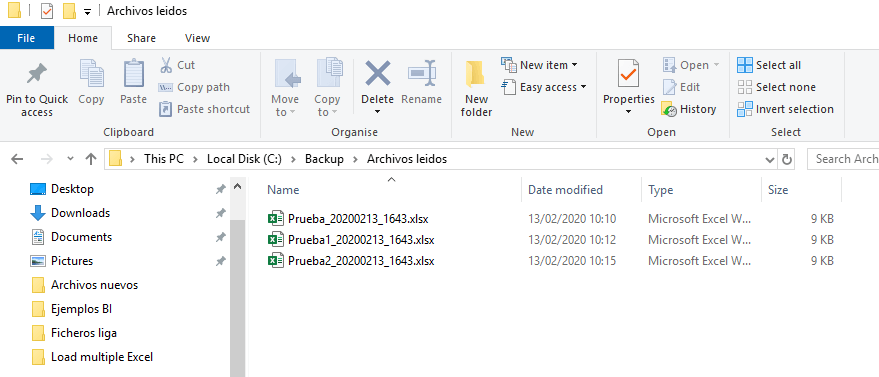
- Second, in which we would like to archive the files already read and renamed with the date and time it has been processed (Archivos leídos).
3. Creating a New project in SQL Server Data Tools
In this phase, we will create a new project in SQL Server Data Tools. If you do not have the program you can download it here.
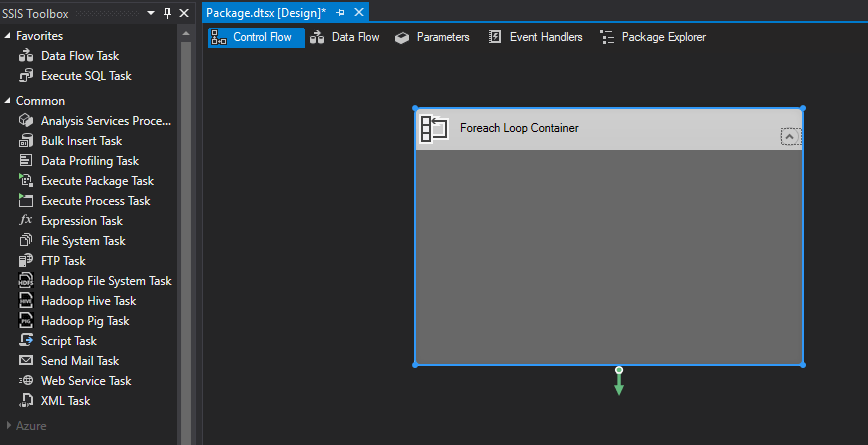
First we need to create a new SSIS project and on the package that creates by default (package.dtsx) we will start to create our loop.
Within Visual Studio we have a window called SSIS Toolbox, we have different tools, in this project we will mainly use five of them:
- Foreach Loop Container: It allows us to repeat in a loop the process that we have specified within it.
- Data Flow Task: Tool that allows you to archive a specific process.
- Excel Source: Specify an .xlsx file as a data source.
- Data Conversion: Allows you to change the data type of a certain column or its length.
- OLE DB Destination: A tool that allows you to specify the destination of the data after being processed in the Data Flow Task.
We need to create certain variables, since it is not going to be done only on one file but on three (in our case, they could be more as long as the structure of Excel is the same).
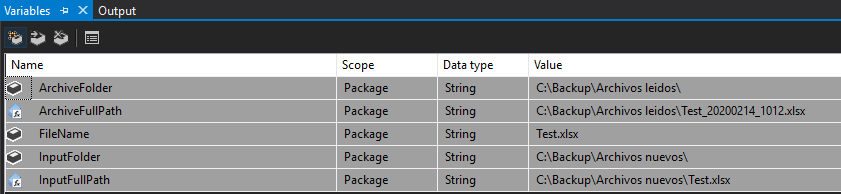
Here I show you what are the variables that we will need in our project:
- ArchiveFolder: It gives us the name of the folder which will store the read and renamed files.
- FileName: Test name given to the file that will later be replaced by the ArchiveFullPath.
- InputFolder: Name of the repository from which will read the Excel files.
- ArchiveFullPath: Determines the folder in which the processed file will be stored with the name, date and time in which it was read, for this we will need the following function:
InputFullPath: Address of the repository of the files specifying that you have to read them, with the following expression, which indicates that will take the repository and add the name on the file.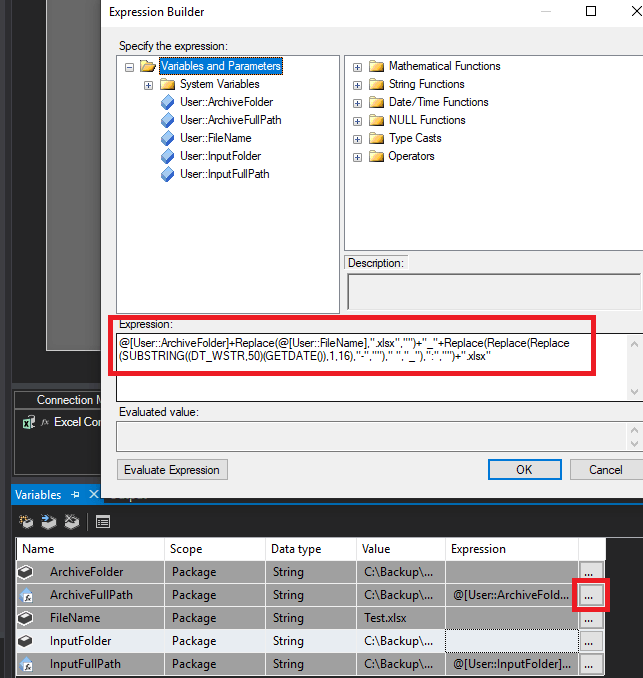
- InputFullPath: Address of the repository of the files specifying that you have to read them, with the following expression, which indicates that will take the repository and add the name on the file.
@[User::InputFolder]+@[User::FileName]- With the variables created, we can already connect both the repository from which will read the files and the data storage in our SQL Server.Next, we are going to select a specific file and, later using variables, we will make it read all the source files.Select the Excel connection (Excel Connection Manager) and click on the 3 points in the Expresions section. It will open a window in which we have to create an Expression that we will specify from an ExcelFilePath and again on the 3 points we will create the expression by joining the two variables. In this step, we change the expression of the Excel connection so that it takes the name of the repository in which the files are located. Then, we add the variable that we created previously to take the files that are in the folder, regardless of the name they have.The next connection we need is the destination in which all the data will be stored, in my case it is located locally, but it can be any type of destination, included in Azure SQL Database.
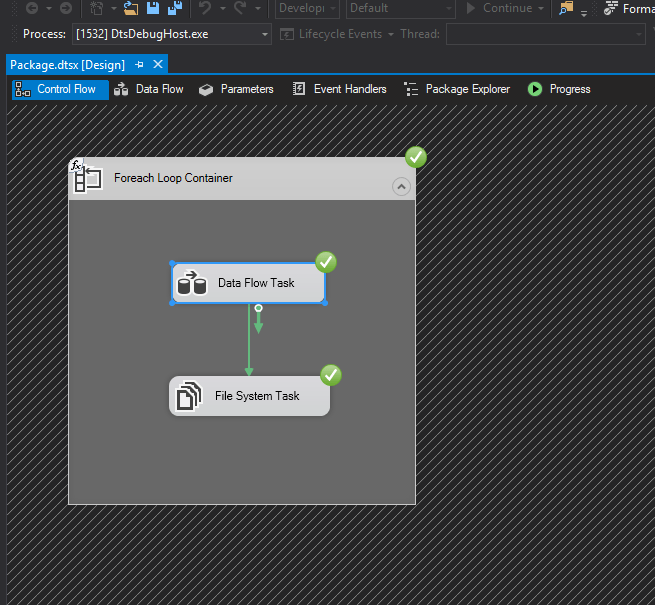
First, we choose a Foreach Loop Container and create a Data Flow Task.
Within the Data Flow Task we have to specify a source on which the process will be carried out. A Data Conversion process (if data transformation is necessary) and a Destination in which the data contained in the Excel files, called OLE DB Destination, will be stored.
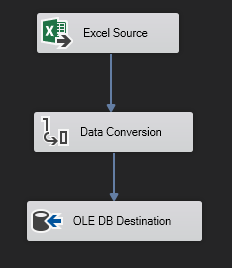
This would be the basic structure of the Data Flow Task that we should carry out in the loop that we intend to use.
Once we have all the part of the Data Flow Task performed, we will configure the Foreach Loop to detect the files in the specified repository and be processed one by one by the Data Flow Task previously performed.
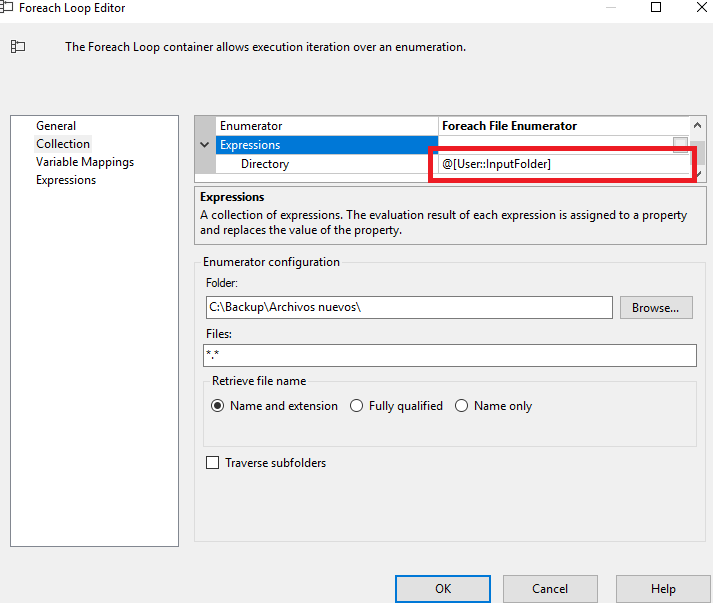
In the editor, we simply have to specify the path of the folder on which you have to loop once the first file has been read, the name of the files (or extension) that we want you to take, in this case I have set “*.* “but it could be” .xlsx “to avoid confusion if there are other types of files in the same repository.
In the expressions we must also specify that it is a directory and in the expression, we add the InputFolder variable, which was the directory path where the files are located. Finally, we only have to give you the instructions of what to do with the files once they are processed.
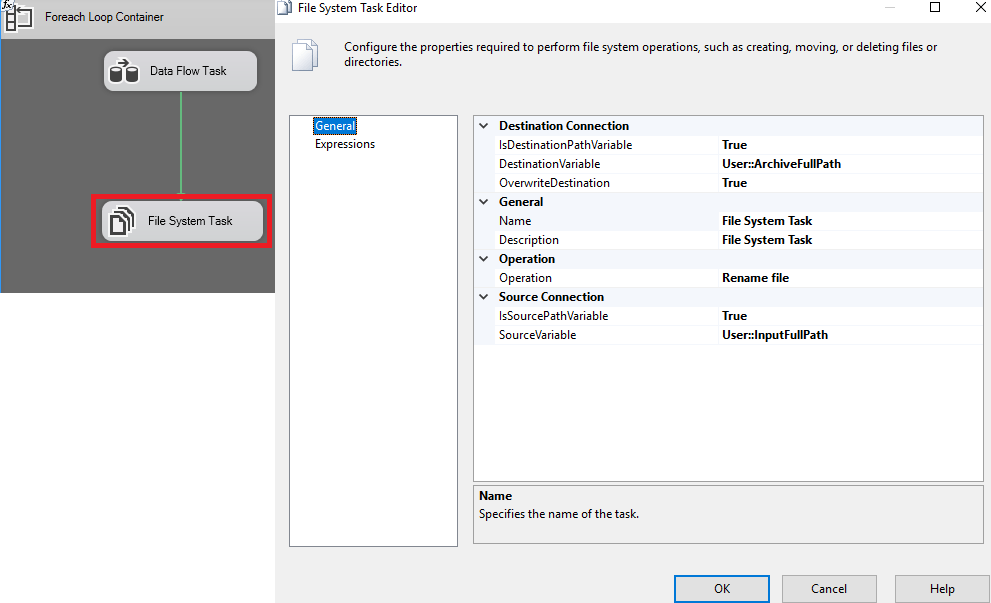
In this window, we will indicate that when the previous loop ends you have to search for the specified destination, the operation you have to perform is Rename File, the file will be saved with the name you have and also the date and time at which It has been added to the database.
Once the archiving process is done, it asks us if there is anything else to do, we change the Source Connection to True and the source choose the InputFullPath variable.
4. Project Execution
In this final phase, we only have to execute the project, check if it works correctly and if the data is registered in our SQL Server.
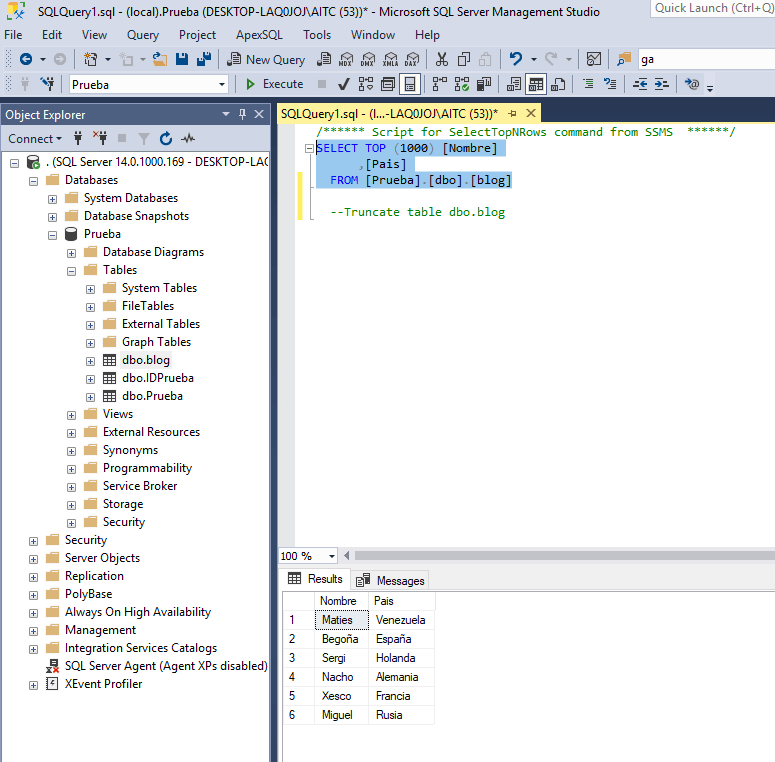
If the data is in the database, we would only have to check the destination to see if the files are renamed with the script that we created previously in the variable.
If you want us to help your business or company contact us at info@aleson-itc.com or call us at +34 962 681 242
Data Analytics Analyst. Iniciando mi carrera profesional en el mundo de los datos.
