
How to Configure pgbackrest in PostgreSQL to back up to Azure
Hello! Welcome and welcome to a new post in the best Data and Cloud blog. In today’s article we will talk about how to backup to Azure with pgbackrest in Postgre SQL.
But first, let’s talk a little about what PGBackrest is and what its main features.
PGBackrest is a simple and powerful tool for automatic backups, in which we can make differential, incremental and full backups.
It’s also compatible with the following Azure/Amazon S3/OCI/GCP platforms.
This tool is only compatible with PostgreSQL and is currently only available on Ubuntu distributions.
In the example of this blog, we are going to do it on an Ubuntu server 20.04.1 and PostgreSQL 15.
1. Install PostgreSQL
We will install it with the following commands:
Create the file repository configuration:
sudo sh -c ‘echo “deb http://apt.postgresql.org/pub/repos/apt $(lsb_release -cs)-pgdg main” > /etc/apt/sources.list.d/pgdg.list’
Download and install the certificate
wget –quiet -O – https://www.postgresql.org/media/keys/ACCC4CF8.asc | sudo apt-key add –
Update the repositories with the new lists
sudo apt-get update
Install the latest version of PostgreSQL
sudo apt-get -y install postgresql
But if we want to install a specific PostgreSQL version we can do it with the following command:
apt-get install postgresql-12
2. Install PGBackrest
apt-get install pgbackrest
3. PGbackrest Configuration
When we install pgbackrest it also generates a file called pgbackrest.conf which is in the path /etc/pgbackrest.conf.
We edit the file, and in the file we will see the following:
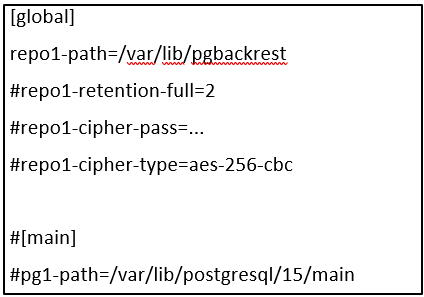
Global: are the global options that we can configure for our database cluster, i.e. encryption, backup retention, Azure, Amazon, Google and other settings.
Main: is the name of our stanza.
A stanza is the configuration of a PostgreSQL database cluster in which we define where the database is located, i.e. the path and how the backups will be performed.
Let’s delete the content and put the following:
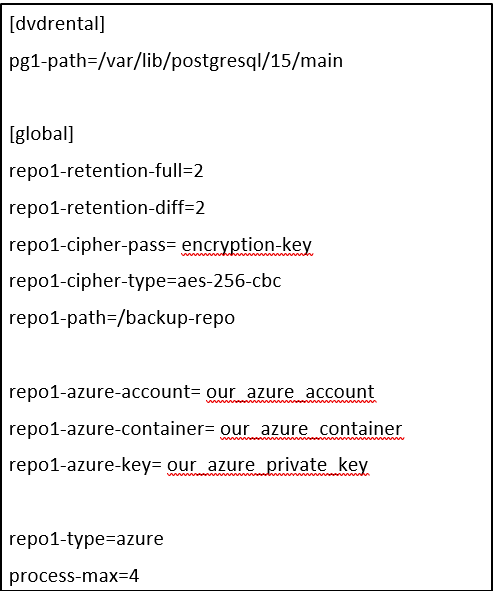
Parametres to knowing:
[dvdrental]: is the name of our stanza, we have given it the same name as our DB but we can call it whatever we want. [global]repo1-retention_full y repo1-retention_diff means that we are going to save the last two successful full backups as well as the associated backup diffs.
But if we want to specify the retention in days, we can do so with the following lines:
repo1-retention-full-type=time
repo1-retention-full=30
Important:
If in this example the repository would hold five full backups – one 25 days old, one 35 days old, and the rest older – the 35-days-old full backup would still be required to restore to the period between 30 and 25 days ago, and as such is kept even though it is older than the configured retention period. All other older backups will be removed during retention maintenance.
[repo1-cipher-pass]: clave de cifrado para nuestros backup
Note:
For the encryption key we can run the following command to generate a key:
openssl rand -base64 48
[repo1-cipher-type]: is the type of encryption we are going to use
[repo1-path]: is the folder in our cloud where we are going to save the backups, the folder is created automatically.
The following parameters are the credentials of our Azure user.
[repo1-azure-account] [repo1-azure-container] [repo1-azure-key]To obtain these credentials we go to our Azure account.
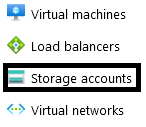
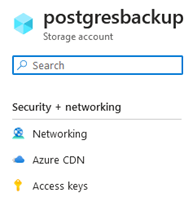
We create a new account and once created we go to Access keys:
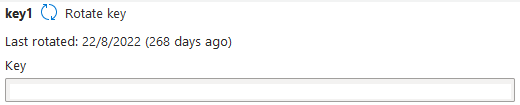
And here we can see our key.
[repo1-type]: is the type of storage, i.e. Azure, Amazon, Google…
[process-max]: is the maximum number of processes to use to compress/transfer, each process will perform the compression and transfer to make the execution as fast as possible.
This value should not be set too high as it may affect the performance of our database.
4. PostgreSQL Configuration
Edit the PostgreSQL configuration file located at the following path:
nano /etc/postgresql/15/main/postgresql.conf
Check the version that you have installed on your server, as the path may not be the same.
At the end of the file we put the following lines, right below “CUSTOMIZED OPTIONS”

archive_command = ‘pgbackrest –stanza=dvdrental archive-push %p’
archive_mode = on
max_wal_senders = 3
wal_level = hot_standby
archive_command: this to determine how we are going to send our archive.
archive_mode: with this option we are going to backup the transaction log to be able to recover our database at any point in time.
max_wal_senders: this specifies the maximum number of concurrent connections from standby servers or streaming database backup clients, i.e. the maximum number of WAL sender processes running simultaneously.
wal_level: determines how much information is written to the WAL file.
Once PostgreSQL has been configured, the server must be restarted for the changes to take effect.
Systemctl restart postgresql
5. Back up Configuration
The configuration of the copies is going to be done with postgres users, which is the default user of PostgreSQL.
And we are going to configure the copies so that only this user can launch the backups.
Here we log in as postgres user in our Ubuntu:
sudo -i -u postgres
We start the repository:
pgbackrest –stanza=dvdrental –log-level-console=info stanza-create
We check the configuration:
pgbackrest –stanza=dvdrental –log-level-console=info check
6. Back Up Schedule
In this part we are still logged in as postgres users.
In the /var/lib/postgresql/ folder we are going to create a script for the copies.
nano copia.bash
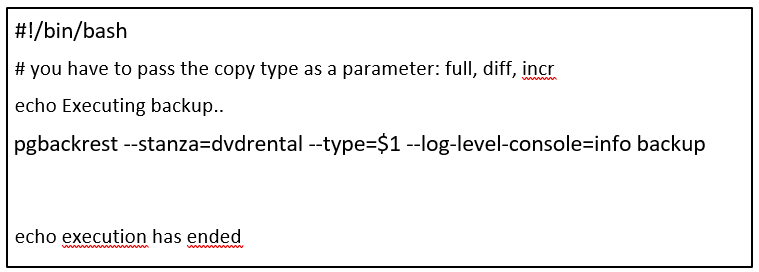
We add execution permissions:
chmod ug+x copia.bash
And in the Ubuntu crontab we add the lines to run automatically.
#copy full every Sunday
0 23 * * 0 /var/lib/postgresql/copia.bash full > /var/lib/postgresql/copia_full.ultimo 2>&1
The full backup runs every Sunday at 23:00.
#copy diff all other days
0 23 * * 1-6 /var/lib/postgresql/copia.bash diff > /var/lib/postgresql/copia_diff.ultimo 2>&1
The backup diff runs every day at 23:00.
Important Points to consider
Once we have pgbackrest configured and running it is very important to make a copy of the pgbackrest.conf file, because this file is where we have our encryption key, our azure credentials, key, account and bucket.
IF WE LOSE THIS FILE WE WILL NOT BE ABLE TO RECOVER OUR BACKUPS.
On the other hand, it should be noted that when pgbackrest performs the backups, it splits them into small files, which makes it easier to upload files to our azure account, instead of uploading a single file.
And with this we conclude today’s article. If you found it interesting, you can check our latest SQL Server and Azure posts:
Update MongoDB without Service Issues
How to create Cost Alerts in Microsoft Azure
If you need help with your database or are thinking of migrating your SQL Server to the cloud, Aleson ITC’s team can help you.

Data Analyst Associate.