
☁ How to Install Managed Instance in Azure
Today, we are back with another post related to the Microsoft Azure Cloud platform, this time we are going to talk about a new service, a service that will mark a before and after in the migrations from SQL Server to Azure, we will talk about Managed Instance.
Managed Instace is a new Azure SQL Database deployment option that provides almost 100% compatibility with the latest SQL Server (Enterprise Edition) local database engine, a native virtual network (VNet) implementation that allows you to troubleshoot common security issues and a favorable business model for on-premises SQL Server clients.
It’s a service that Azure offers us to have a SQL Server instance, with all the advantages that it has, but without the need to manage our operating system or updates of new versions of both SQL Server and Windows Update patches.
Let’s start with the creation of the Managed Instance resource.
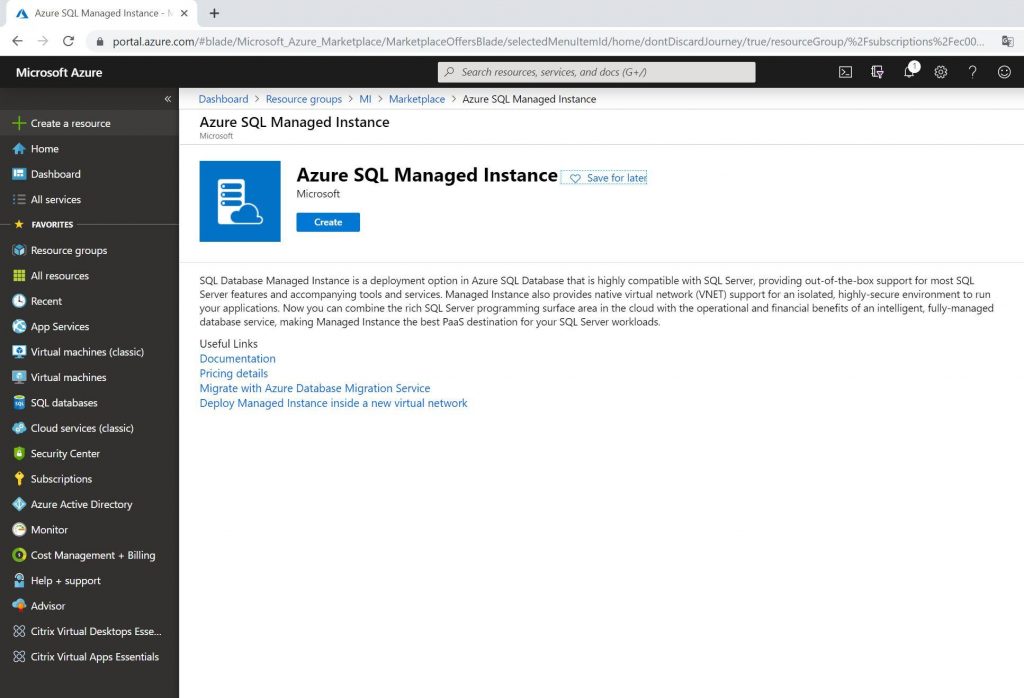
First of all, we must look for the resource to be created (Azure SQL Managed Instance), once selected we click on Create to continue:
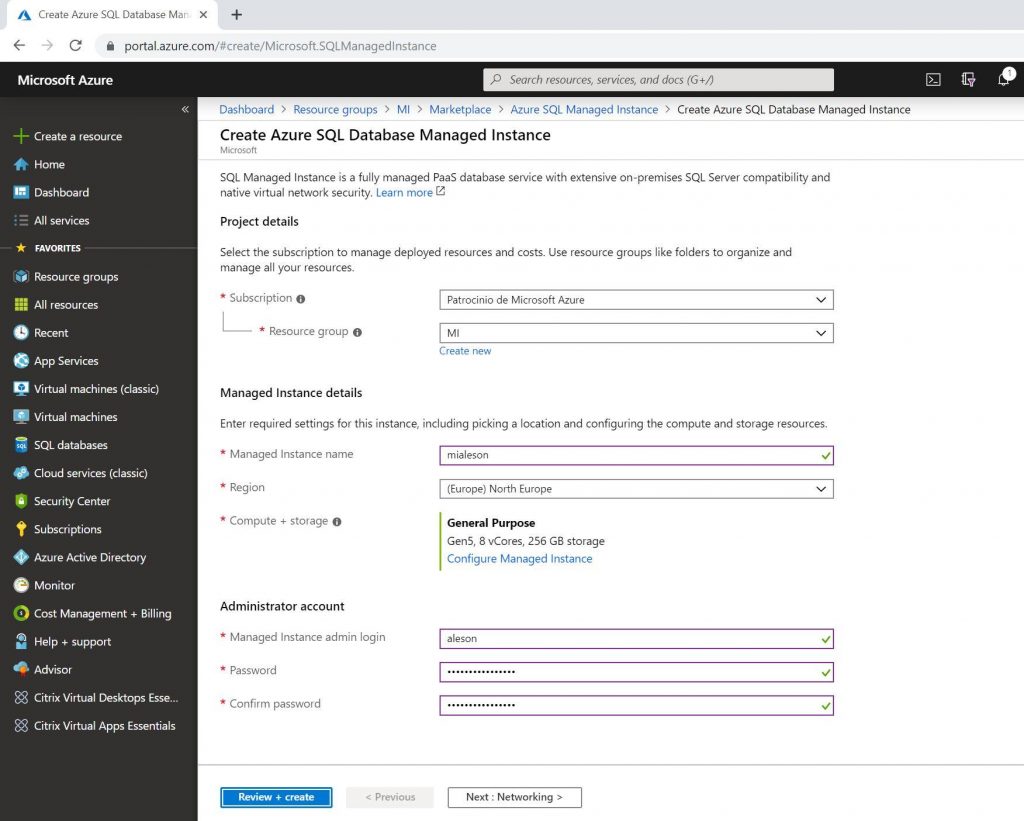
In this step we must fill in the following fields:
- Resource Group: We must create or have created a resource group.
- Managed Instance Name: Name of our Managed Instance.
- Region: Where are we going to locate the instance (in our case in North Europe).
- Compute + Storage: Size of our instance (We will talk about this point below).
- Managed Instance admin login: SysAdmin user of our instance.
- Password: Password of our SysAdmin user.
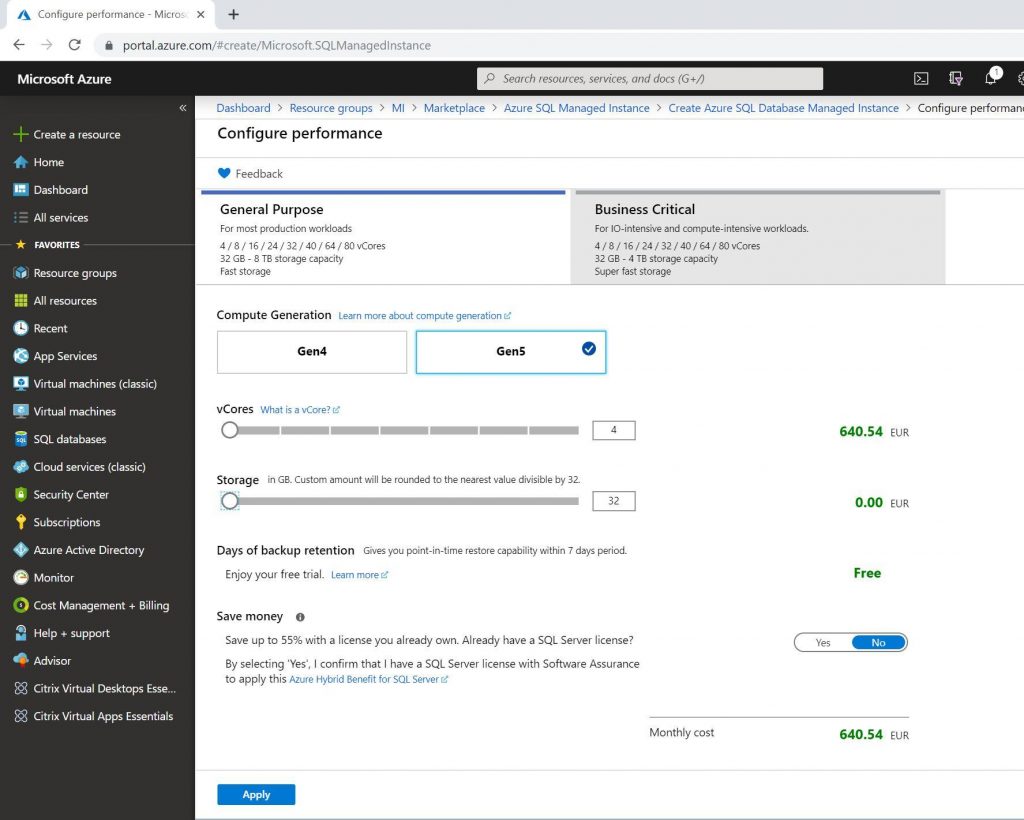
We will make the choice of the size of our Instance, click on “Configure Managed Instance” in “Compute + Storage”, once in the configuration we have several options:
There are two types of generations of Managed Instance (Gen4 and Gen5). These are the differences:
Gen4:
- Intel E5-2673 v3 (Haswell) 2.4 GHz processors
- Locally-attached SSD
- 8, 16, 24 vCores options
- 1 vCore = 1 physical core
- 7GB of RAM per vCore
Gen5:
- Intel E5-2673 v4 (Broadwell) 2.3 GHz processors
- Locally-attached fast NVMe SSD
- 4, 8, 16, 24, 32, 40, 64, 80 vCores options
- 1 vCore = 1 logical core, hyper-threaded
- 5.5GB of RAM per vCore
- Guaranteed accelerated networking
Depending on our needs we must choose one or the other. And within each generation we have two types of instance:
General Purpose:
- Designed for applications with performance and common I/O latency requirements.
- Azure Blob Storage high performance (8 TB).
- Integrated high availability based on reliable Azure Blob Storage and Azure Service Fabric services.
Business Critical:
- Designed for applications with low I/O latency requirements and business applications with higher performance.
- Includes extremely fast SSD local storage (1TB in Gen4 and 4TB in Gen5).
- Integrated high availability based on AlwaysOn Availability Groups.
In our case we have chosen General Purpose Gen5 (4vCores and 32GB of storage). Once the Managed Instance is created, it’s possible to change all these values, choose more processing, more storage for our databases, as well as make an escalation to Business Critical.
Once the values have been selected, click on “Apply” and continue.
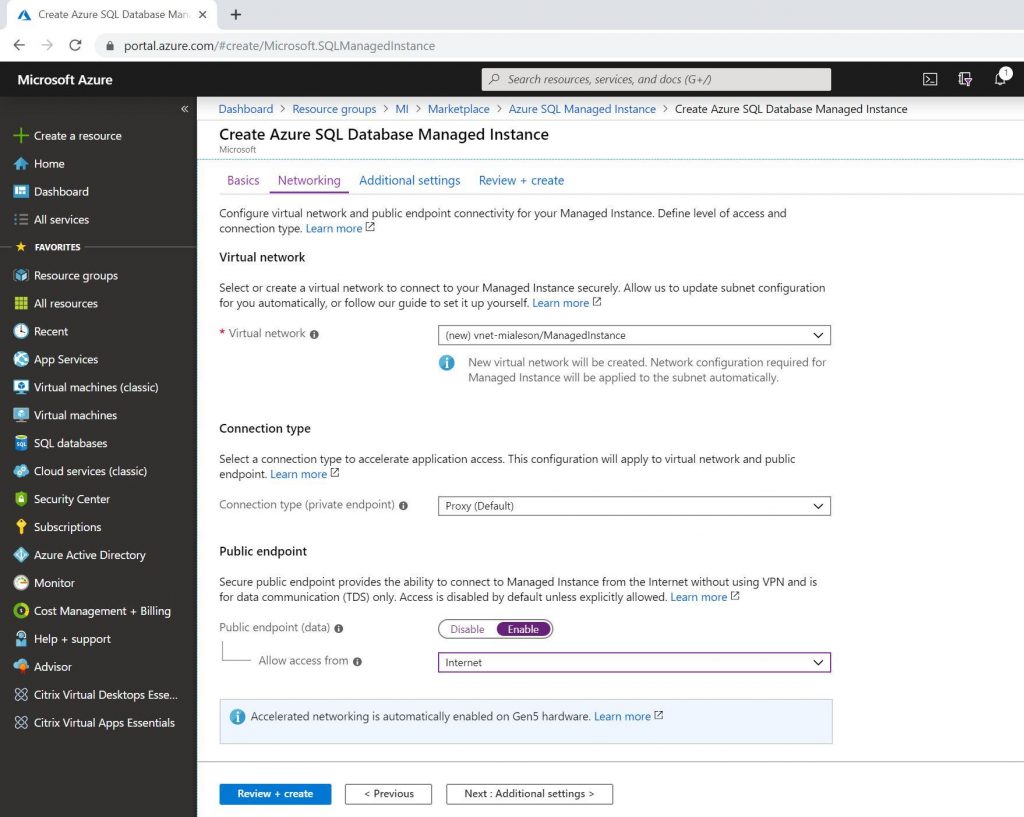
After the first part, we will configure our virtual network, we have two options in this case:
- Create a new Vnet and a subnet for our Managed Instance.
- Have a Vnet already created and create a subnet for our Managed Instance.
Since this service requires a single subnet within our private network for exclusive use, only Managed Instances can be stored on this subnet.
Another point to consider is whether we want to have our Managed Instance open to the Internet with a Public Endpoint or not.
Once all the points have been selected, we proceed to the next step:
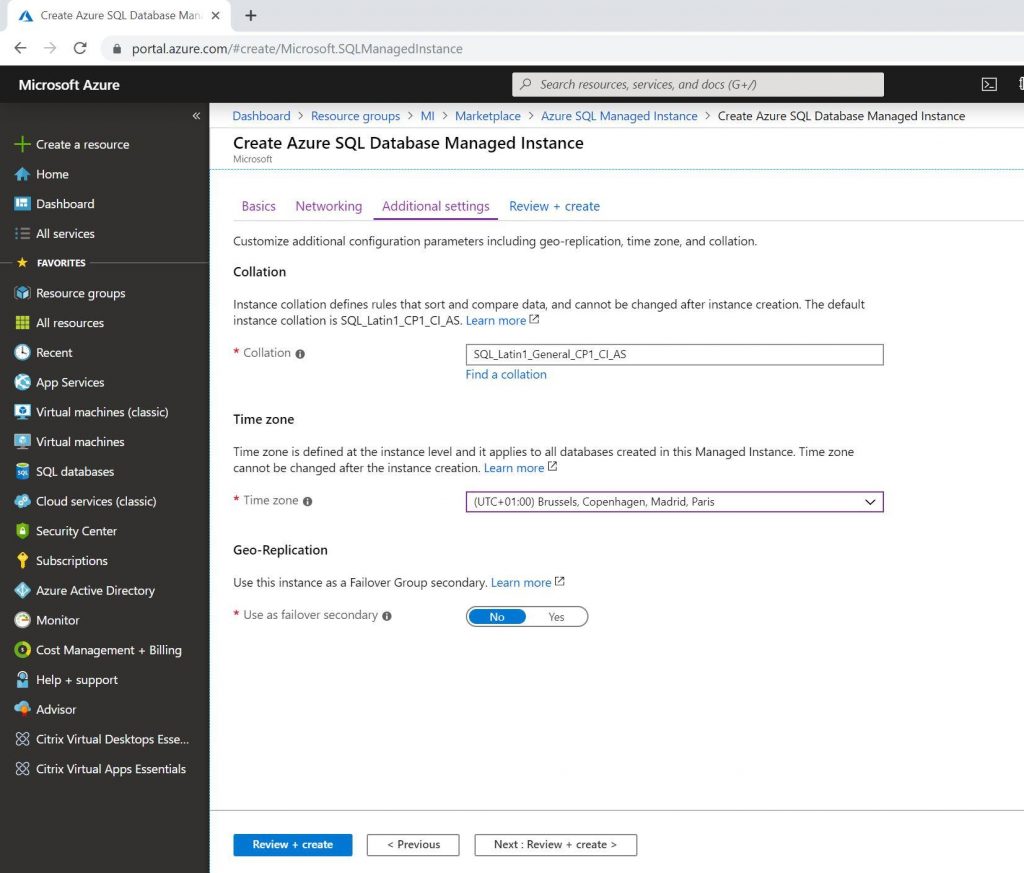
In this part of the creation we must choose the Collation that our instance will have, if we are going to migrate databases from On-Premise or an Azure Virtual Machine, we must take into account the source Collation.
We also choose the “Time Zone” of our region as well as the Geo-Replication if we want to have a secondary node in another location:
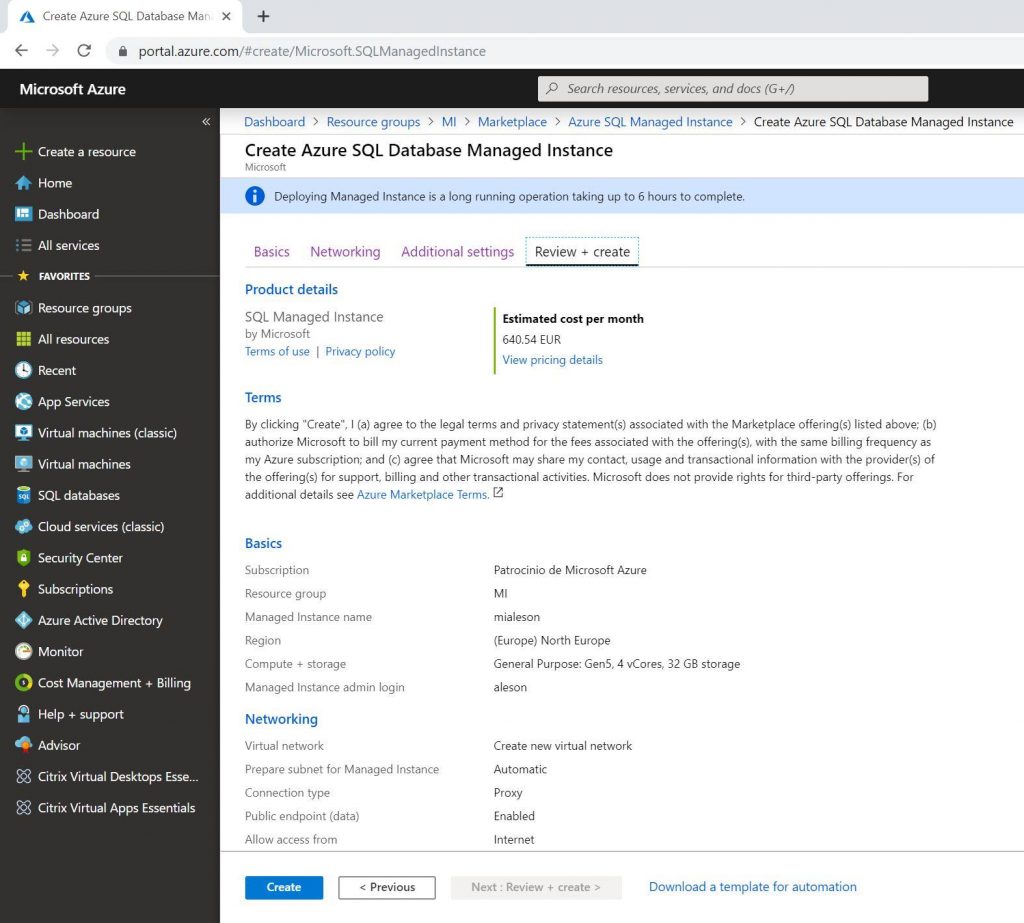
And finally, we go to the last point, check that all the data is correct and make the creation. They inform us that it can take about 6 hours to deploy the Managed Instance, since the first creation makes configurations at the Virtual Network level and performs the creation of a Virtual Cluster that will store all the managed instances that we create within the same subscription.
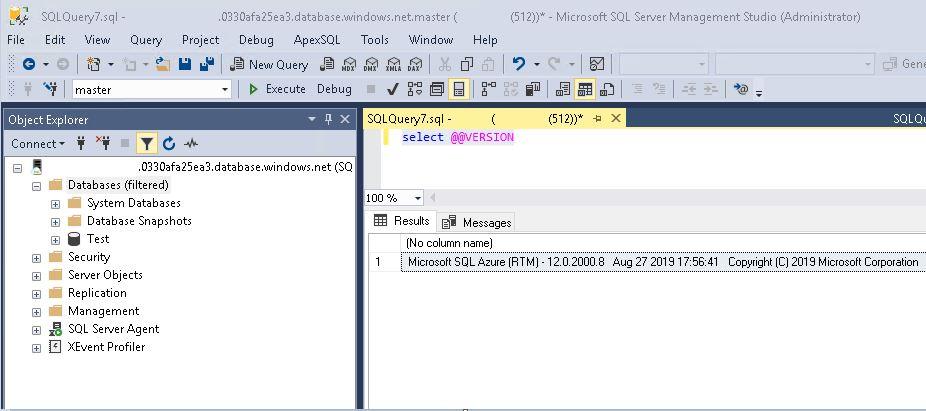
Once our Managed Instance is created, we access it through our host or instance name. To see that we are connected to our Managed Instance we launch a “Select @@ VERSION”, and as we can see in the result of the query we are under “Microsoft SQL Azure (RTM) – 12.0.20008”
Keep on reading the blog because during the following weeks we will be publishing more entries about Managed Instance and how to migrate to this service.
Azure Solutions Architect, Infraestructura e Implementación. Centrado principalmente en la plataforma Azure, la arquitectura de red y la innovación.