
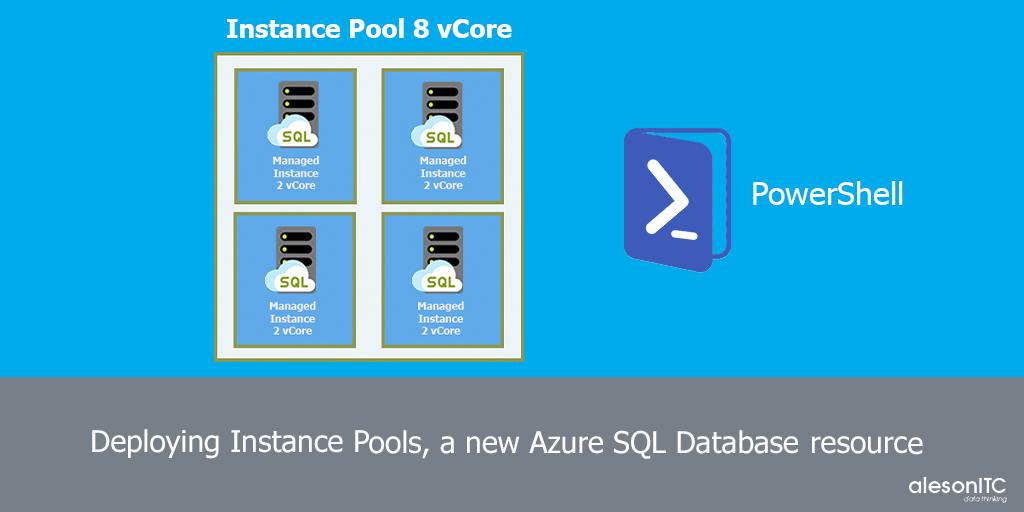
☁ Deploying Instance Pools, a new Azure SQL Database Resource
Continuing with the post of my colleague Fran Lens’ about Instance Pools, today I am going to teach you Step by Step how to create Instance Pool in Azure using Powershell.
Next, I show you the steps to follow to carry out this process:
1. Creation of a Valid Virtual Network and Subnet
In this step, we will check where we can implement the Managed Instance of the SQL Azure database.

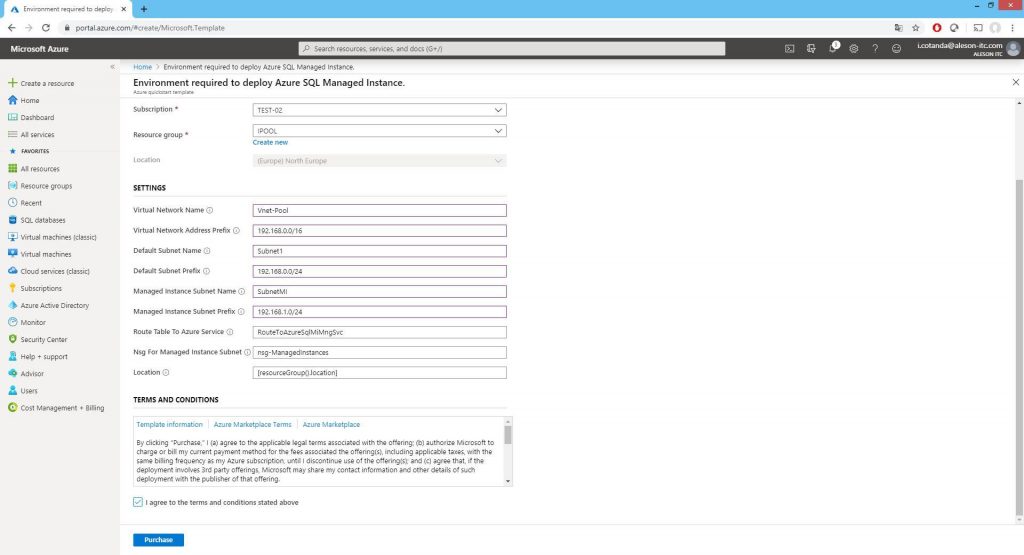
Here I show you the template provided by Microsoft to meet the standards necessary for optimal operation:
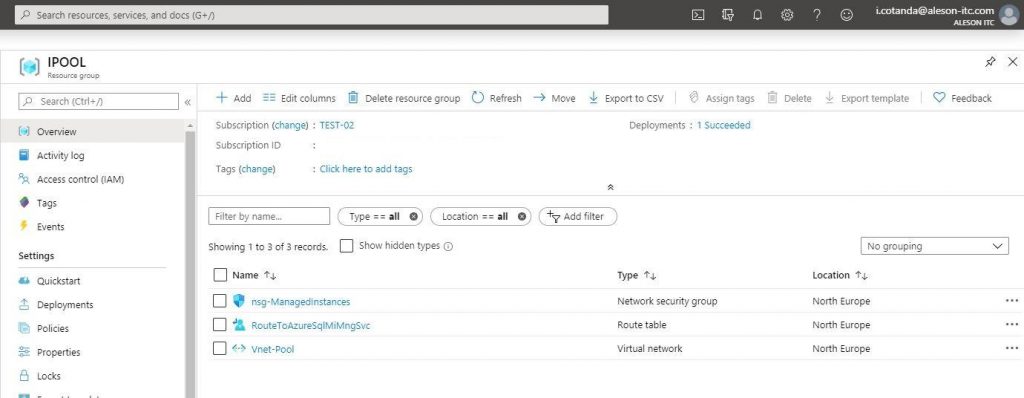
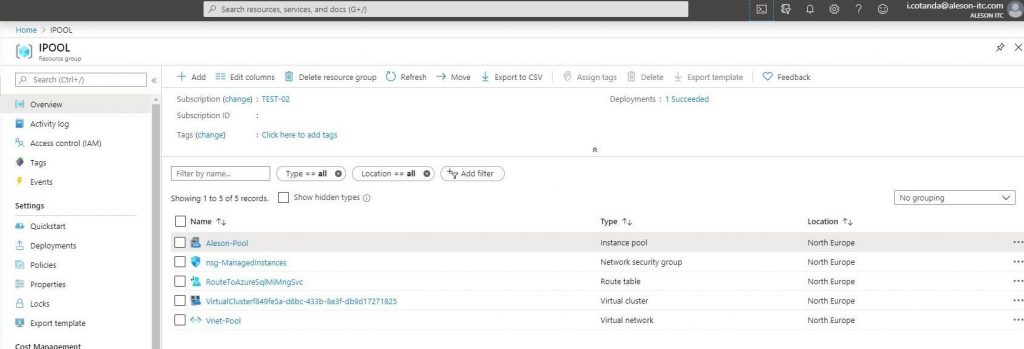
Once all the previous fields have been filled in with the appropriate subscription, resource group, virtual network name, ranges … These are the resources that you create within our Resource Group (Virtual Network, Network Security Group and Route Table):
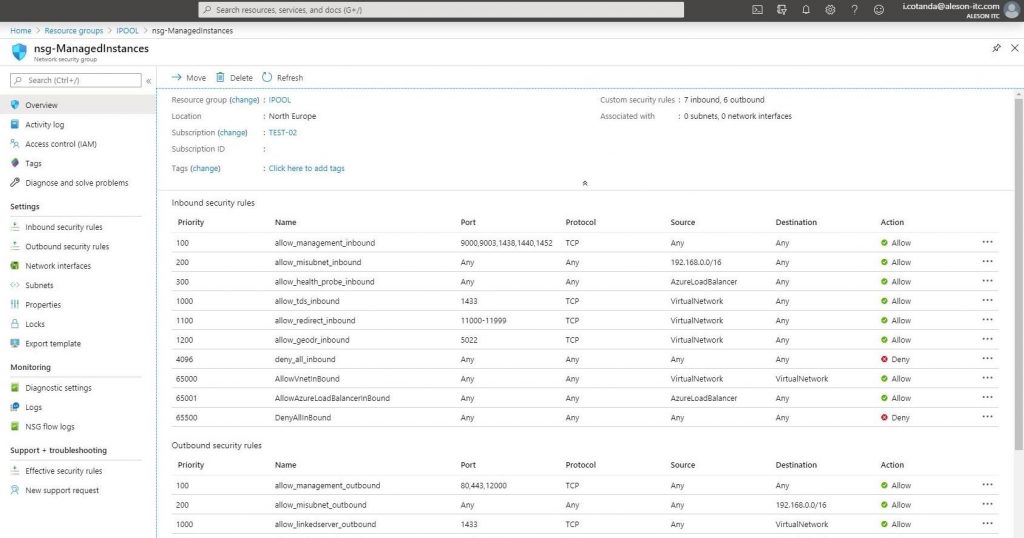
Network Security Group:
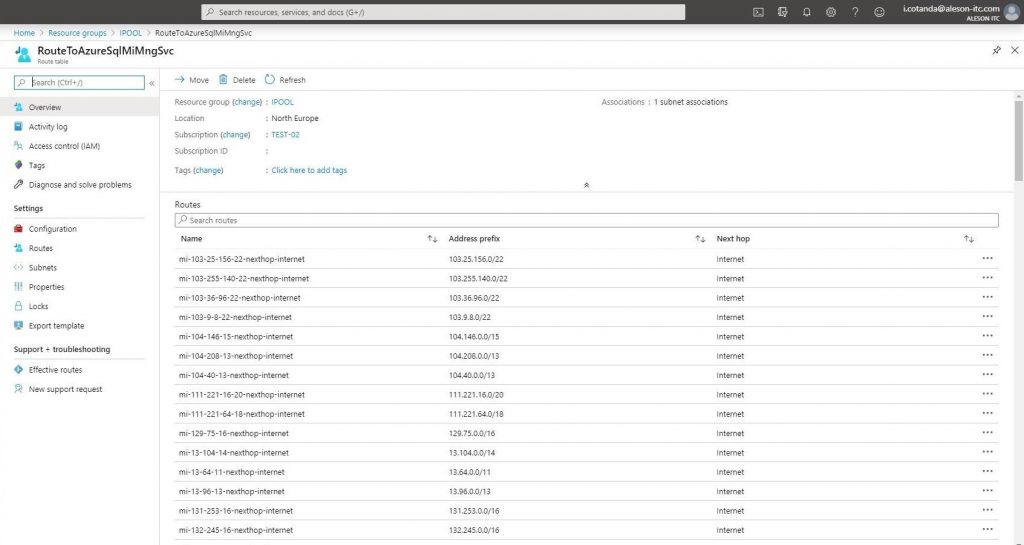
Route Table:
At the moment, being a version in Preview this version of Azure SQL Database, we must create all the resources through the Azure Cloud Shell.
2. Creation of Cluster and Instance Pool
The following image contains the code necessary for the creation of the Cluster and the Instance Pool:
$virtualNetwork = Get-AzVirtualNetwork -Name "Vnet-Pool" -ResourceGroupName "IPOOL"
$subnet = Get-AzVirtualNetworkSubnetConfig -Name "SubnetMI" -VirtualNetwork $virtualNetwork

#Create Cluster
$instancePool = Get-AzSqlInstancePool -ResourceGroupName "IPOOL" -Name "Aleson-Pool"
-SubnetId $subnet.Id -LicenseType "LicenseIncluded" -VCore 8 -Edition "GeneralPurpose"
-ComputeGeneration "Gen5" -Location "northeurope"

#Instance Pool
$virtualNetwork = Get-AzVirtualNetwork -Name "Vnet-Pool" -ResourceGroupName "IPOOL"
$subnet = Get-AzVirtualNetworkSubnetConfig -Name "SubnetMI" -VirtualNetwork $virtualNetwork
$instancePool = Get-AzSqlInstancePool -ResourceGroupName "IPOOL" -Name "Aleson-Pool"  -SubnetId $subnet.Id
-LicenseType "LicenseIncluded" -VCore 8 -Edition "GeneralPurpose" -ComputeGeneration "Gen5" -Location "northeurope"
The implementation of Instance Pool can last approximately 4.5 hours.
Once the previous command is launched, we must wait until all the resources created within our Resource Group are:
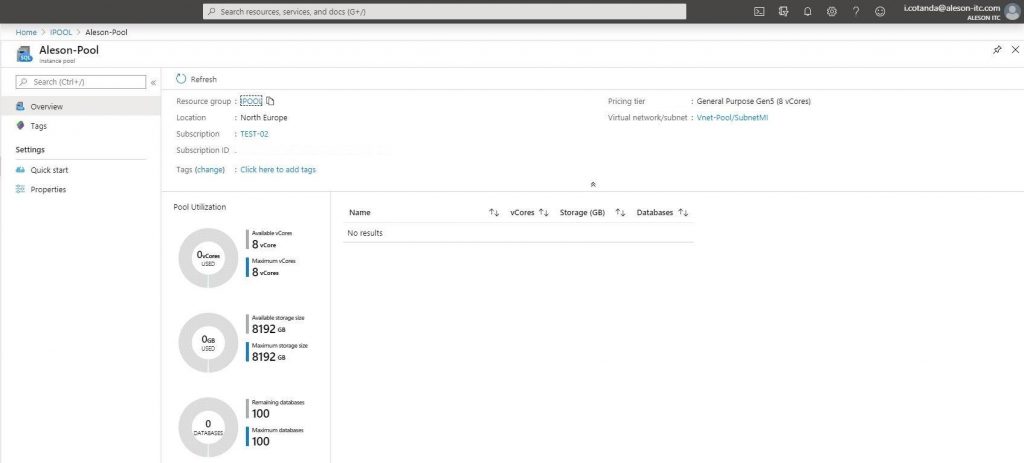
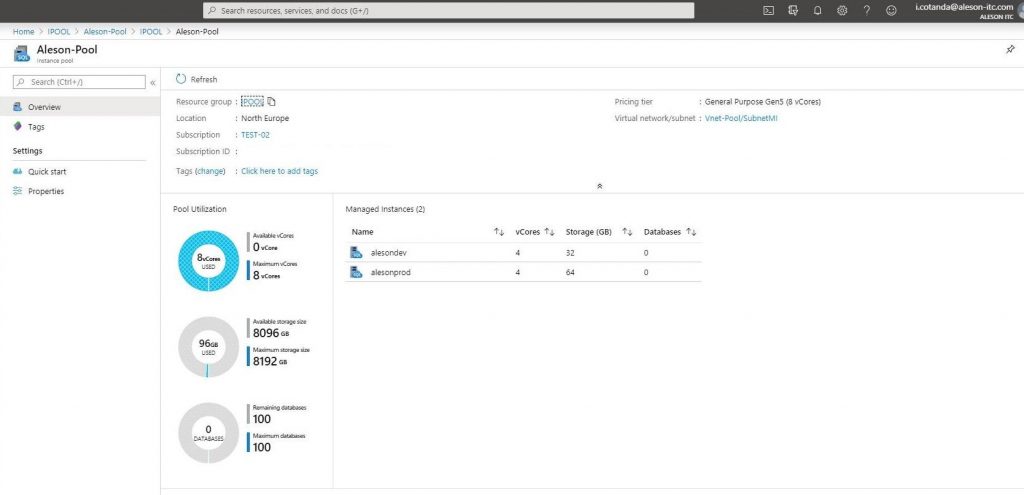
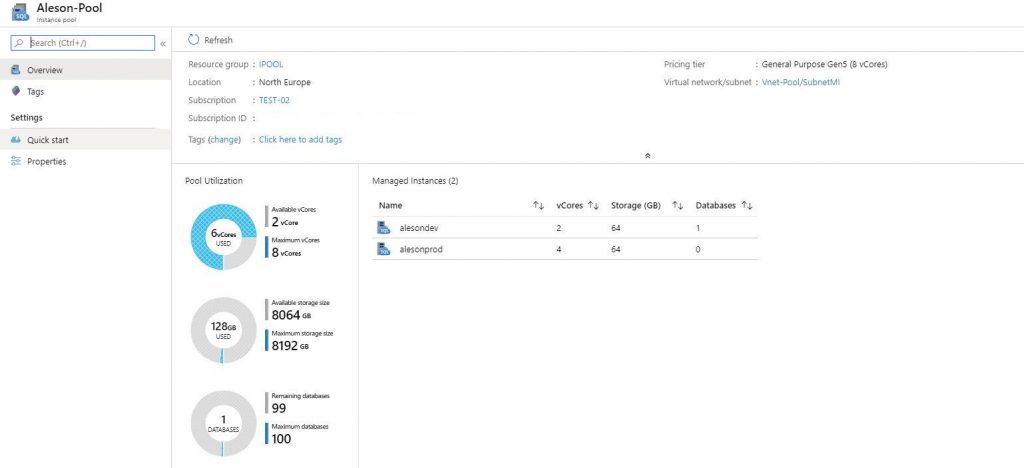
Inside Instance Pool, we can see all the resources we have (vCores, Storage Size and Remaining Database):
3. Creation of Independent Instances within Pool
In this step, we will create our independent instances within the Pool. To do this, we will make the creation using Powershell Code as in the previous steps.
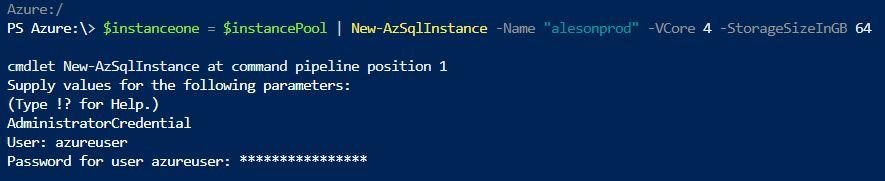
We create two instances, one called AlesonProd with 4 Vcores and 64GB of Storage:
And here, another instance called AlesonDev, with 4 Cores and 32GB of storage:

Once the instances are created (it does not take more than 5 minutes to generate a new instance), it will appear in the resource group:

To see the resources used by our Instance Pool, in the overview we can see the number of Instances we have, as well as the vCores used and memory ::
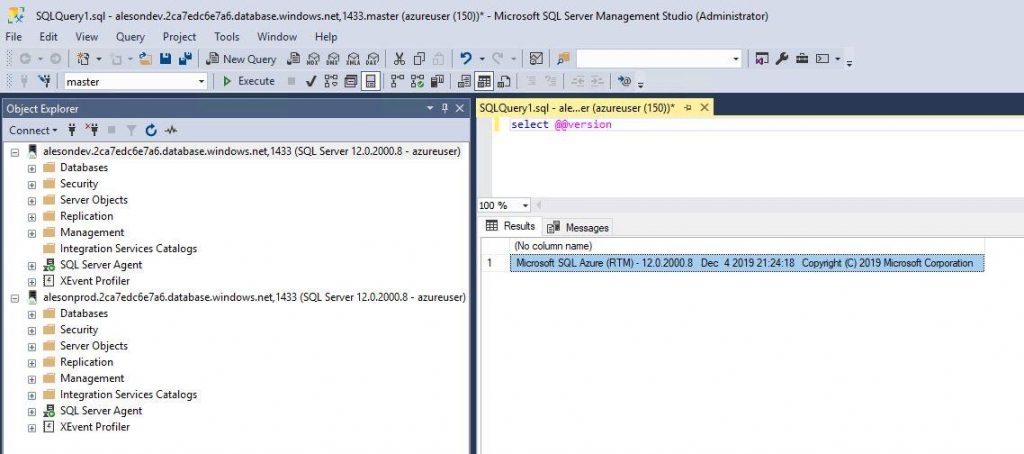
4. Executing a Connection via SSMS
We will make a connection using SSMS (SQL Server Management Studio) to the two instances created previously:
5. Creating a Database using PowerShell
The next step is to create a database using Powershell:
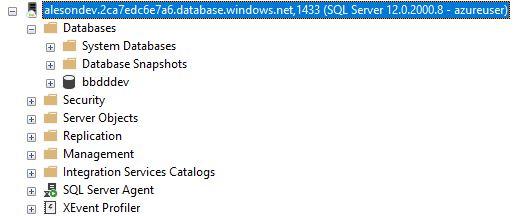
Once the creation of the database from SSMS, we can verify that it has been satisfactory:
When the time comes, and knowing that one of the best features of Instance Pool is to have an instance of 2 vCores, we will make a reduction in the size of the AlesonDev instance, for this, just as we have done the previous steps through Powershell we can perform The escalation of our Instance:
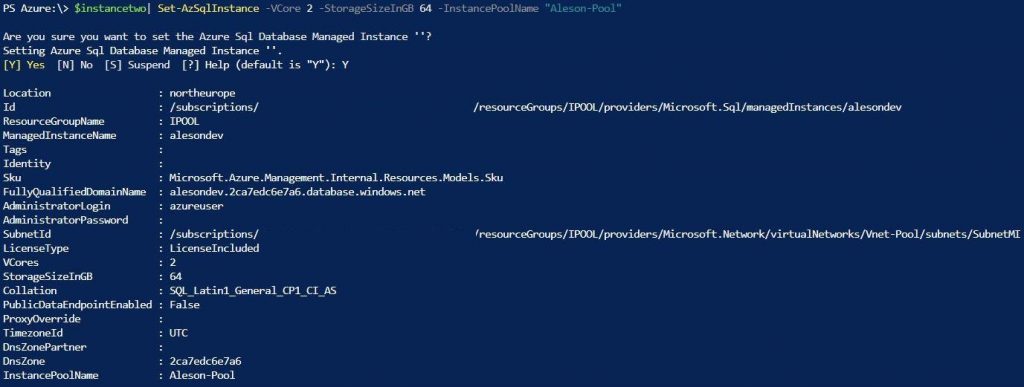
In this case what we have done has been, to lower vCores and increase Storage.
From the Instance Pool service, we can see how we currently have 2 vCores available to be able to assign them to an existing or new instance.
6. Revision
And to finish the post, we will review how we can access our Instance from a Public Endpoint, this feature is not recommended, since we are opening our Managed Instance to the internet, but since this functionality currently in Instance Pool can only be enabled by Powershell, below I show you how to perform this step:

Once opened from the Azure portal you will find the host and the port for the external connection to the instance:

And after following all these steps we can end this post on Instance Pool. As we have commented in previous posts, it is a service in Preview and not currently, it has no final version date. But surely with the versatility of this service it will offer a perfect solution for our architectures.
I leave here my GitHub repository where is all the code used for this post: https://github.com/NachoCotanda/InstancePool
Instance Pool Series:
- Discovering Instance Pools, a new Azure SQL Database Resource
- Deploying Instance Pools, a new Azure SQL Database Resource
Azure Solutions Architect, Infraestructura e Implementación. Centrado principalmente en la plataforma Azure, la arquitectura de red y la innovación.