
Automate the sending of documents with Power Automate
Today, companies seek to develop applications without investing a large amount of resources in the process and with an impact on the business as immediately as possible. Low Code solutions are the answer to this need, allowing the implementation of tools that do not require advanced technical knowledge.
Thanks to the Microsoft Power Platform, companies can easily build their business applications to adapt to changing needs and increase profitability. Solutions like Microsoft Power Automate allow you to automate processes quickly and improve the economic impact on your ROI.
In today’s post, we are going to talk about how to develop a Flow with Power Automate. As we know, to achieve the highest degree of digital transformation in a company it is important to automate more and more our usual processes in order to increase our productivity.
In today’s flow we are going to see a very common process, it is about sharing files from Sharepoint so that different approvers can verify them.
It is a fairly simple process and easy to handle if we follow the following steps:
Creating a Sharepoint List
First, we are going to create a list in Sharepoint. This list will be where we will add the documents that we want to share with our approvers.
For a correct operation of the flow, we must add as the main metadata of the list: the Process Status and the Approvers.
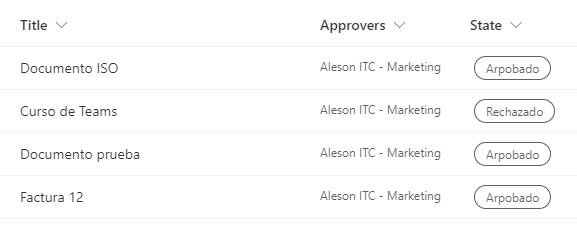
We can add as many columns as we need, but the most important ones for this type of process will be those mentioned above.
It must be taken into account that when we configure the approvers column, we must select the option to allow multiple selections, since our flow will be directed to several people.

As for the status column, it will indicate where our approval is, that is, if it is still pending, if it has been rejected or if it is definitely approved.

Once we have configured the list according to our needs, we will go to Step 2.
Process Creation with Power Automate
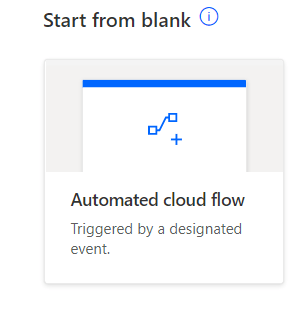
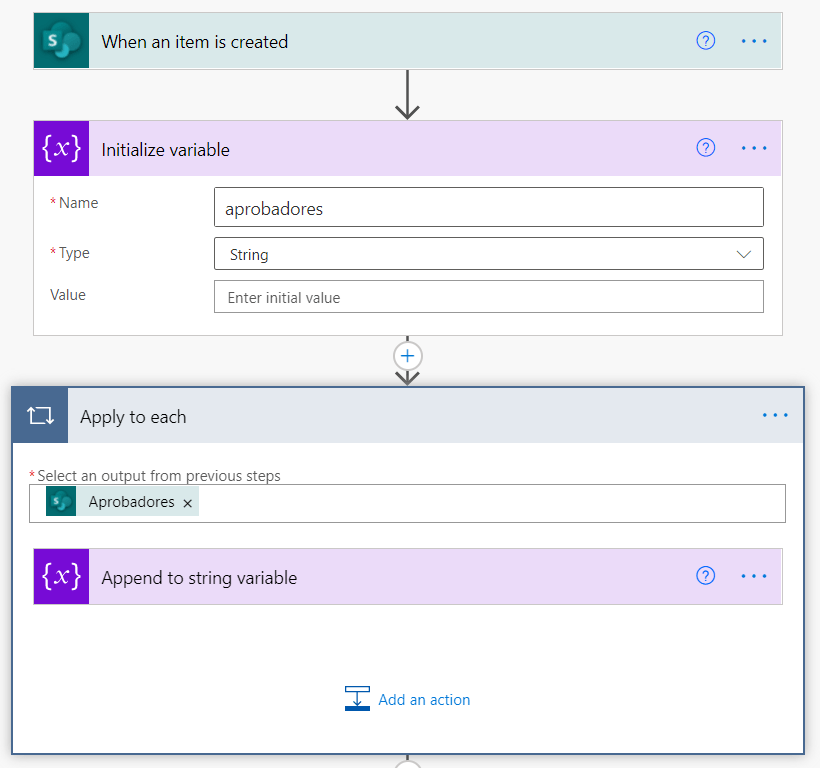
Now that we have created the list in Sharepoint, we are going to move on to automating the Process. From Power Automate we will choose, automated flow creation and as the initial trigger we will choose Sharepoint since our action will start from this platform.
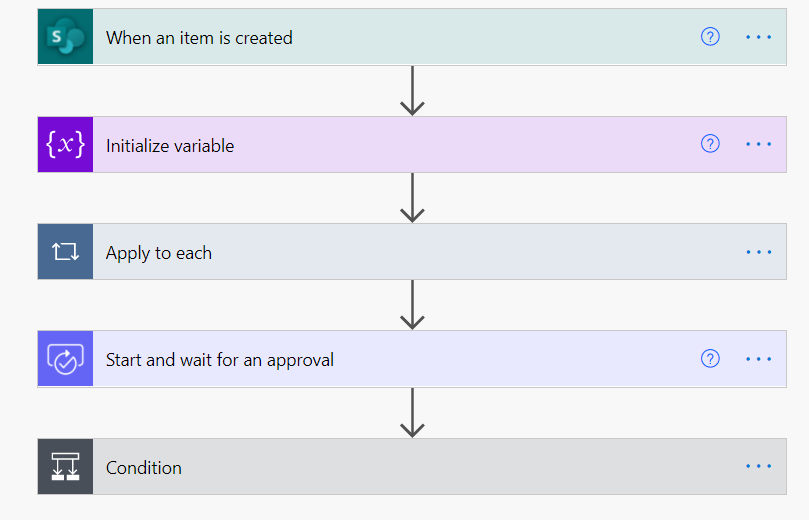
Within the Sharepoint trigger, we will choose the option: When we create a new item.This means that when we create a new file in the sharepoint list, a series of actions will be triggered.
As the Flow will be an approval flow, we will have to choose a variable as the second step, the variable will be that of approvers since there will be multiple ones, if it was always the same approver, we would not need this intermediate step.
To complete this step we will need to add: Apply to each, and here we will indicate that we want multiple approvers in Sharepoint.
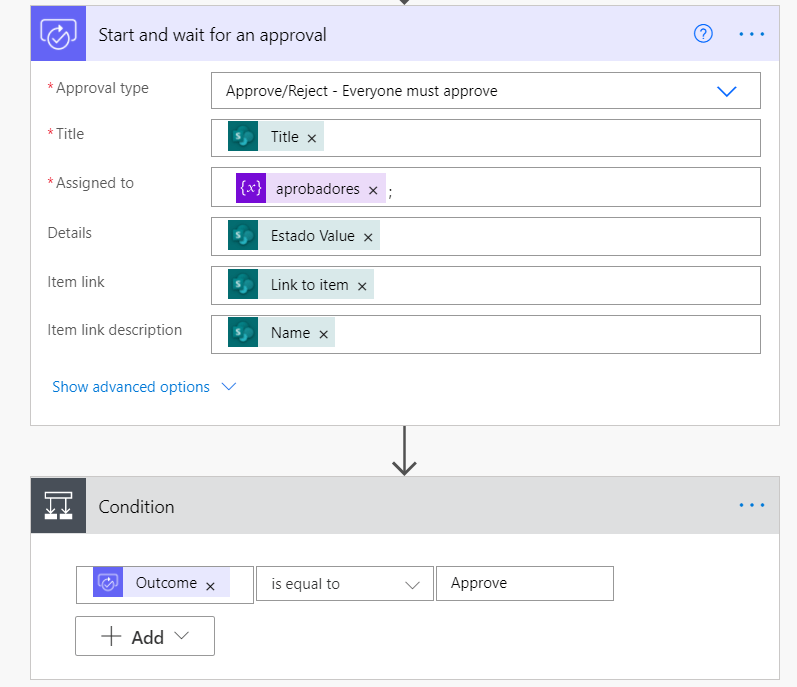
To continue, we will choose the Approvals option specifically: Start and wait for an approval and we will configure it with the items we need.
And as the last step we will establish the Condition: If the file is approved or if it is rejected.
The idea is that there is a flow like the following:
Regarding the approval conditions, we must decide what action will be triggered if the action is approved and what will happen if the action is rejected.
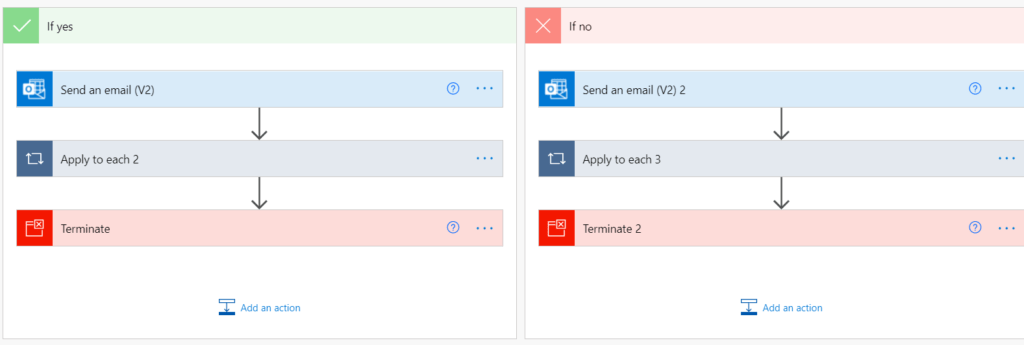
In this case, if it is approved, an email will be sent to the sender of the flow indicating the status of the request.

Otherwise, the exact same thing will happen.
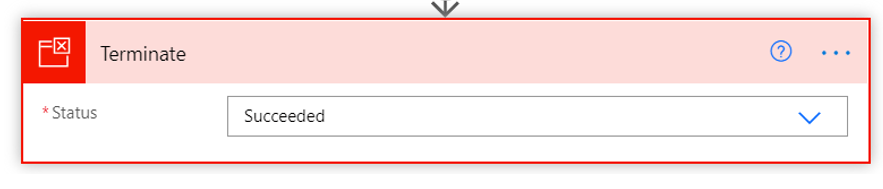
For the flow to finish, we must add one more step: Terminate.
At the end of the process we should obtain the following flow:
Once the configuration of the process is completed, from the upper right we can test it to see if it actually works.
To carry out the test we will go to the sharepoint list and add a new element, we will choose which approvers we want to send it to and … everything ready to go!
I hope this post helps you automate your internal and external processes.
And if you want to know more about Power Automate and Teams Approvals, don’t miss this articles:
New Power Automate Visual for Power BI Reports
Learning how to use Microsoft Teams Approvals
If you want us to help you on your way to the Digital Transformation of your company, contact us.
Marketing and Communications Specialist. International Trade, Business Management, SEO, PPC.