
Sending Auto Reply with Power Automate from Microsoft Forms
Today, we continue with the series of posts dedicated to the Power Automate Platform. In this article we are going to look at one of the most common processes in the world of marketing automation. How many times has it happened to us that we have had to manually send calls to webinars? This problem already has a solution in the flow that we are going to present today.
EXAMPLE CASE
We will use the following example case for explanation:
Our company wants to organize a webinar to show its customers the new product, for this we have sent a newsletter with a registration form. Once the form is filled out, we want them to be automatically sent an email with the ics calendar so they can save the date on their calendar and in this way make sure they will attend.
Now that we’ve made the case, let’s take action. To carry out this flow, the following steps must be followed:
Create the Form in Microsoft Forms
As you know, Microsoft Forms is a tool for creating forms included within Office 365 applications.
We create a standard registration form, with name, surname, company and email. It is advisable not to insert more than 4 questions as it may be too long for potential registrants.
Creating the Process Flow with Power Automate
When we have created the form it is time to start the Flow.
We log in to Power Automate, click Create and then we will have to choose the main trigger for this flow, which in this case will be Microsoft Forms.
Once we have chosen which will be the trigger, we must choose the action with which the flow is going to start:

When we receive a new response in the form, a series of actions will happen.
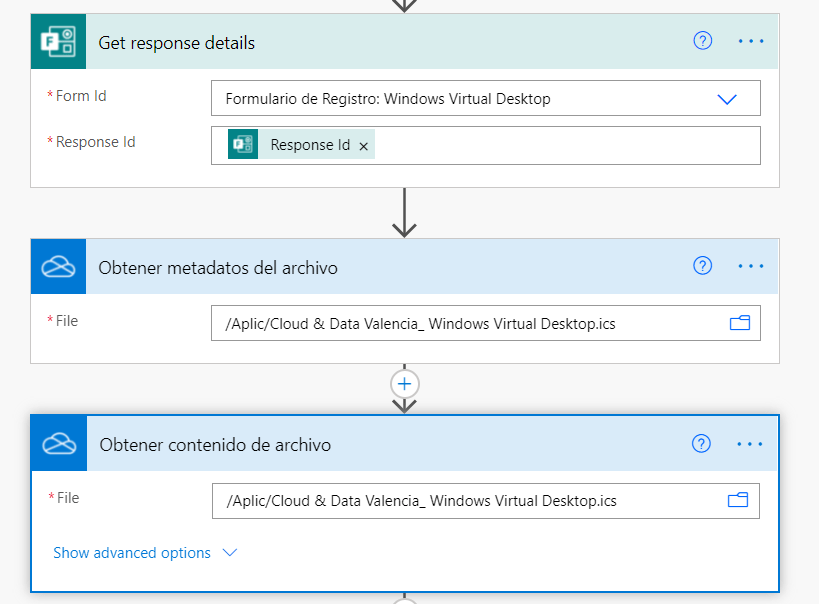
As the next steps we will have to insert the file that we want to attach (icsCalendar) and from which platform we want to share it, in this case, it will be from Onedrive although you can also do it from Sharepoint.
As a last step, to finalize the process, we need that the people registered in the form receive an email indicating the details of the webinar and the ics in order to schedule it in their calendars.
To do this, the next step will be: Send email.
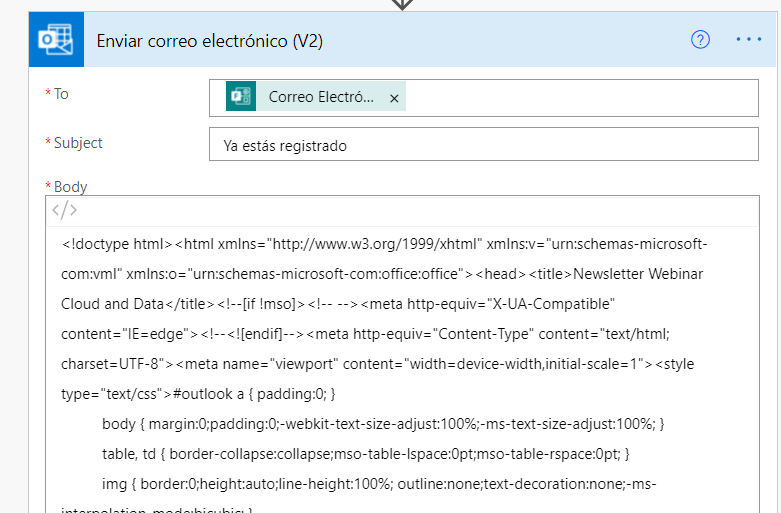
As recipients of the email we will add the email forms box.
From here, we can customize it to our liking. In this case, I recommend two options:
- Add a simple text thanking you for registering for the webinar and indicating its details.
- Create a Newsletter Template (either in Mailchimp or Mailjet) with the details of the event. This option is more visual and more marketing. In order to insert the Newsletter template, we will simply have to obtain the html code of it and paste it in the email.
It is important to check that the process works before launching it. For this, we have the Test part, located in the upper right corner.
When the check is done, we are ready to go.
And here the post today. I hope it helps you automate your daily processes much more.
Check the latest posts about Power Automate:
Automate the sending of documents with Power Automate
New Power Automate Visual for Power BI reports
If you want to start a Business Intelligence Project visit our Data Analytics page and we will inform you.
Marketing and Communications Specialist. International Trade, Business Management, SEO, PPC.