
Creating applications quickly and easily with PowerApps
Have you ever needed an application to share information with someone, access a SQL Server database, or simply to see your business store?
The solution to this type of questions used to be to make an application using Visual Studio, but in this post we are going to talk about the powerful and easy PowerApps tool.
What are PowerApps?
It is a Microsoft service oriented to companies with which you can develop many applications according to the needs or requirements of the client or the company itself. This brings a lot of versatility when it comes to creating and managing applications.
Users have the advantage of being able to access data in a simple way with PowerApps, either to internal company data such as clients, social networks, etc.
Given the multitude of options that facilitate us, the PowerApps are able to adapt to the needs of users and the company such as filling in form data and uploading it into a database, viewing or deleting SQL Server content, accessing Sharepoint lists, access OneDrive or Dropbox … no doubt that the biggest advantage of PowerApps is that it is an Android, iOS or Web application that can be run from any device with Internet access. So the user can access without problems the use of the applications whatever the time.
Another advantage of the PowerApps is that they can be created very intuitively, it is not necessary a great knowledge of programming since its syntax is quite simple. It’s true that if we want to make some bestial application we can also count on them, since they can be as complex and wonderful as we want.
What do we need to use PowerApps?
The only essential requirement for the use of PowerApps is an Office 365 account. Any user of Office 365 is able to create and manage applications in PowerApps.
How can we start creating our application?
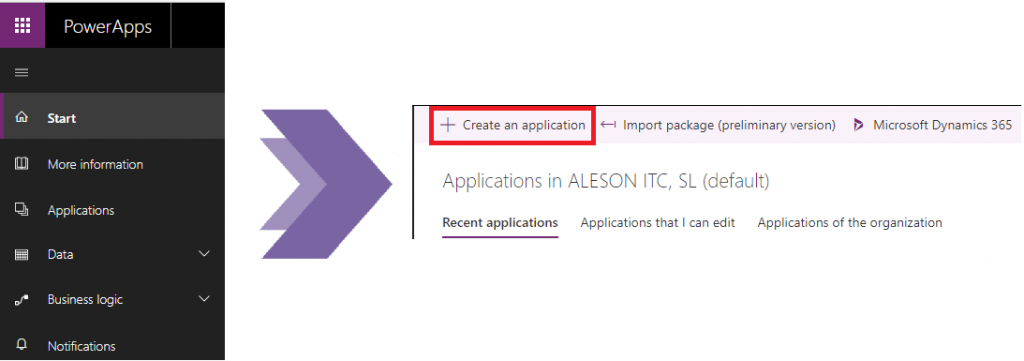
When we log in with our Office 365 account, we can access to create the application by clicking “Applications” on the left, then “create new application“.
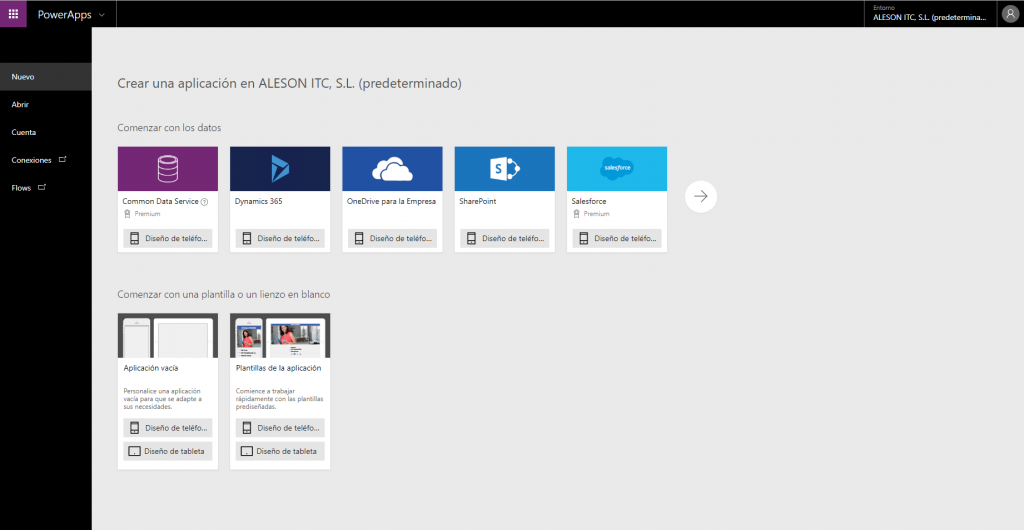
This will take us to the next window where it gives us the option to connect with data either SQL Server, Dynamics 365, OneDrive, Sharepoint or Salesforce lists. We also have the option to create a blank application or use templates already created.
Let’s see how it would be a PowerApp application using a default template, for this case, we will use the following template:
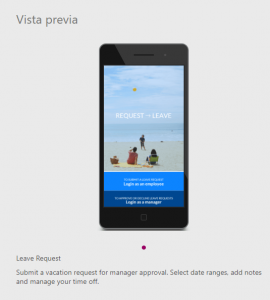
This is a template that simulates an application to manage the days that you miss work, whether due to illness, holidays, grief … Let’s see it more carefully.
When accessing the application we will open the editing window of it where we can see the different elements of which it consists (purple), the screen that we have selected (green), the characteristics table (red) and the button to pass to the use mode and the toolbox (blue).
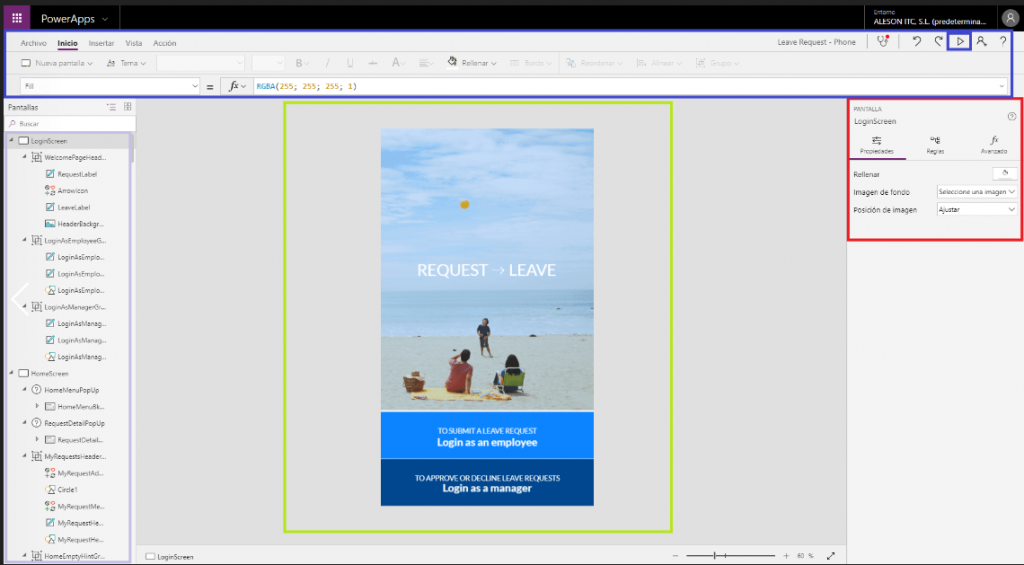
- On the left side we have the creation chart, where it will show all the elements created in our PowerApp.
- In the central part we have the window that we select in our creation table to see how the elements that we add to the application are going to remain.
- In the right part we will have the property and advanced options box of the application elements where you can change, for example, the size of a button or the font used.
- Finally at the top we have the toolbox and data insertion to add elements dynamically and easily to our application. In turn, to the right side of the toolbox we can see the “play” button to switch to the execution mode.
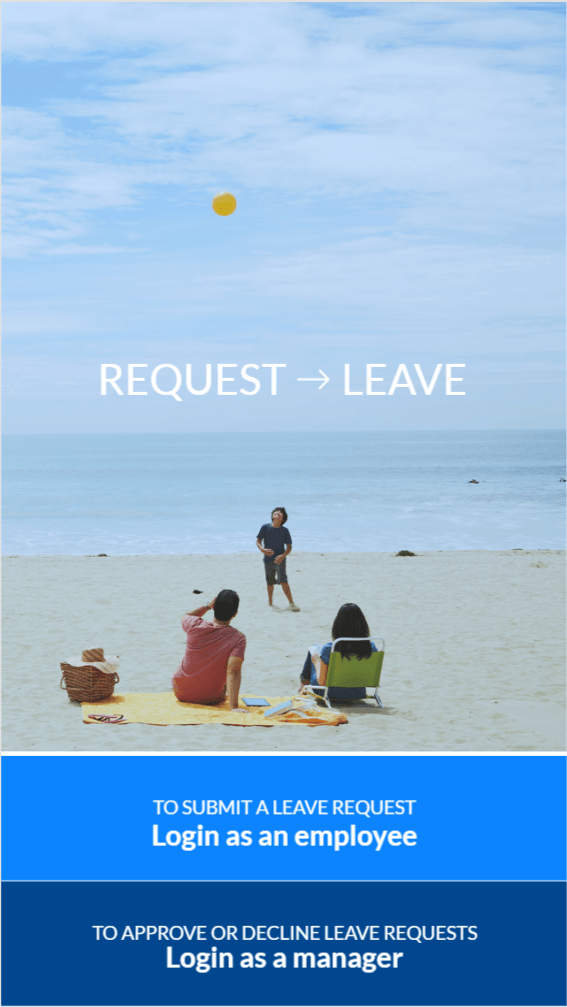
From the “Execution” mode, we will see through the demo different functionalities offered by the PowerApps.
The first window of the application is the one that gives us the option to log in as an employee or as an administrator. Depending on what we choose we will be redirected to one window or another.

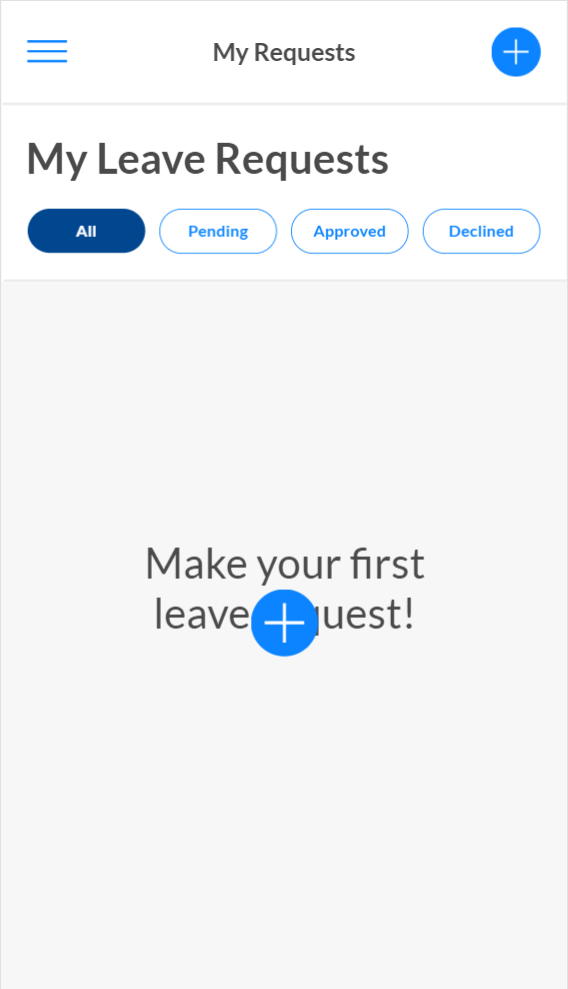
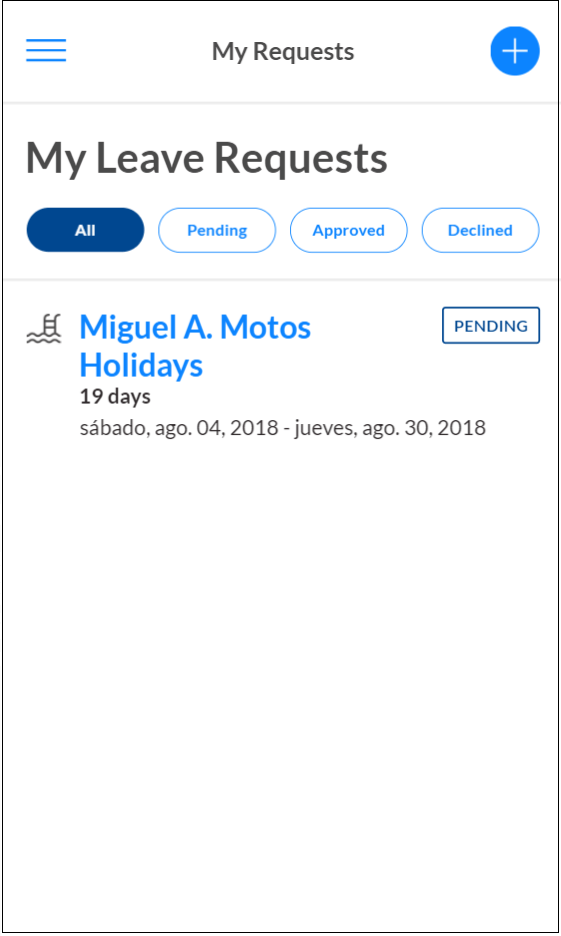
If we access as an employee, we will go to the screen where all the absence requests that we have previously submitted will be displayed. As it is the first time we access, there will be no request to show. Let’s click on the button to add a new absence request.
Once the button is pressed, we will be redirected to the next window where we must select what type of absence it is. The options are vacations, illness, floating holidays, duty services or Bereavement.
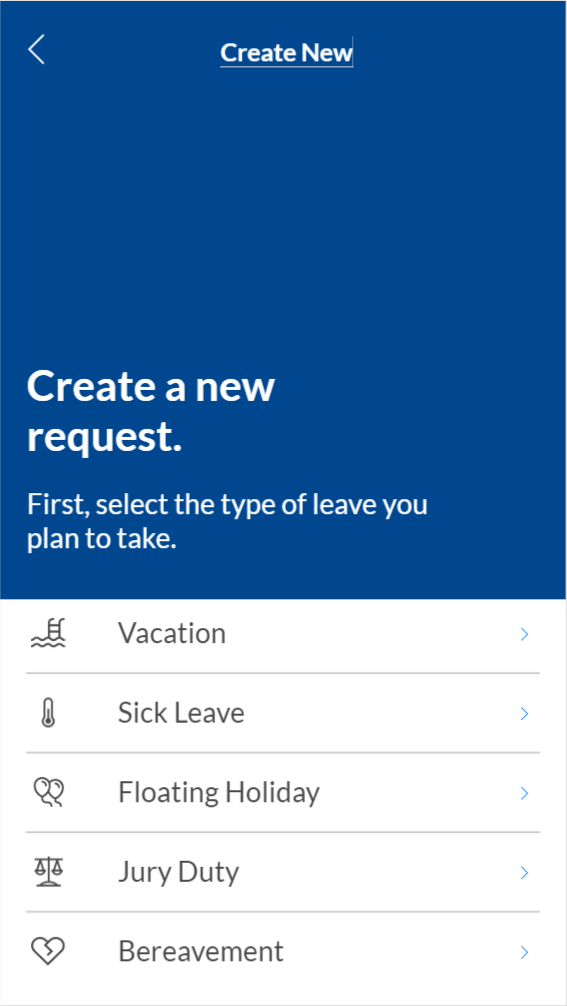
For our example, we will select the most common type of absence and the one we are most interested in choosing, vacations.
By clicking on the holiday label we will go to the date selection window, in it, we will select from which day we will take the holidays and until what day we want to take them.
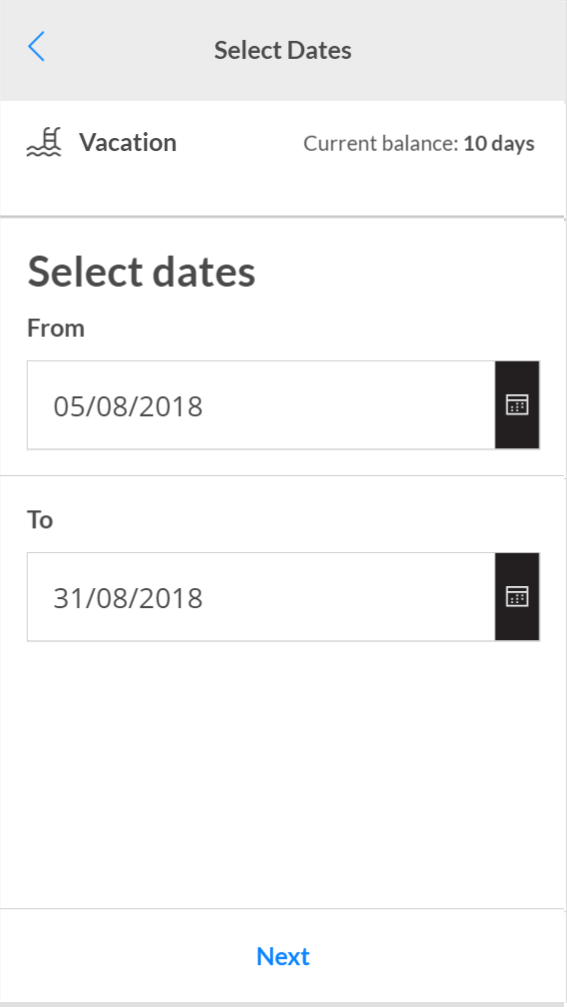
Once both dates have been selected, click on the “Next” button, this will take us to the next page, where the new balance of days appears with the requested holidays.
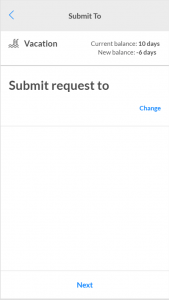
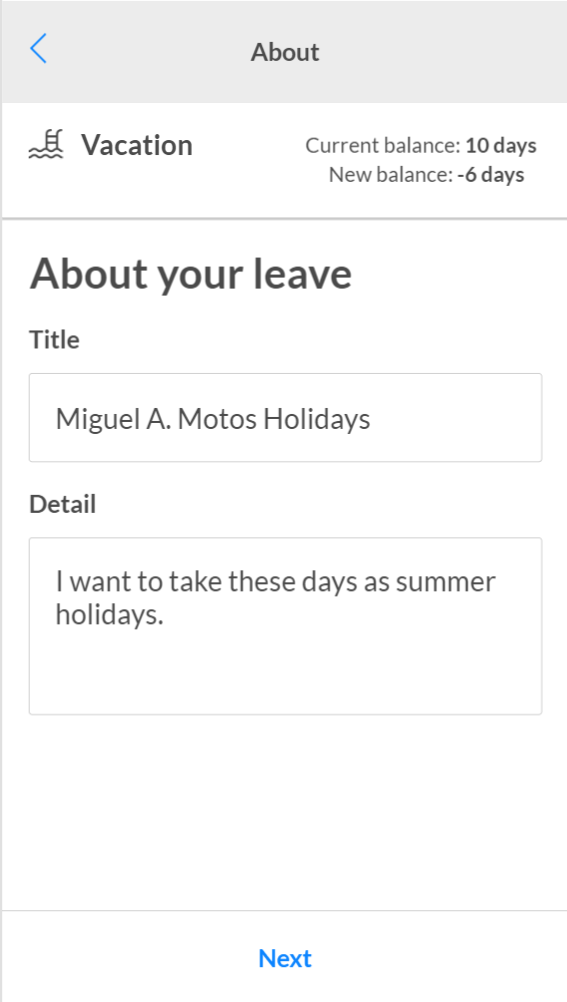
Press “Next” again and in the next screen we must fill in the fields so that our superior has proof of the days that we are going to request and the reason for it. This point would be more useful if, for example, your absence is due to illness.
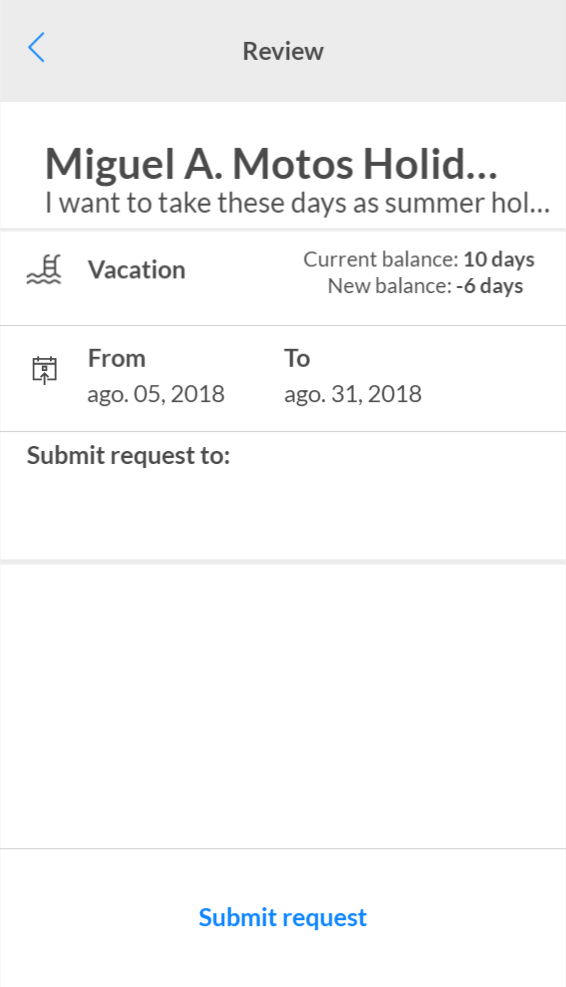
When we have filled in the fields, press “Next” again. In the next screen we will have the summary of the whole process to be able to check it and press “Submit request” if we see that everything is correct.
Once the absence request has been completed, the following window will appear indicating that everything is correct:
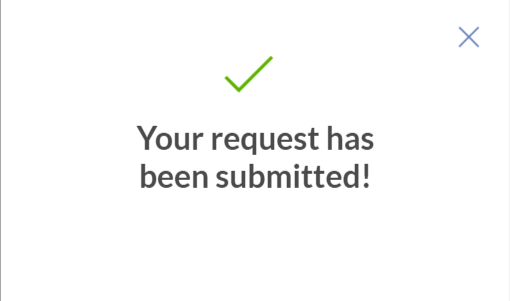
When closed, our request will remain pending approval, waiting for the administrator to accept or deny it.
With this we conclude the introduction to the fantastic world of PowerApps applications. In the following articles we will see more in depth with examples such as connecting a database of SQL Server to our PowerApp, how to make forms, visualization of tables, dynamic search engines by text entry and more.
If you want us to help your business or company contact us at info@aleson-itc.com or call us at +34 962 681 242

Azure Data Engineer con más de 7 años de experiencia. Conocimiento de múltiples herramientas y enfocado en el mundo del dato. Experto en tuning de queries y mejora de rendimiento de Base de Datos. Profesional apasionado por la tecnología y los deportes al aire libre. En mi tiempo libre, me encontrarás jugando vóley playa o disfrutando con nuevos videojuegos.