
Creating a Sharded Cluster in MongoDB
In today’s post I’m going to explain how to create a sharded cluster in MongoDB. With this cluster we will get a performance improvement of the read and write times and also to obtain a major security.
1. Cluster configuration
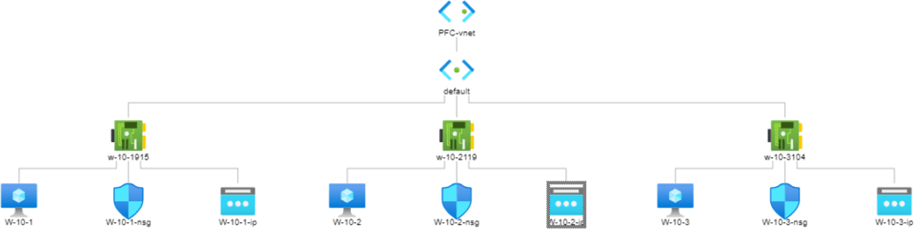
For this case, we will use three virtual machines running Windows on Azure with DNS service installed on one of them. The architecture used is as follows:
Once we have installed the version of MongoDB that we are going to use together with the Compass program, we will also install an external tool that will provide security with a key file, in this case OpenSSL has been used.
A key file is used to authenticate the connection between servers. So we will create a key file with the following commands:
cd C:\OpenSSL\bin
(This command is used to go to the path you have chosen to store the OpenSSL files.)
set OPENSSL_CONF=C:\OpenSSL\bin\openssl.cnf
(This command is used to make the OpenSSL configuration the same as in the openssl.cnf file.)
openssl rand -base64 756 > mongodb.key
(And finally, we ask the openssl program to create a completely random key with the name mongodb.key).
We will have created the file in the path we have indicated above. First, we will move this file to the path where the MongoDB files are. Once we have moved it, we will have to copy it to all the servers, to have all the same key file in the same location.
2. Configuring the Replica-set of the two Config Servers
Now let’s configure the Config Server replica-set.
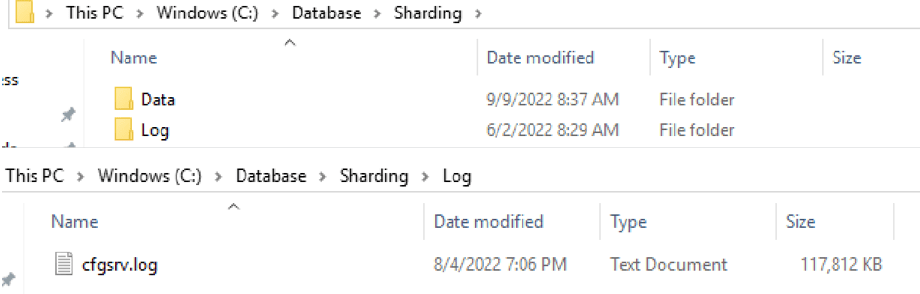
First of all, we will create a folder called, for example, Sharding. Inside it, we will create two new ones called DATA and LOG. And whenever we create a folder where only logs are stored, we will also create a .log file.
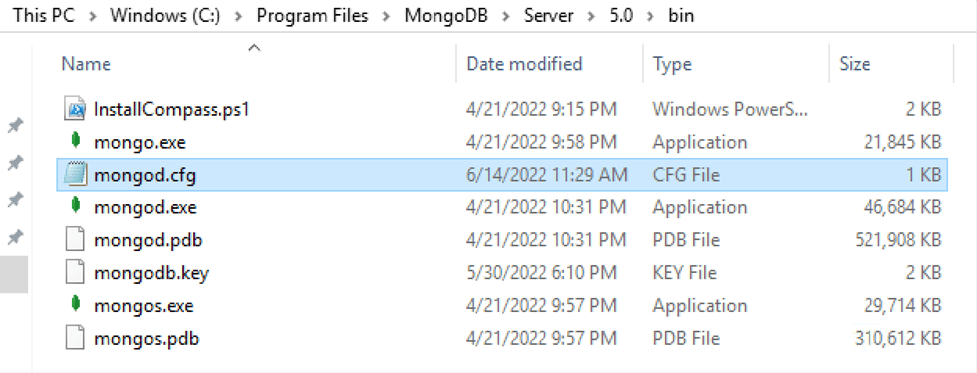
When we go back to the Sharding folder, we will create the . cfg file. This type of file tells MongoDB that it’s a configuration file. In it we will have to put the characteristics that we want our instance to have.

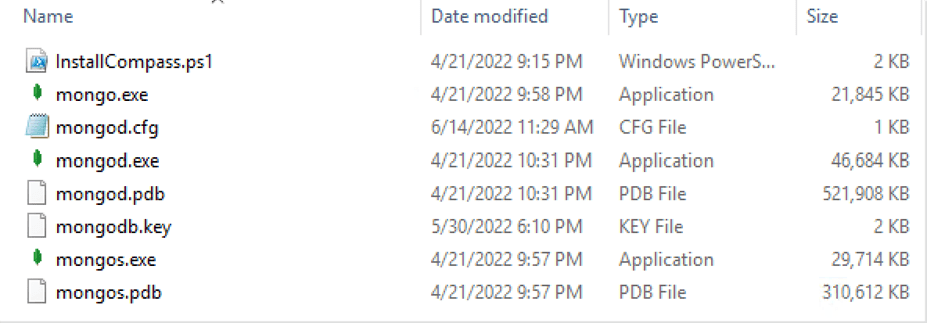
The first time we edit it there will be nothing, but when we install MongoDB there is a file that comes by default with all the possible options and therefore with a template. Of course, the file must be in the installation location.
As it is a template, we will copy the inside of the file and paste it into our . cfg file that we created earlier. Inside you will find this:
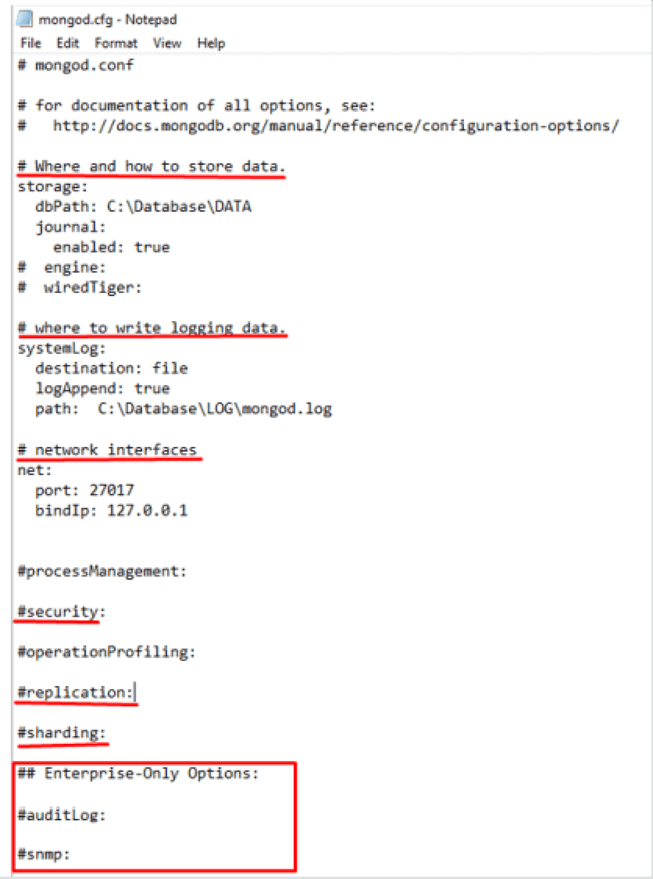
As we can see, we have the ability to decide where the data and the log will be stored. We can also choose the port, increase the security with the keyfile, the options that we think are appropriate in the replication and sharding, and finally, it offers us some options that are only available if you get the Enterprise version. The version used for this demo is Community Server 5.0.12.
Once everything has been modified as we wish, we should be left with a configuration similar to the following:
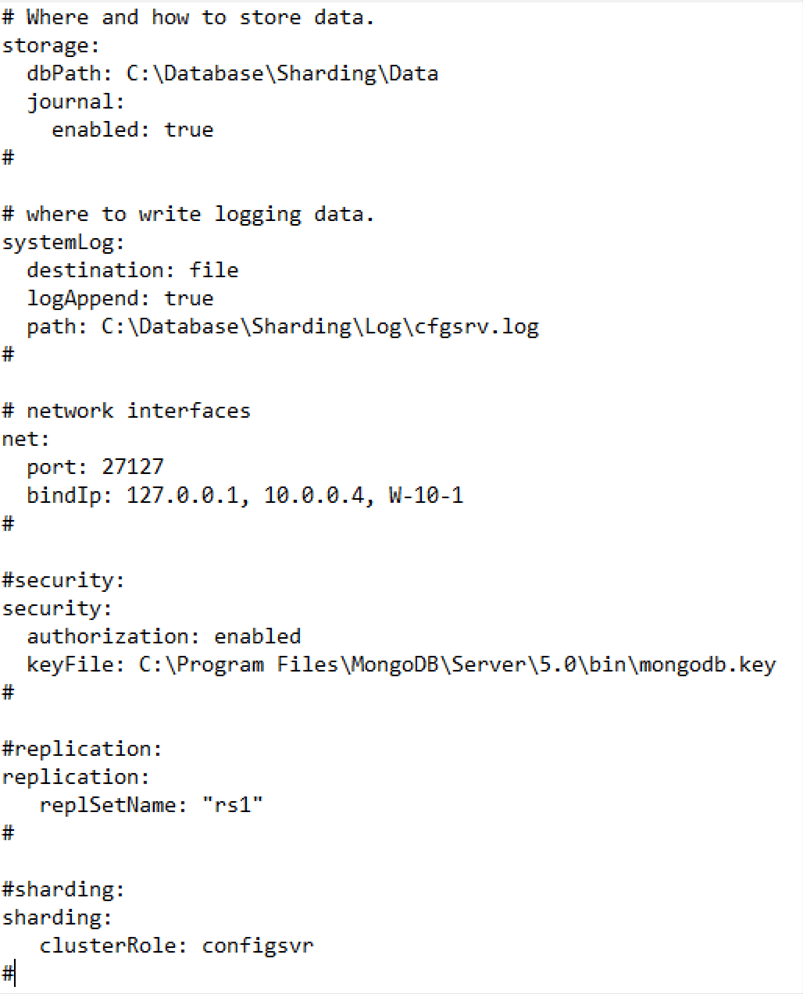
A best practice in this configuration is to provide more security with the key file, since MongoDB does not require it to create the instance. Another best practice is to indicate, apart from the IP, the name of the server, because if by any chance we change the IP of our machine, the service will stop.
3. Configuration Validation
Now we are going to validate if the configuration is correct by creating the service with the following steps:

In this command, the new MongoDB instance is requested with the configuration that is in the file of the proposed path, and that besides, it installs a new service called Mongocfgsrv but it shows it as MongoDB Config Server.
First of all, the service will be stopped. It will be necessary to start the service and it will always start when the server is connected thanks to the Automatic option. Here is the result:

If, by any chance, we get an alert like this when the service is up:

It means that we have not been able to start the service. This is a symptom of an error in the file (possibly a tabulation).
This process must be done on the other two servers.
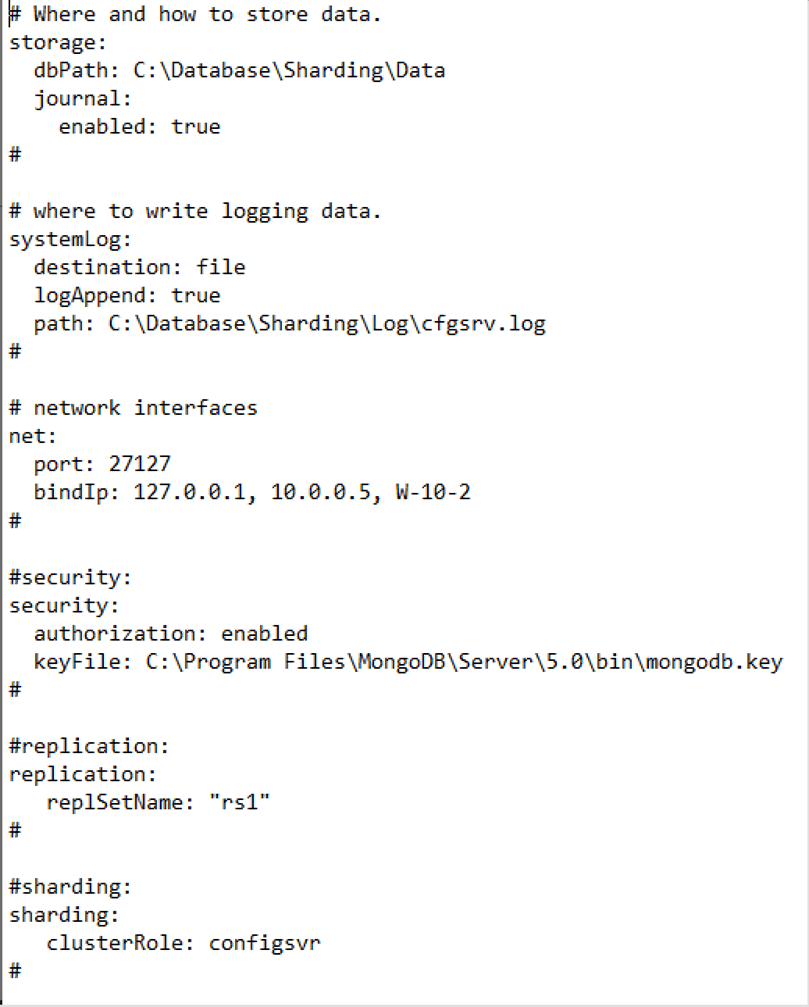
In the configuration file, as they are different servers, we will preferably use the same port. But when we put the IP and the name of the server, we must change it to the one given to the server itself.
I show the configuration of the W-10-2 server for an example:
4. We start the Replica-Set Group
Once we have done all the configuration on the remaining servers, we are going to start the replica-set group. First we will connect from a CMD to the instance created: mongo localhost:27127. This command connects us to the new instance because we indicate the port we have configured in the previous file.
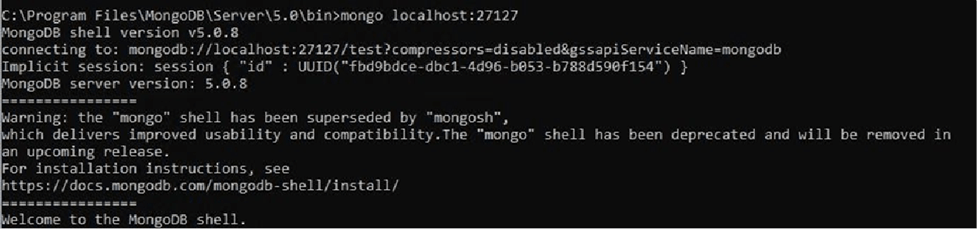
Once we are welcomed to the instance, we will definitely create the replica-set group with the command used in the image:
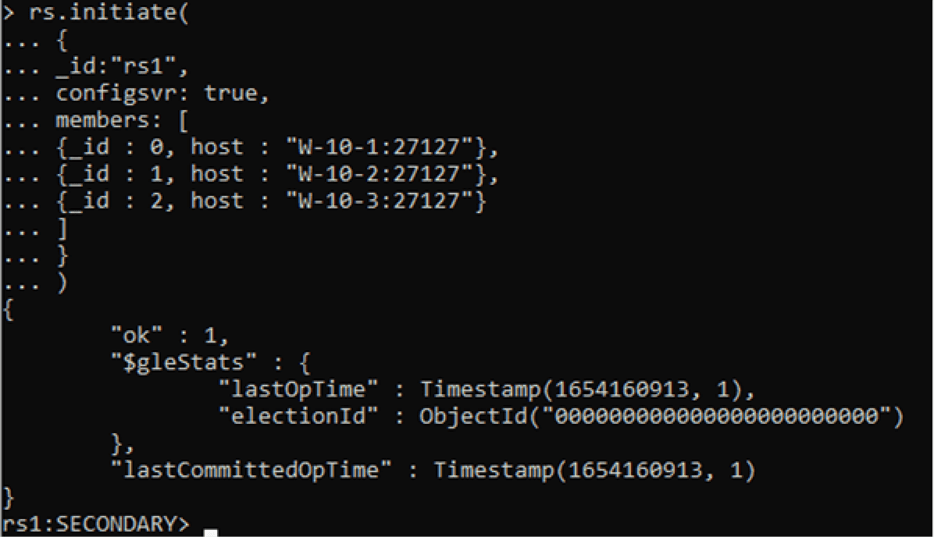
Note that with this command we indicate the name of the replica-set that we had already created in the files. We also indicate that this replica-set group is a configuration group. And finally, the members that join the group with a unique identifier.
You can also see that apart from saying that we have successfully created it, we have already been connected to a member of it.
5. Creating Shards
Next we are going to create the Shards.
As usual we create the necessary folders and files to create a new instance in MongoDB.
In this case, a folder called Shard has been created and inside it, the Data and Log folder is created with its respective .log file and the instance configuration file. In the Shards, the roles are distributed in: Primary, Secondary and Referee.


Again, we copy the template and modify it. It is very similar to the configuration server file, but with a few changes.
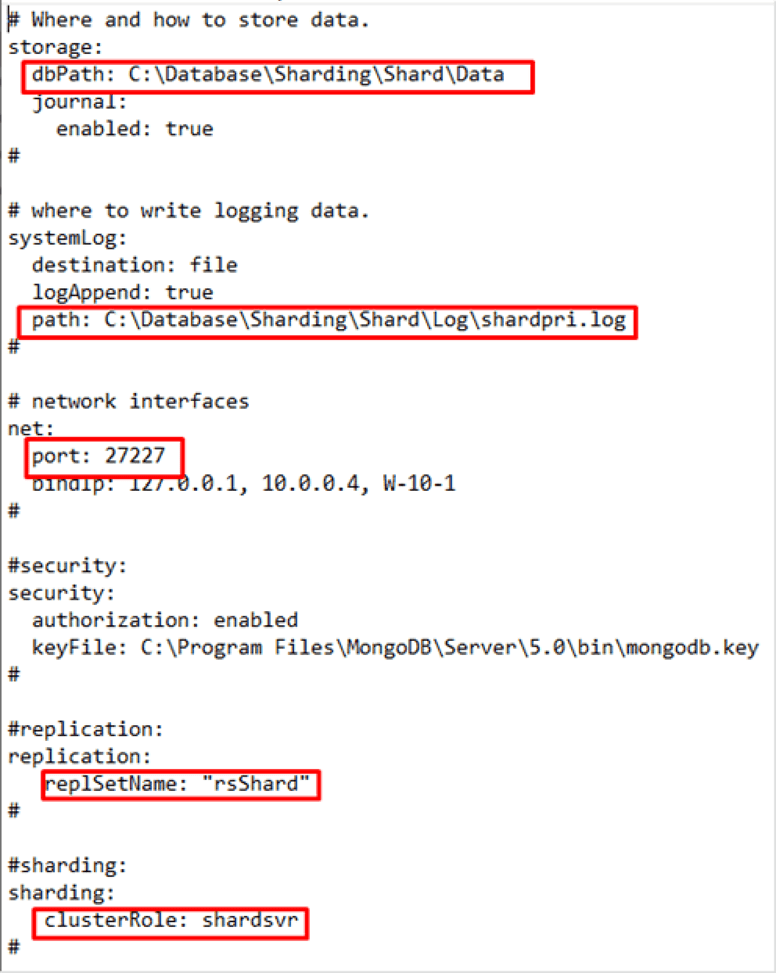
The new DATA and LOG paths need to be specified. You also need to set a new previously unused port, specify a new replica-set group name and change the cluster role to shardsvr.
Now we only need to create the service of the new instance. We will open the cmd again, we will locate where we have saved the installation of MongoDB and we will put the command corresponding to the creation of the service.

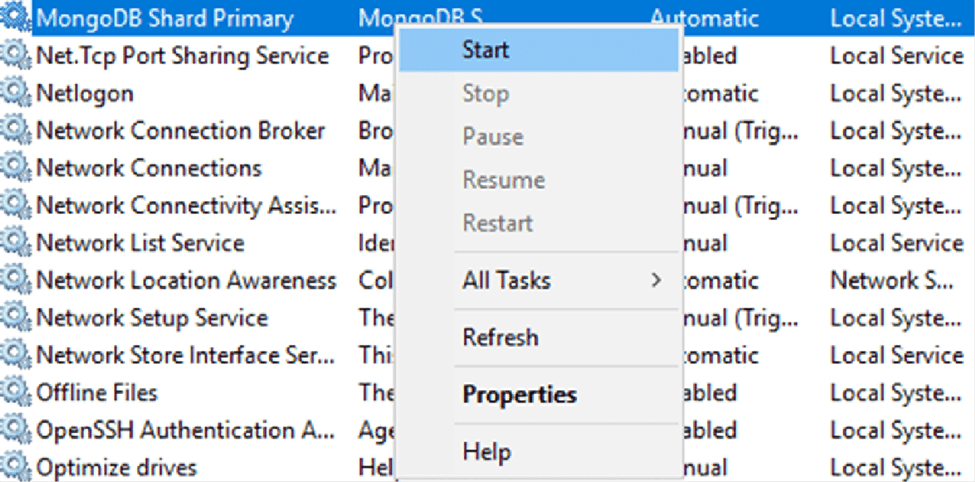
This command will be changed depending on the server we are in, for example, if we are in the secondary server we don’t want to put in the parameter serviceDisplayName “MongoDB Shard Primary” but we will put “MongoDB Shard Secondary”.
We will open the Services programme and in the new service created with a right click we will choose the option to start it. We know that if we get an alert we will have to check the . cfg file and try again.
Once we have created the instances in the other servers we will create the shard in MongoDB. The procedure is to go to the location where the installation is and connect to the new instance.

Once inside we will create our replica-set inside the shards with the following command:

If we look closely, this time, we see that apart from the cfgsvr: true option being missing, the Primary and Secondary server priority has been added. And also the arbiterOnly:true option has been added for the arbiter server.
To create the second Shard, we must proceed in exactly the same way, but taking into account the changes in the parameters within the . cfg file of each one.
The next step is to create the Router, whose function is to distribute the load and choose the fastest route for the desired query, as well as to provide an interface between the client application and the cluster.
In this instance we will create the same files and folders except for DATA, since the router cannot obtain data. It aims to reduce latency and decides on which server it finds the requested query data.

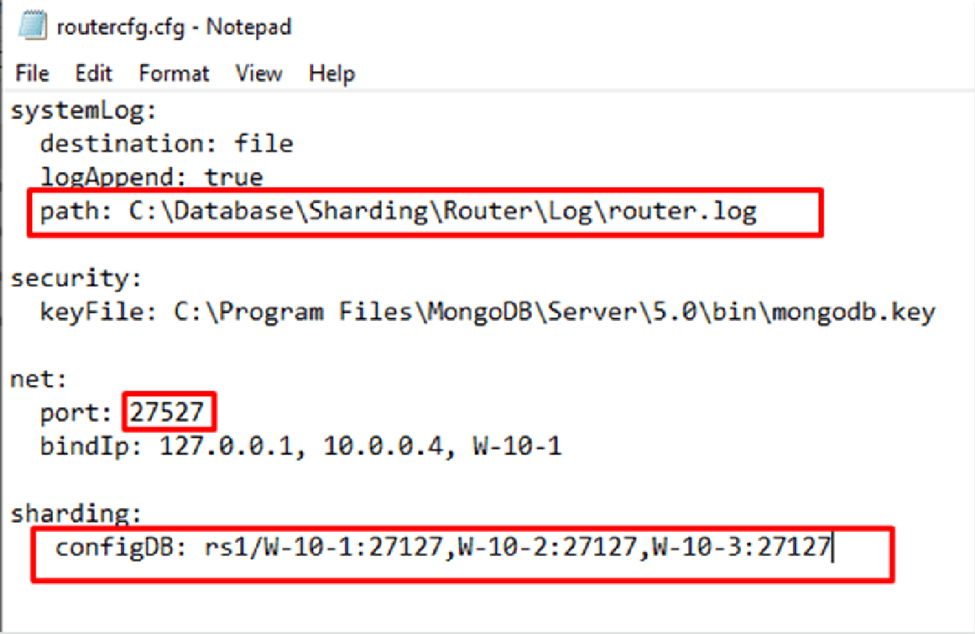
In this configuration file, there will be no parameters referring to the DATA folder, nor will it be necessary to specify the replica-set name. And in the sharding, we will have to indicate the replica set group and the members of the configuration servers, that is, the first replica set we have created.
It is advisable to point out the names of the servers instead of the IPs, remembering that this is a Best Practice.
The file would look like this:
6. Router Service Creation
The next step is the creation of the router service, this time, instead of doing it with the mongod application, we will do it with the mongos application. This is because the mongod option does not support an instance without Data, but mongod does. Still, we will go to the installation location.

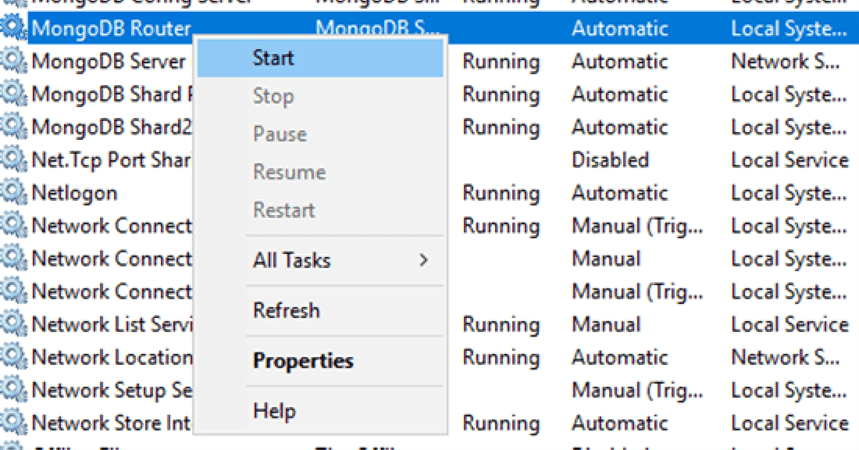
Once the command has been executed, open the services tab and launch the new service.
Finally, we will connect to the router instance.

Once inside, we will create an administrator with all possible permissions, colloquially known as SuperAdmin.
First of all, we must grant admin database permissions to the admin user and then create it with all possible permissions.

From the moment the first user is created, the instance will require us to register in order to carry out any option. So let’s authenticate ourselves:

Once we have entered the necessary credentials we will add the two shards created earlier, with the following command:
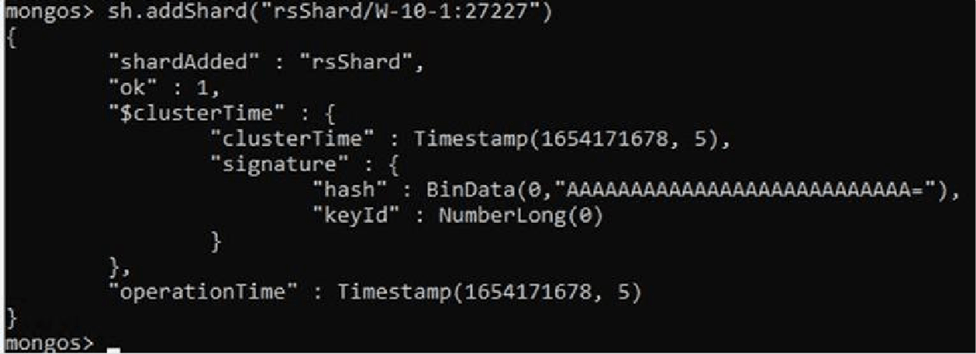
We will start with the first shard. And then we’ll add the second shard.

As we have seen, just by registering the two primary ones, all the other nodes will be added.
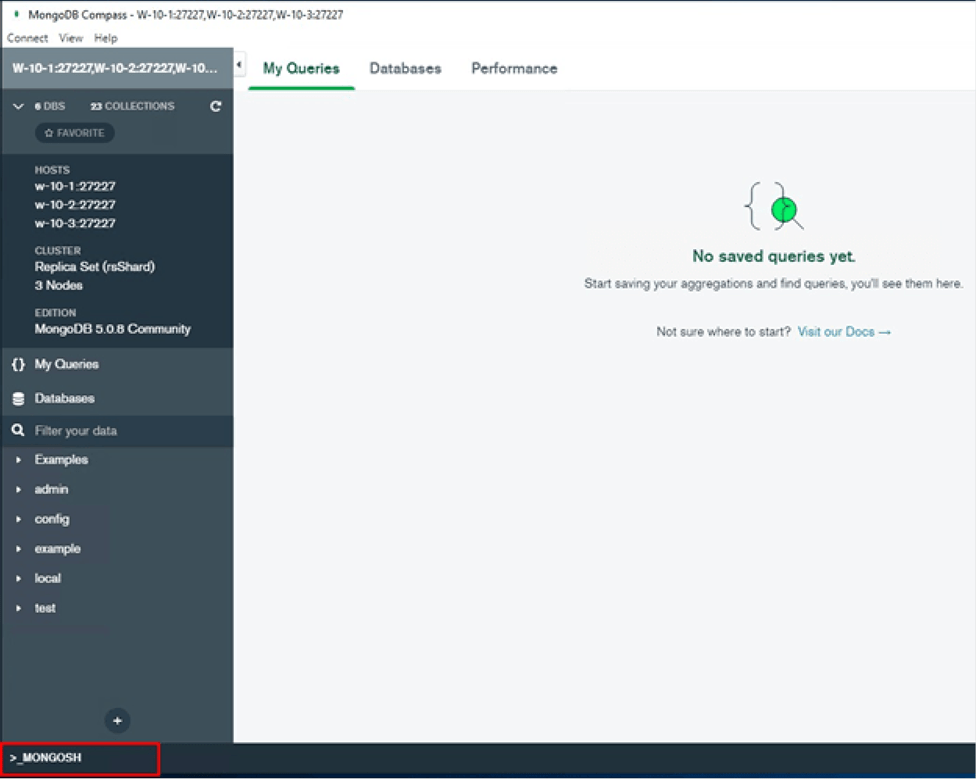
From the Compass program we connect to the first shard. As there is no user created, we will connect from localhost and the chosen port in the following format.
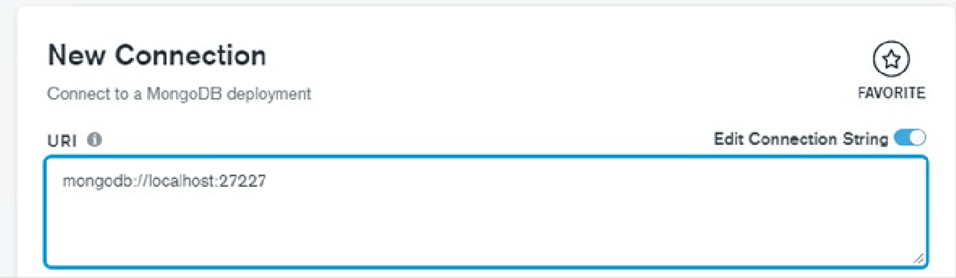
As you can see at the bottom there is a command line.
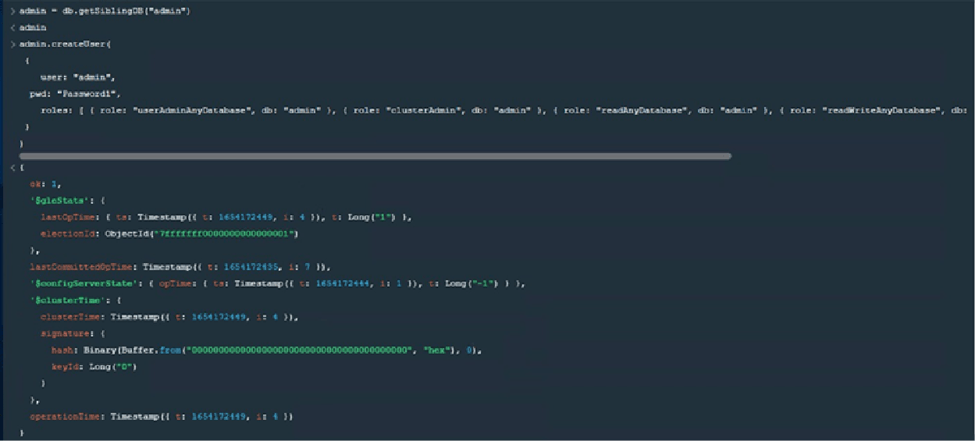
From that mongosh portal, let’s create the SuperAdmin in the rsShard replica-set. There is no change in this command compared to the previous one:
We will create a new database. To do this we will go to the Databases tab and in green there is a box where we will click to create a database.
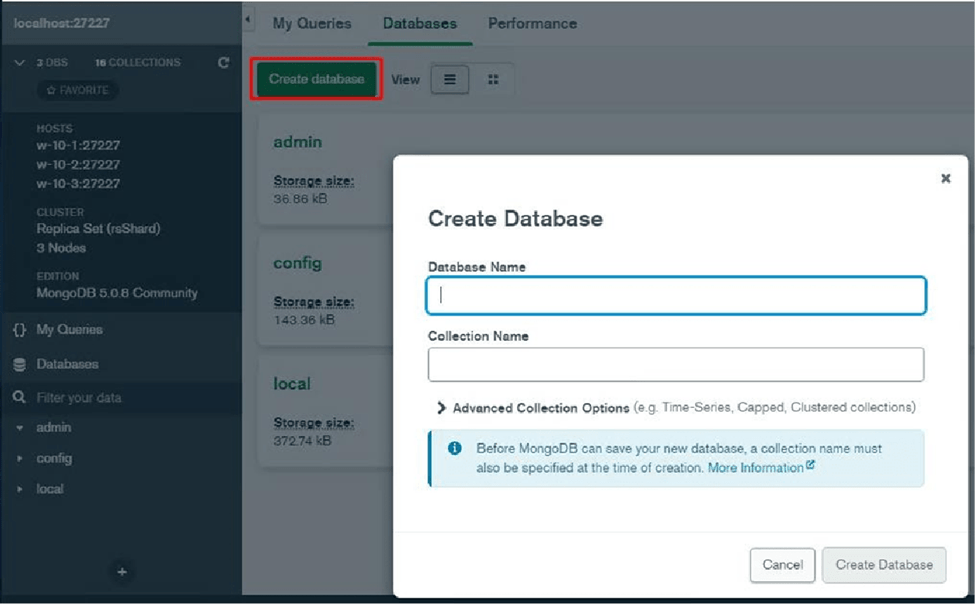
This window will appear where we will choose the name of our database and its collection.
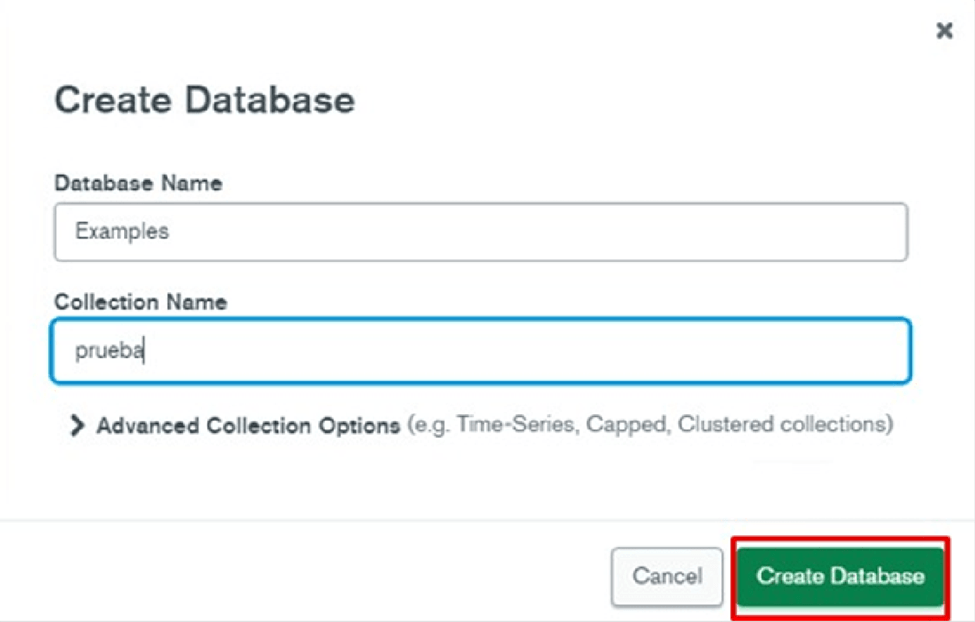
Within the database, Examples in this case, we will see all the collections we have:
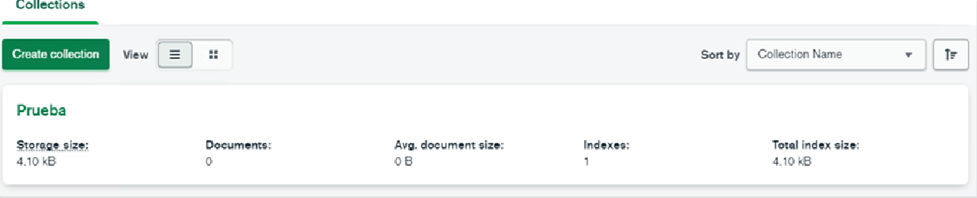
As there is only the one we created earlier, we go into that collection and import data into it.
This is a function of the database tools program but can also be done from here. Much more convenient.
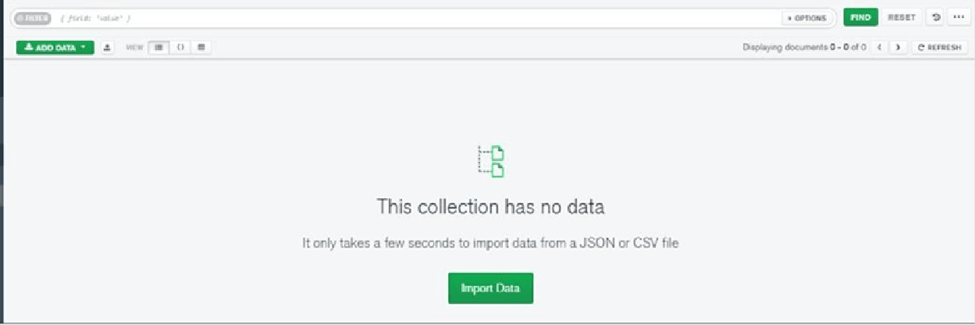
Once you have clicked on Import Data you will be redirected to this tab:
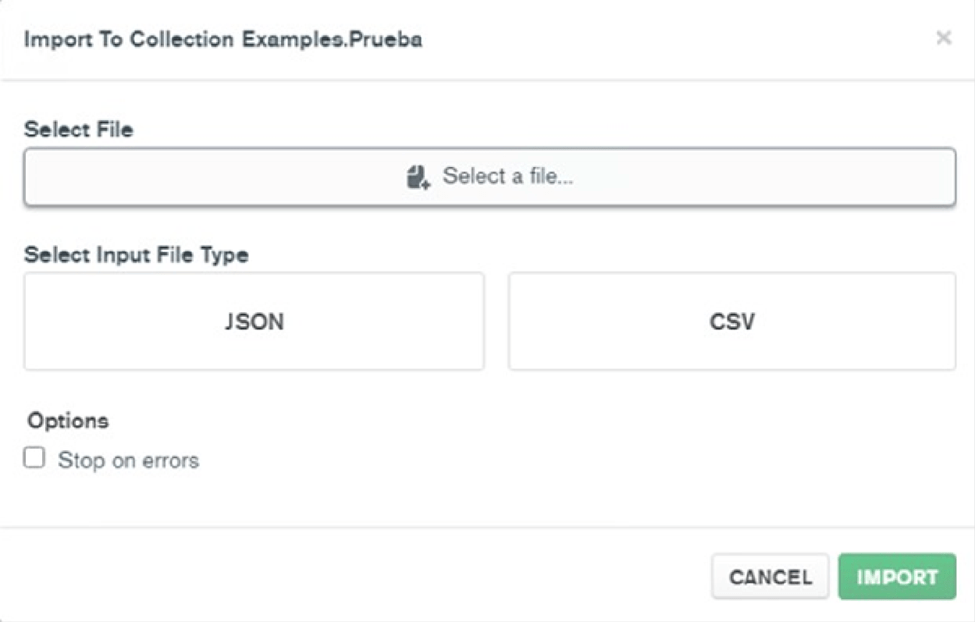
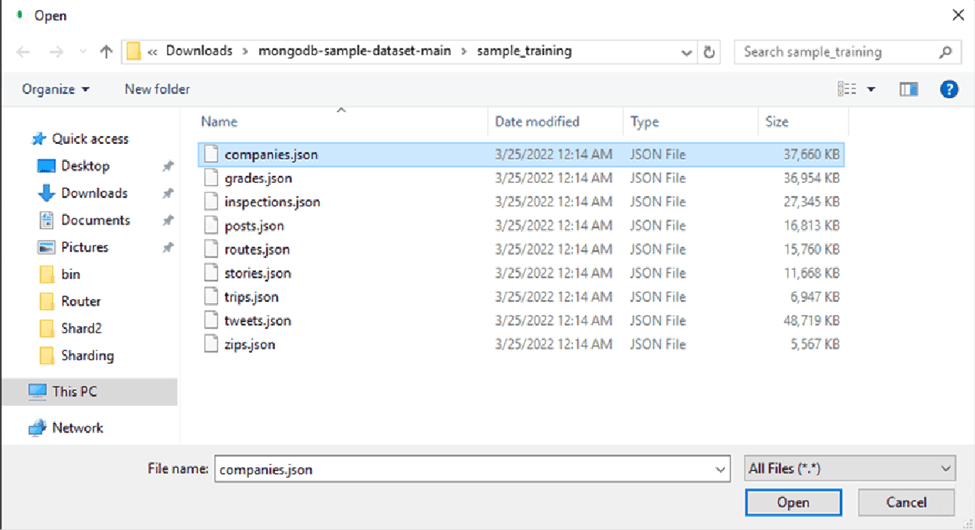
From here we will choose the type of file and select the file we have downloaded.
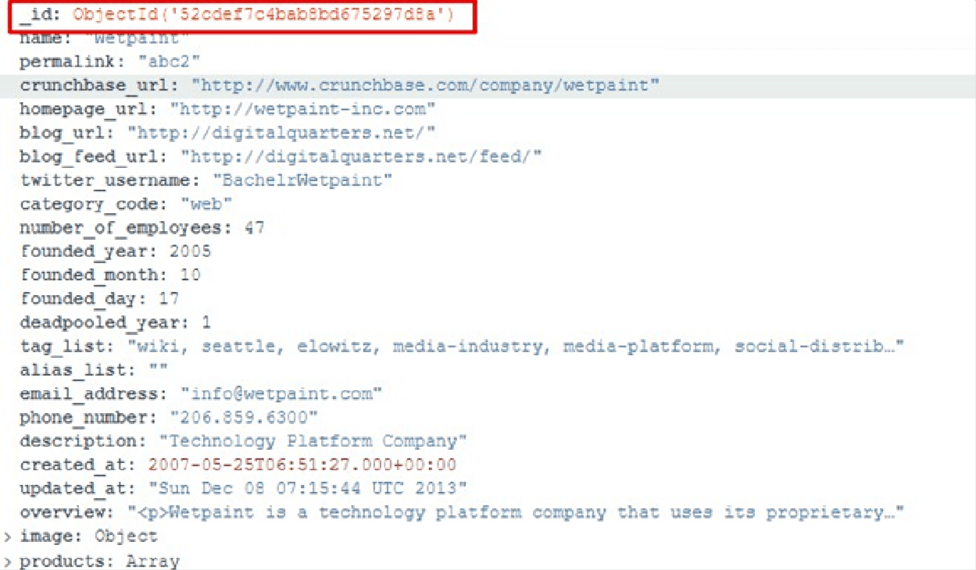
The document I am going to have as an example is a JSON file provided by MongoDB as an example.
When the import is complete, we will be able to see all the data in the collection:

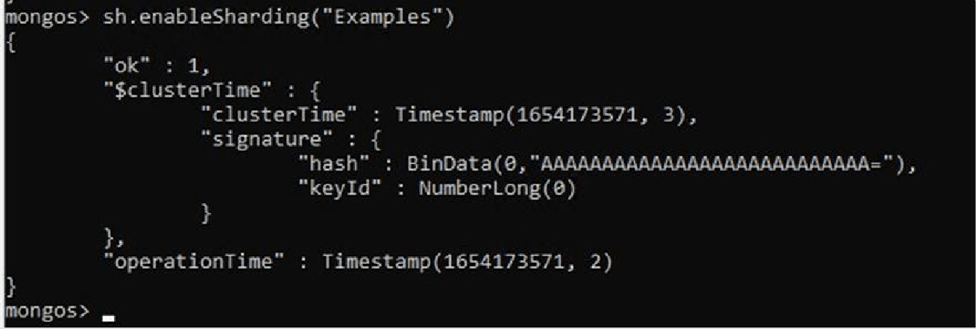
Now we are going to enable sharding on this database. This does not indicate that all the collections we have within Examples will be sharded.
From the mongos instance, i.e. the router instance, we will launch the command necessary to carry out this action:
The next step is to create an index before sharding the collection. If we do not do this, it prevents us from performing the desired sharding.
It should be noted that if the collection has no data, the index is created automatically when the collection is sharded.
To create the index we must launch the following command.
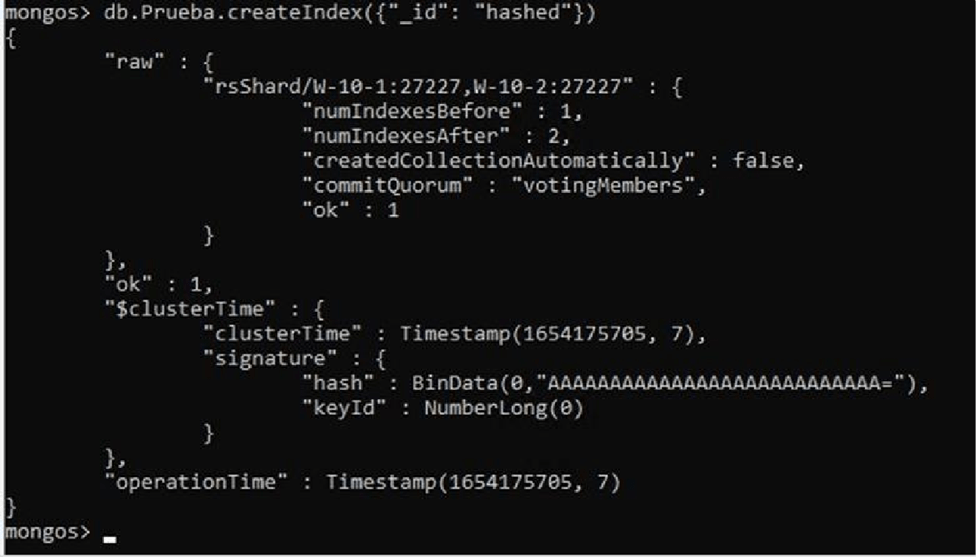
We see the field for which we have created the index.
Now we connect to the Examples database.
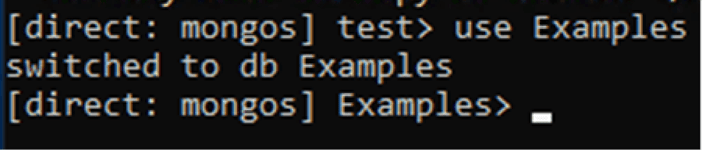
And we fragment the Test collection with the following command:
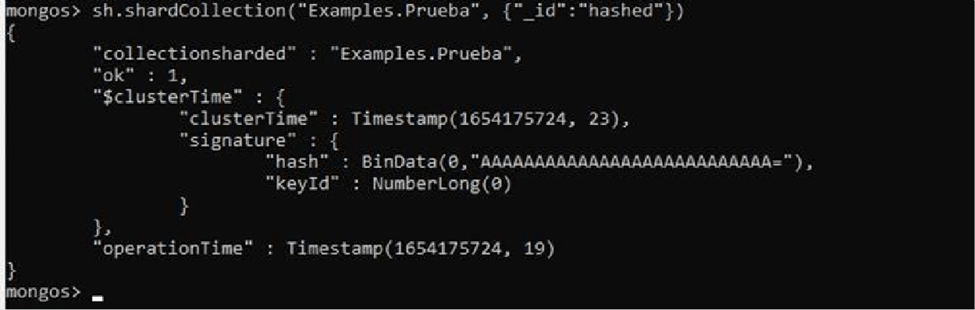
The _id parameter is the field by which the index will be organised and hashed is a type of sharding that provides a more even distribution of data across the sharded cluster.
Once this step is finished, we will have a sharded cluster with MongoDB on our servers.
If you want us to help you improve the performance of your DB servers, check out our
SQL Server Health Check service.

Data engineer with experience in SQL Server and MongoDB. Certified as a database administrator and data modeler in MongoDB, I specialize in designing and managing efficient and secure environments for database applications.
