
Working with roles on Power Bi and SSAS
In this post we will show you how to implement dynamic security at the row level within a tabular Analysis Services model and then visualize it in Power BI, the Best Tool of Business Intelligence.
To get an idea of this, we will imagine that our client asks us to automatically filter the reports by the user belongs.
1. SSAS Tabular Project:
Starting from the following Model in Tabular Analysis Services.
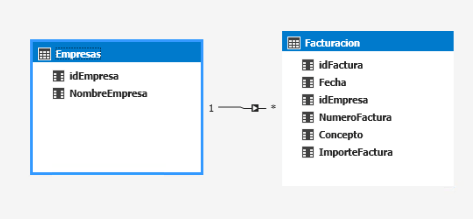
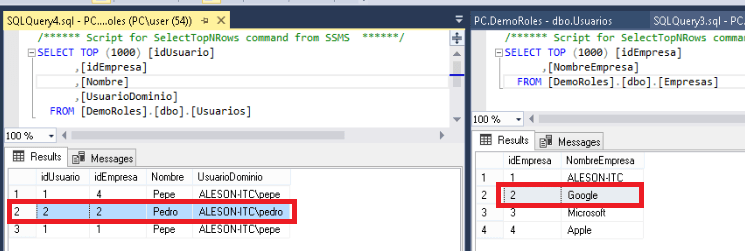
The first step would be to create a table that helps us to relate Active Directory users (Usuarios) with the table to filter (Empresas).
We relate it to the table Empresas in the Model.
Then go to the Model tab and click on Roles. In the Role Administrator dialog box, click New and add the role “RolEmpresaUsuario” with read permissions.
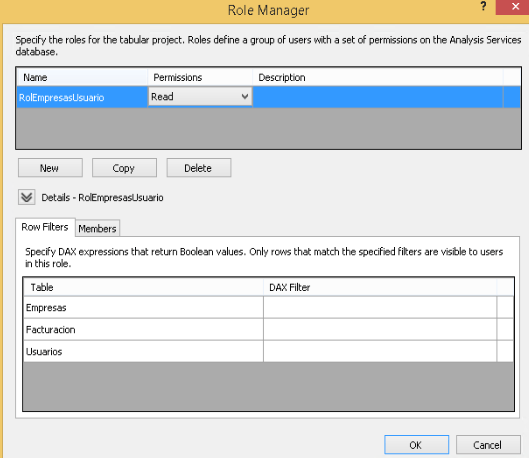
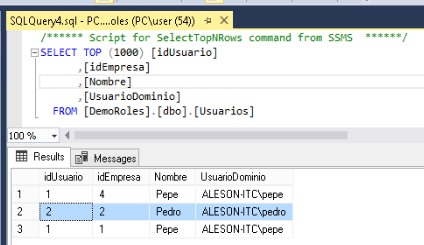
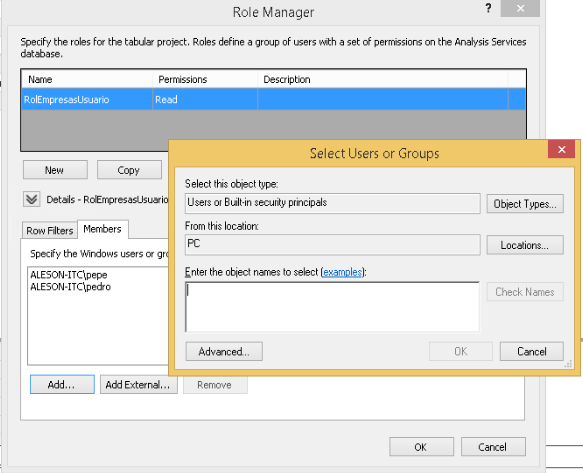
In the Members tab, we add the users or groups of the Users table that we have previously created.
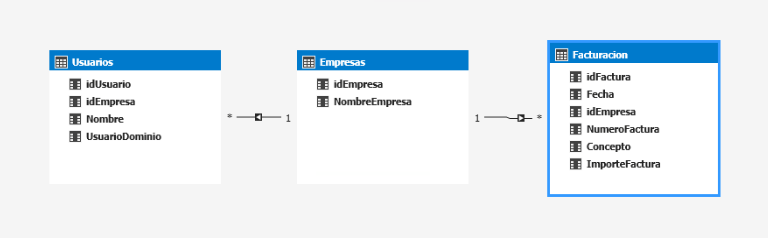
To finish with the configuration of the Role, we will define the filter at the row level within the table where we want it to be applied. With this filter we will get the Empresas table to be filtered depending on the user that logged in.
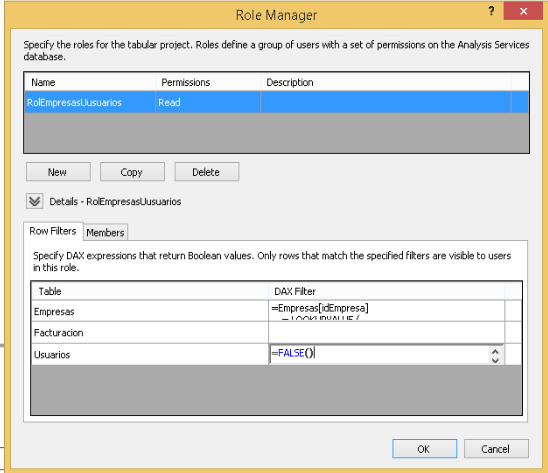
In Dax Filter we add the following query, which will indicate the companies that the logged user belongs.
Empresas[idEmpresa]
    = LOOKUPVALUE (
        Usuarios[idUsuarios];
        Usuarios[idUsuarios]; Empresas[idEmpresa];
        Usuarios[UsuarioDominio]; USERNAME ()
    )
In order that the clients can not access the user table in the Dax Filter, we indicate that Usuarios= FALSE () and hide the table in the model.
We Deploy and we would have the SSAS project ready to use. We create a report in Power BI Desktop.
If we want to display the user with which the report is accessed, we can create the following measure within SSAS -> User: = USERNAME ().
If we published the report right now, we would get an error indicating that there is no data source for this report. So we have to install a gateway.
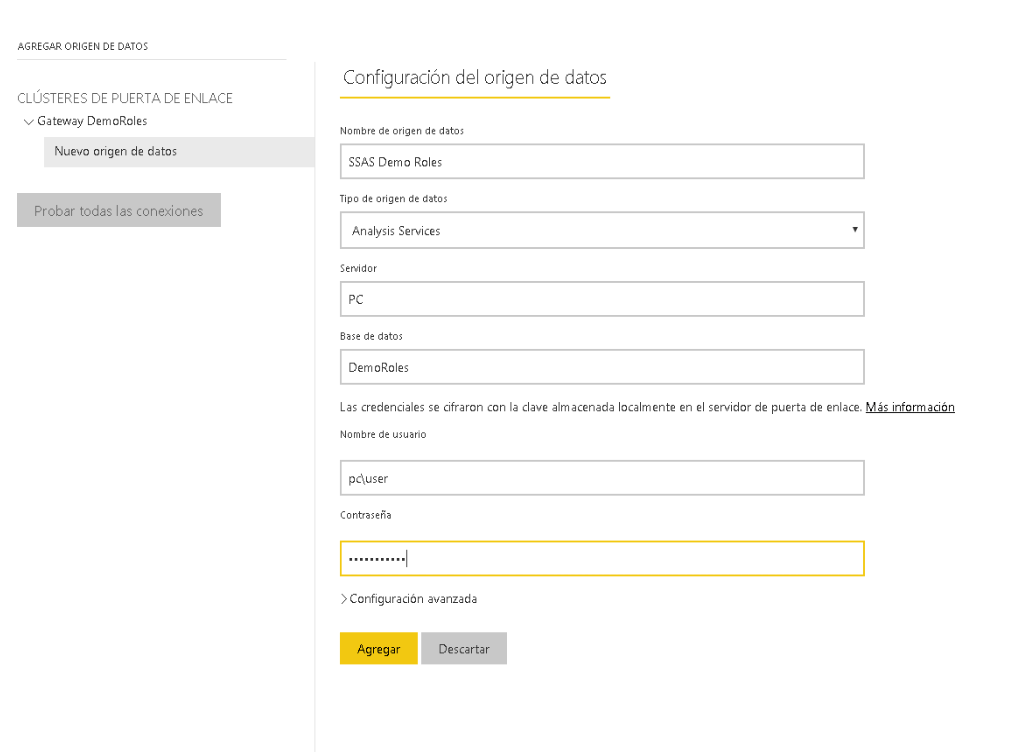
2. Gateway
To have connectivity between our tabular instance and Power Bi Online we need to establish a secure connection by installing the Power BI Gateway. Once we have installed and configured the gateway we will create a data source. To create the data source, we went to the Power Bi Online service -> Configuration -> Manage gateways and create a new SSAS data source.
You can get it here.
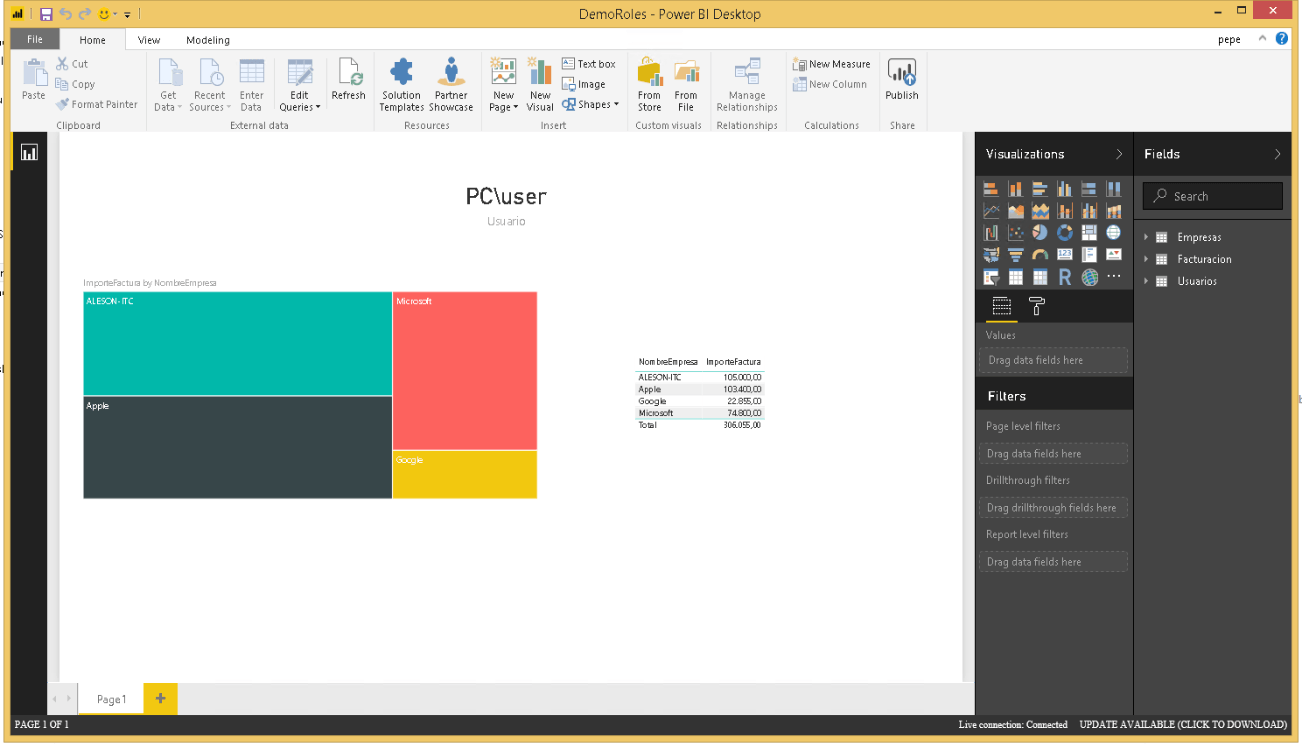
Now we can publish the report from Power Bi desktop. Once the report is published, we will access the user with whom we have published it in our “Pepe” case.
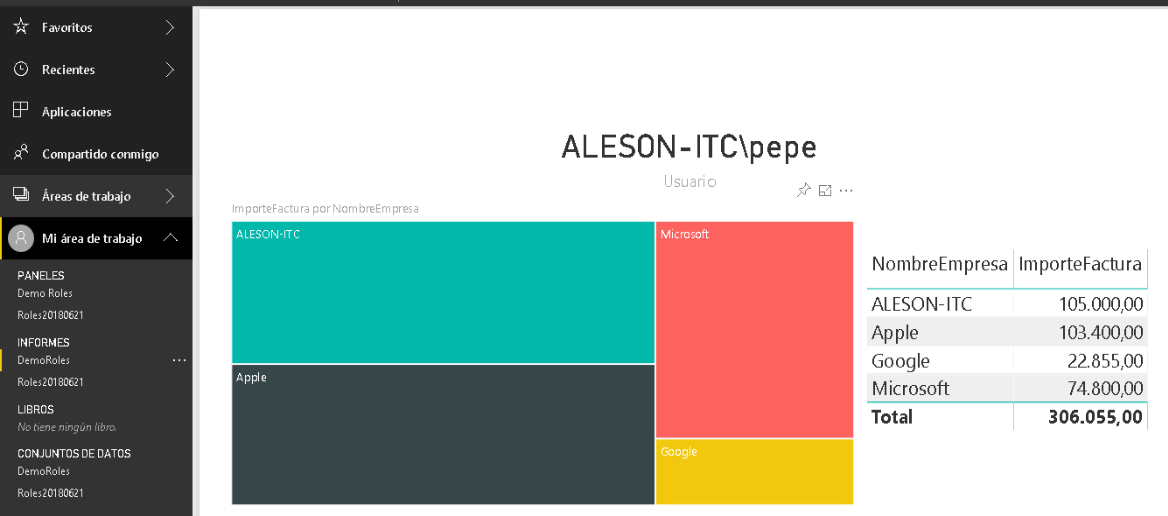
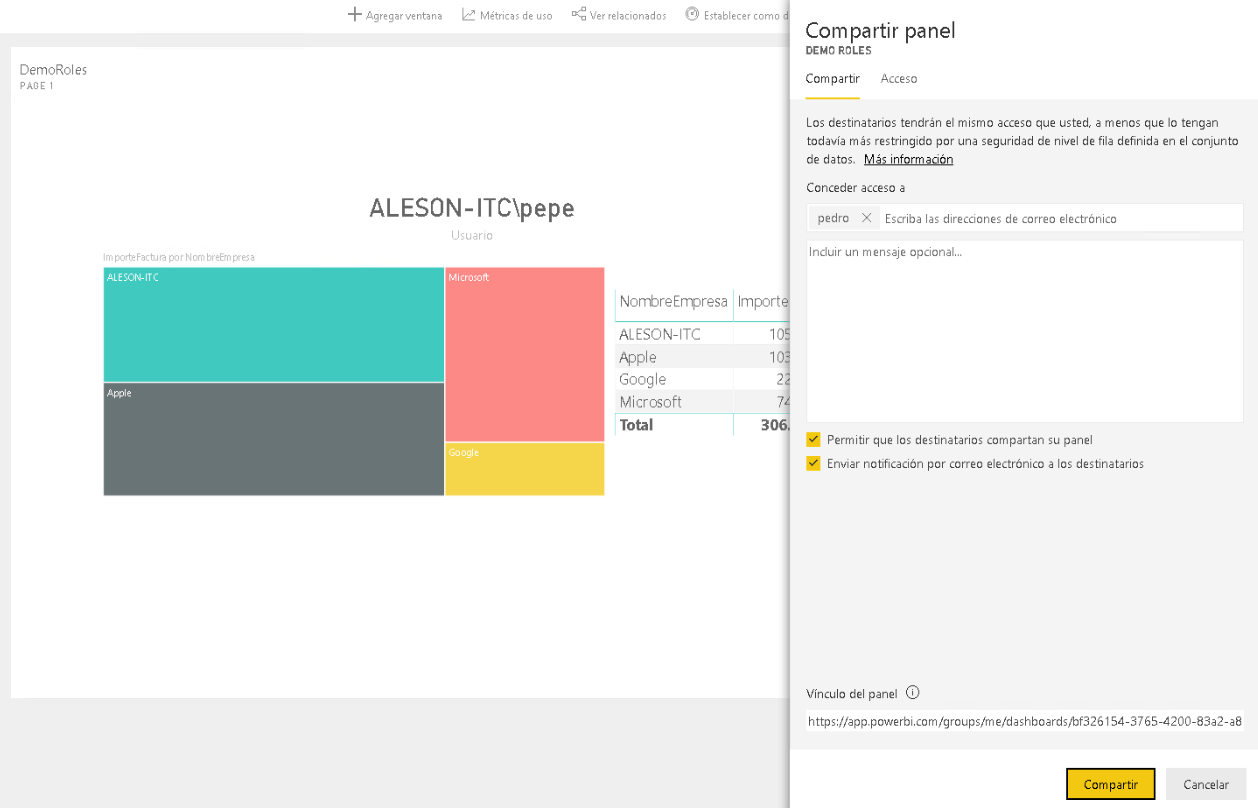
As you can see, the data of all the companies appear. Now we will proceed to share the panel with “Pedro”.
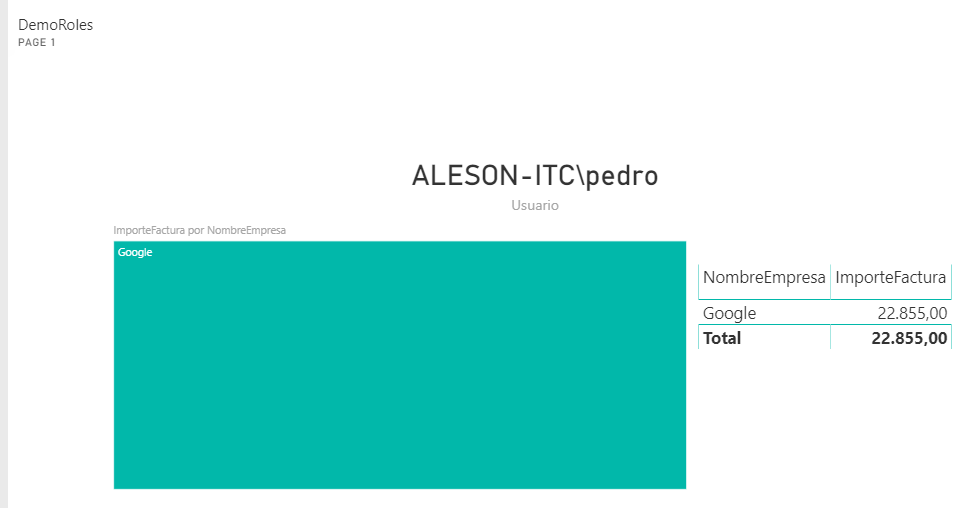
We will open the Power Bi Online service with the “Pedro” account and visualize the shared panel.As you can see in the panel only the data of the Company Google appear because in our example “Pedro” is assigned to this company.
If you want us to help your business or company contact us at info@aleson-itc.com or call us at +34 962 681 242
Business Intelligence Expert Consultant. Specialising in creation of Data Warehouse, Fabric, Analysis Services, Databricks, Power BI, SSIS and SSRS.