
BI Starter Pack (2/4) : Measures Calculated Groups
In my last Post, I showed you a much faster and more intuitive alternative than Visual Studio, the Tabular Editor. Surely many of you will have been testing this new application, so if you liked it and found it really useful, you can not miss this Post!
This time, we will use the Tabular Editor tool to create Measures Calculated Groups.
Surely some customer after creating a battalion of measures has told you that he wants all of these in a comparison with the previous year. The general way to do this would be to create all the measures one by one using the relevant DAX code.
Fortunately, thanks to our tool we can make this comparison with a few clicks.
Measures Calculated Groups Creation
1. Creation of Our Script in .NET
The creation of the Script will be the first step we are going to take. I still have not created any of my own since I have not had this tool in my hands for a short time, so I will just show you an example that I took from one of the sessions of SQL Saturday Madrid: Conviriéndonos en Másters de Power BI con DAX Studio y más.
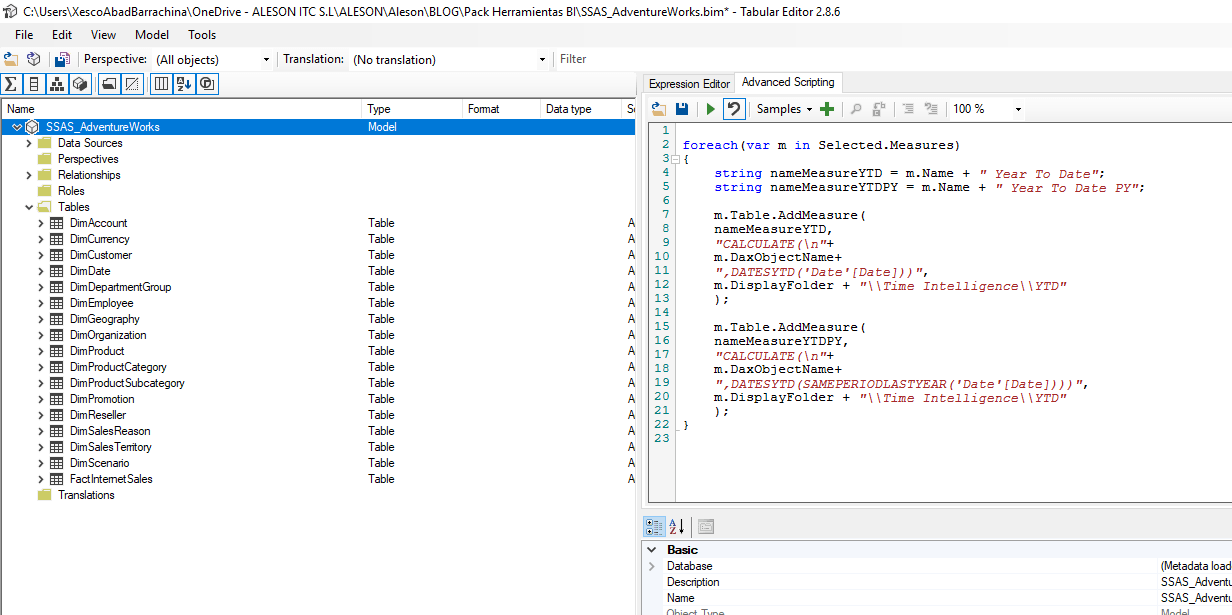
We go to the Advanced Scripting tab and paste the following code.
//Declaramos un cursor para que recorrar todas las medidas seleccionadas.
foreach(var m in Selected.Measures)
{
    // Cargamos una variable con el nombre de la nueva medida.
    string nameMeasureYTDPY = m.Name + " Year To Date PY";

    m.Table.AddMeasure(//Indicamos que cree una nueva medidas en la dimension seleccionada.
    nameMeasureYTDPY,//Indicamos el nombre de la medidas.
    //Indicamos la expresión de la nueva medida en nuestro caso
    //CALCULATE ([Sum Sales Amount],DATESYTD ( SAMEPERIODLASTYEAR ( Date[Date] ) ))
    "CALCULATE(\n"+m.DaxObjectName+",DATESYTD(SAMEPERIODLASTYEAR('Date'[Date])))",
    //Indicamos que guarde la nueva medidas en la siguiente carpeta \\Time Intelligence\\YTD y si no existe la crea.
    m.DisplayFolder + "\\Time Intelligence\\YTD"
    );
}
As you can see the .NET code is quite intuitive and we can do almost anything we can think of.
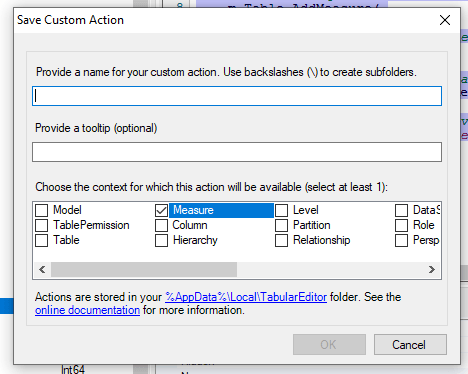
2. Action Creation
To add the action, we click on the + icon and the following window will appear in which we have to indicate the name that we want to assign to the action and on what type of object can be applied, in our case only in measures.
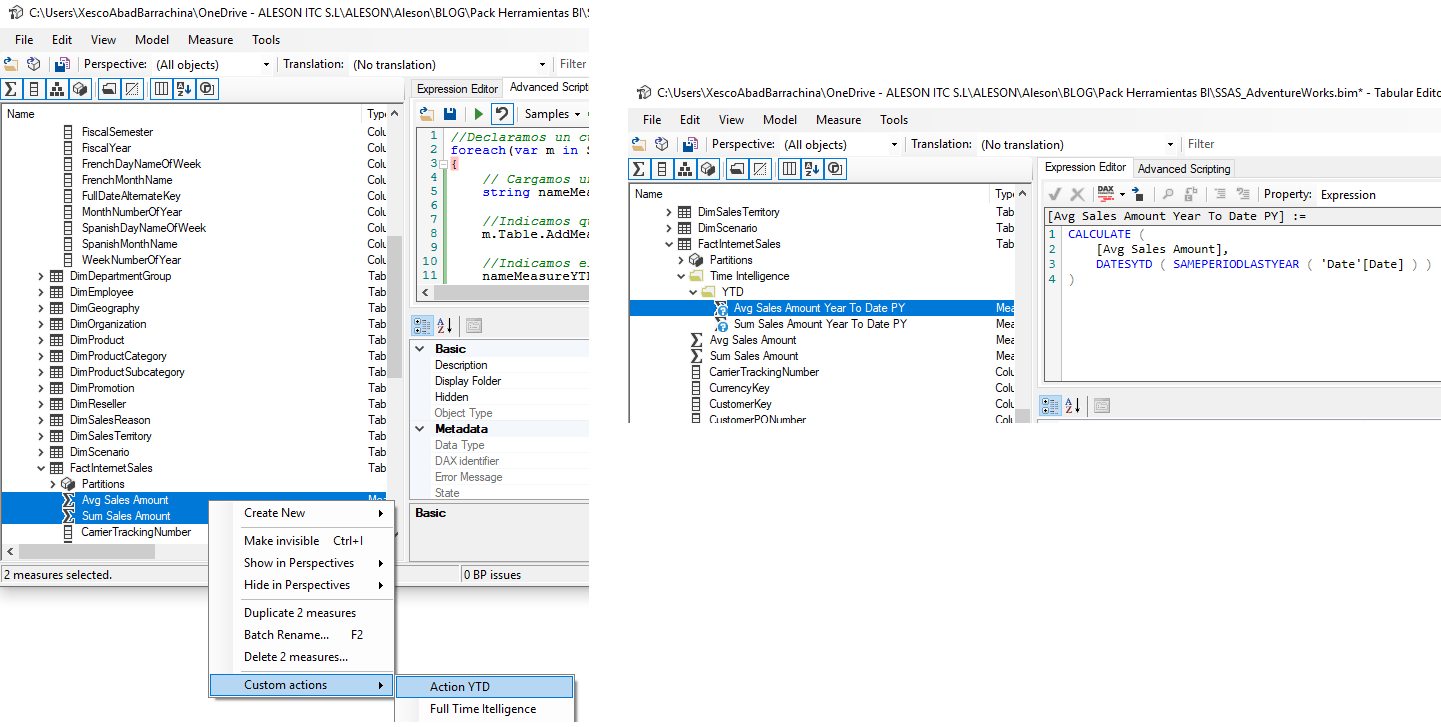
3. Selection of Measures
Once the Action is created, we select the measures where we want them to be applied, click, select Custom actions and all the created actions will appear.
Select the previously created action, in our case Action YTD and then we can verify that it has been created, as we had indicated in the script, the Time Intelligence folder and within this the YTD folder with the two measures selected but with the new name (Measured name + Year To Data PY) and the new DAX code.
Once again, I hope this post will help you facilitate the creation of Calculated Groups.
Don’t miss my next posts about Tabular Editor tips.
BI Starter Pack Series:
- BI Starter Pack (1/4): The Alternative to Visual Studio
- BI Starter Pack (2/4) : Calculated Groups
Business Intelligence Expert Consultant. Specialising in creation of Data Warehouse, Fabric, Analysis Services, Databricks, Power BI, SSIS and SSRS.