Skip to content
Category: Azure
2019-01-31

Windows Server 2019 In Azure – Create Virtual Machine

Today we return with an entry where we will discuss the creation of a Virtual Machine in Azure with the new version of Windows Server 2019 Datacenter.

To start we must have a subscription in Microsoft Azure, if we do not have one we can get a free with € 170 balance for 1 month, I attached in the link:

https://azure.microsoft.com/es-es/free/

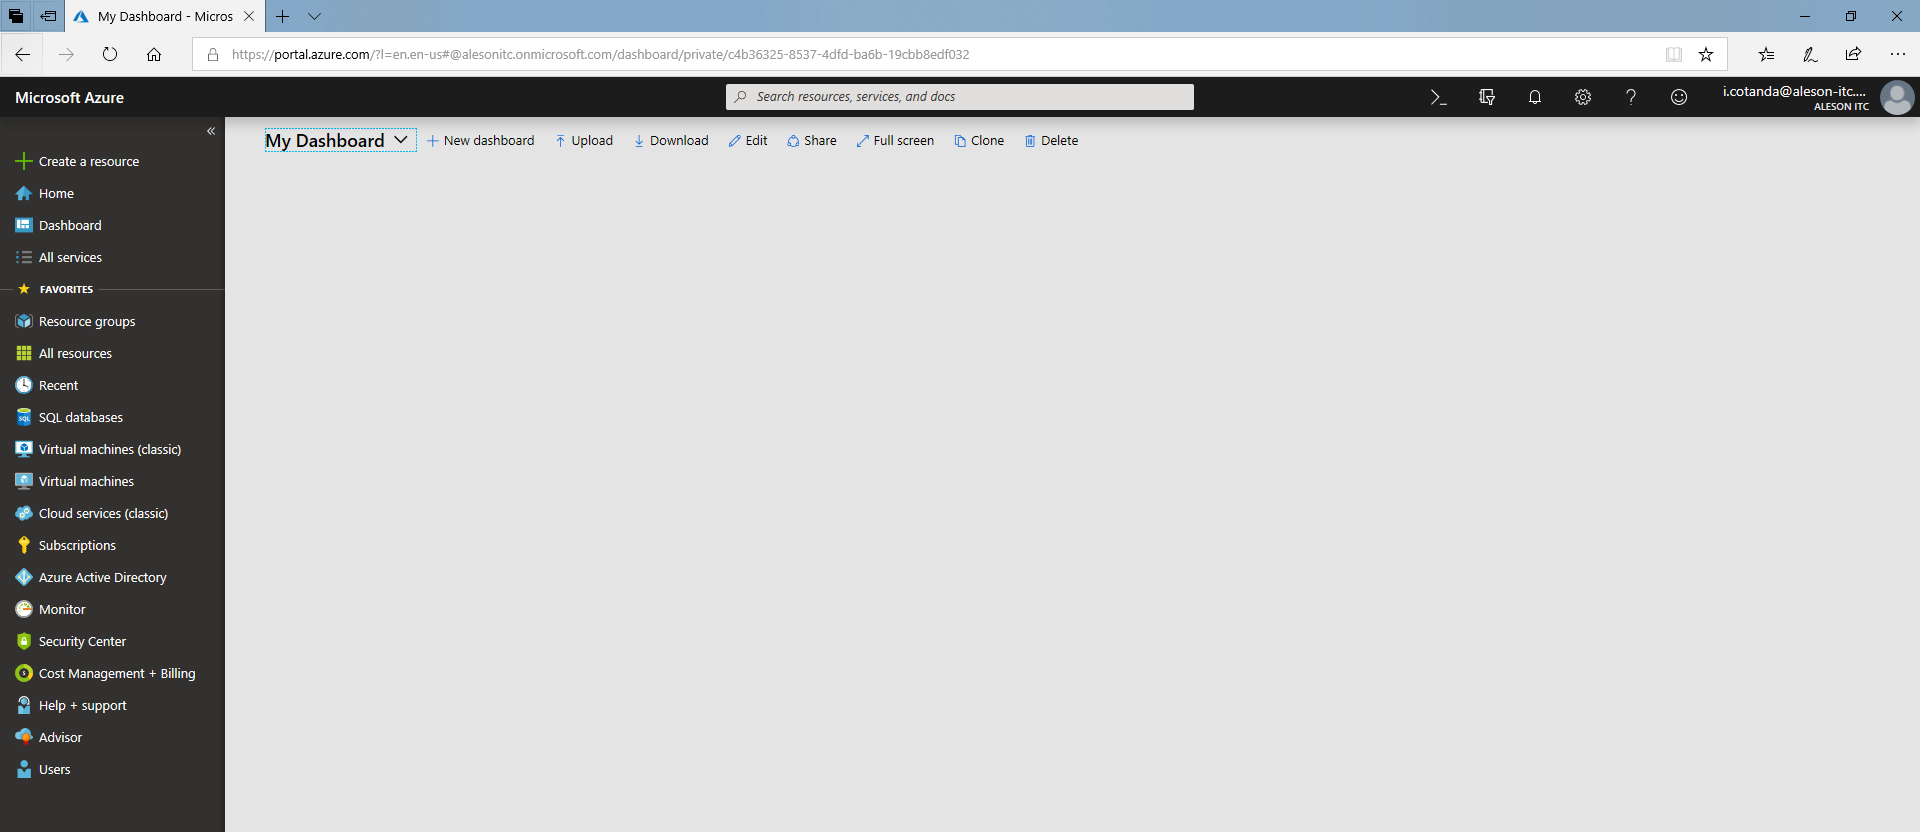
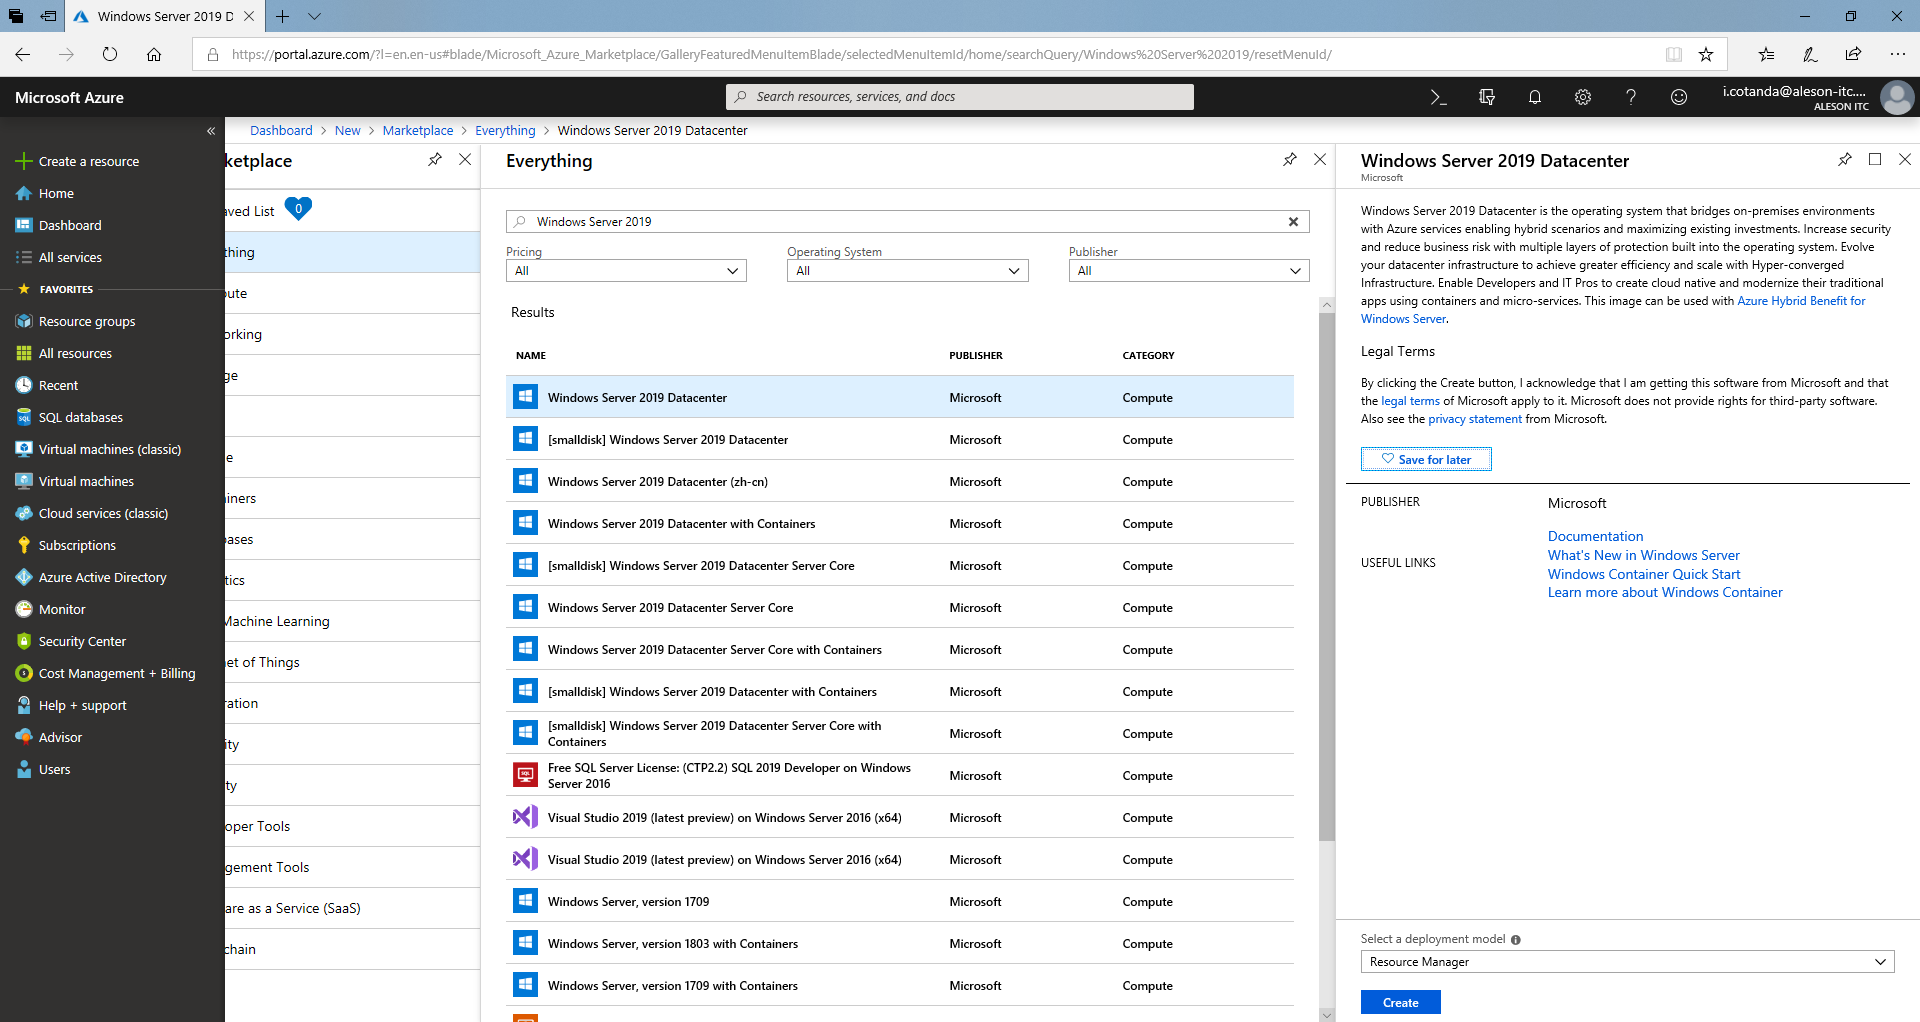
The first step we must do is go to the Azure portal (https://portal.azure.com), from here go to the selection menu and click on “Create a resource”. Once clicked, a tab appears where we will write the resource that we want to create.

azure windows server 2019 virtual network resource groups install instalar grupo de recursos red virtual public ip aleson itc microsoft base de datos sql server mysql oracle postgresql bi business intelligence azure ssis ssas ssrs Azure SQL Database datawarehouse stretch databases managed instance elastic pool data factory

Once we have chosen the resources that we want to create and make sure it is the right one, we will click on “Create” in the lower left part.

azure windows server 2019 virtual network resource groups install instalar grupo de recursos red virtual public ip aleson itc microsoft base de datos sql server mysql oracle postgresql bi business intelligence azure ssis ssas ssrs Azure SQL Database datawarehouse stretch databases managed instance elastic pool data factory

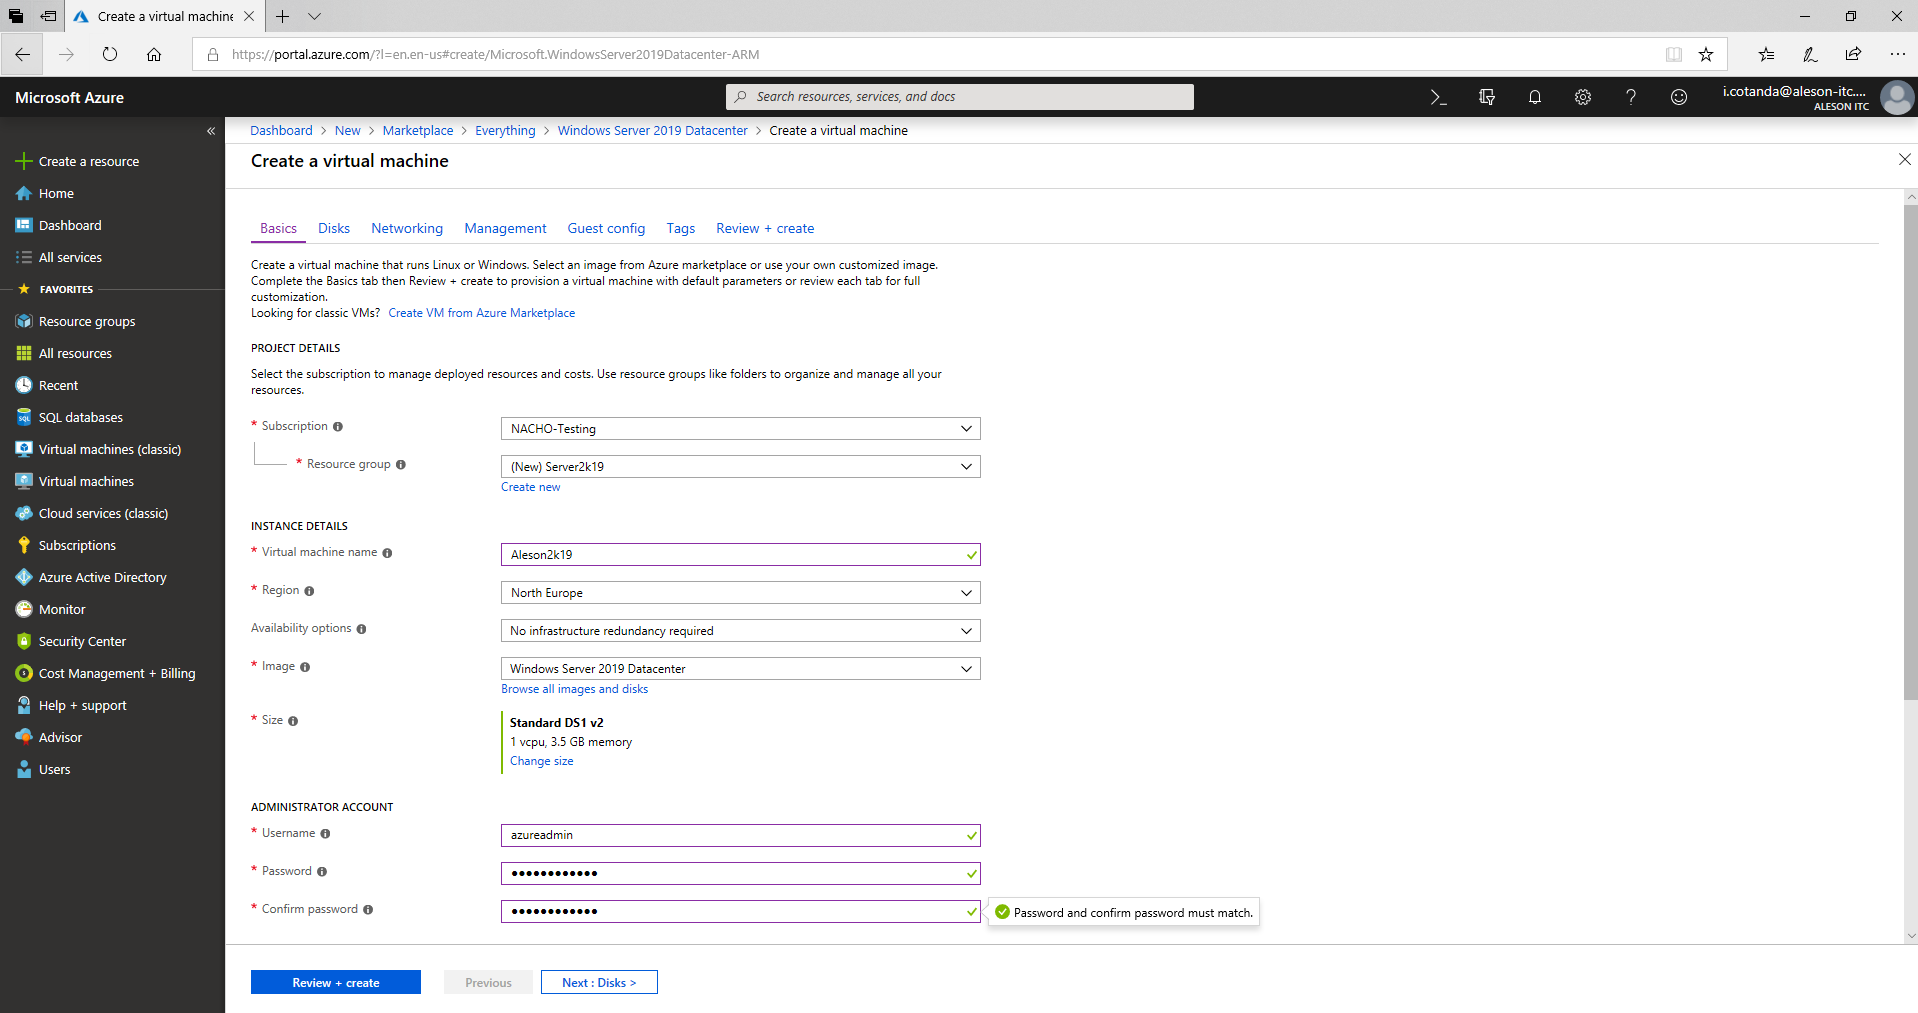
Now we start with the creation of the virtual machine, we must have clear the nomenclature that we are going to use for all the resources that Azure offers us for its creation. Since if we are going to make the creation of a production architecture it is important for in the future to be able to correctly identify each one of them.

If you want to know more about Azure, visit our page Azure for Business

  • Subscription: This is where we must choose the subscription where we go our resources, if we only have one no problem, but if we have several we must make sure to choose the correct one.
  • Resource group: It is a container that stores the resources related to an Azure solution, this is where we will store all the resources related to our server (Virtual Machine,
  • Virtual machine name: Name of the server that we want.
  • Region: The region where we are going to create all the resources related to the virtual machine.
  • Image: The image chosen in the first step.
  • Size: The size you want to assign, in our case a DS1v2 (1vCPU and 3.5 RAM).
azure windows server 2019 virtual network resource groups install instalar grupo de recursos red virtual public ip aleson itc microsoft base de datos sql server mysql oracle postgresql bi business intelligence azure ssis ssas ssrs Azure SQL Database datawarehouse stretch databases managed instance elastic pool data factory

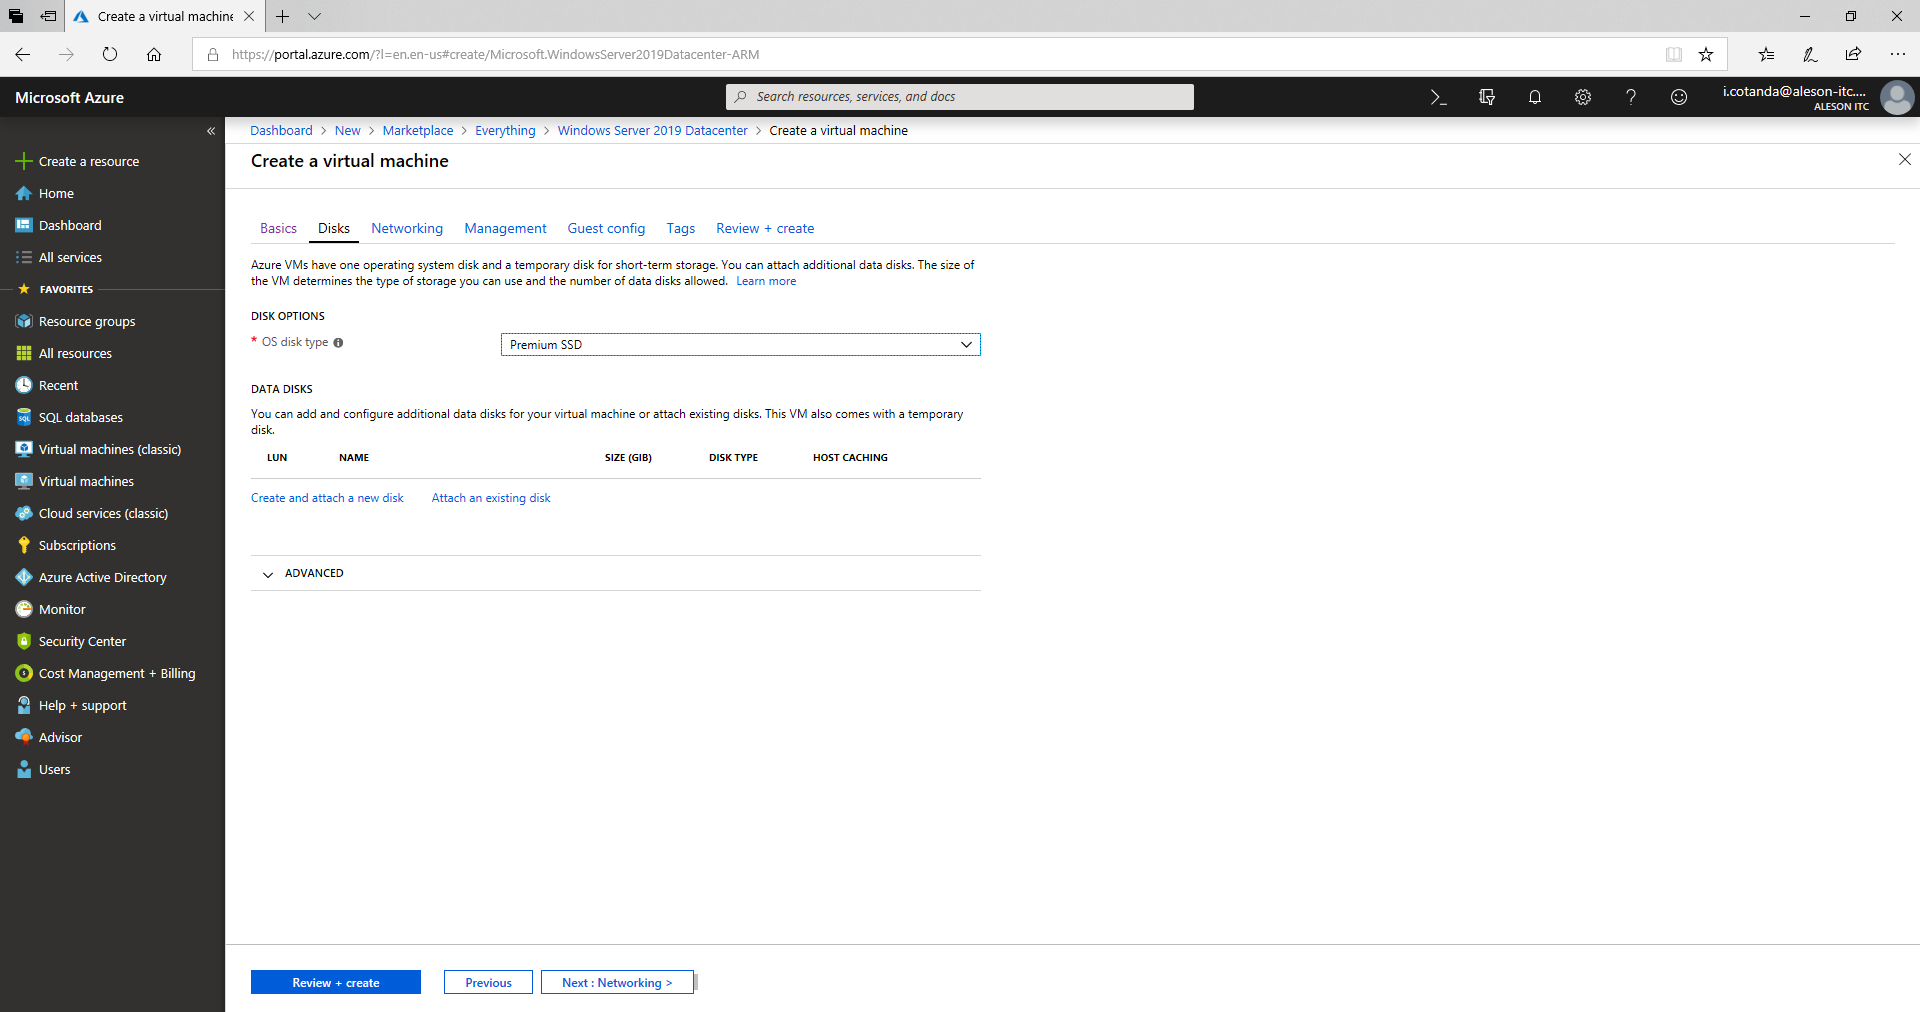
In the next window (Disks) we can add the disk architecture that we want, in our case we will not add any additional disk.

azure windows server 2019 virtual network resource groups install instalar grupo de recursos red virtual public ip aleson itc microsoft base de datos sql server mysql oracle postgresql bi business intelligence azure ssis ssas ssrs Azure SQL Database datawarehouse stretch databases managed instance elastic pool data factory

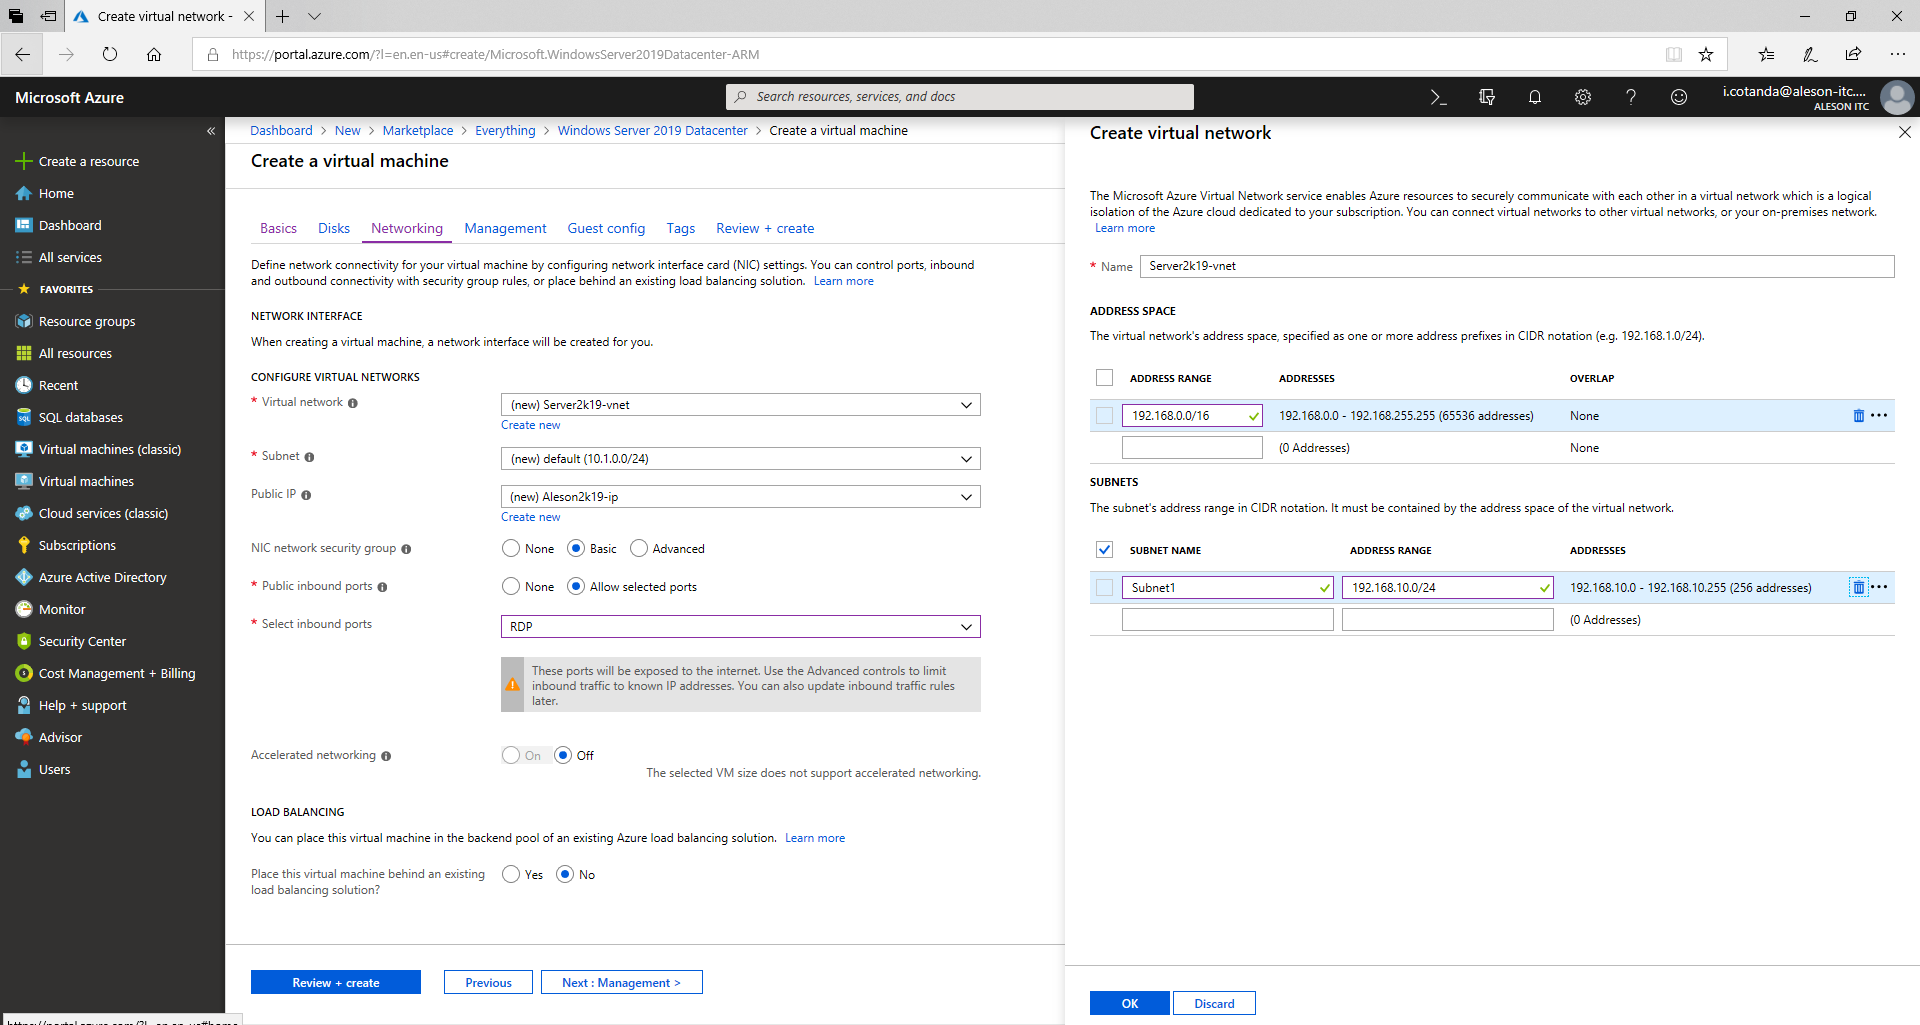
We go to the next configuration option of the virtual machine, and at this point we have to create the VNET (Virtual Network). We can leave all points by default, or we can choose the range of IP’s that we want.

In our example, we chose 192.168.00 / 16 as the address space, with a subnet called Subnet1 in the range 192.168.0./24.

And an important point is to choose the ports of entry that we want to enable on the machine, in this case to be a Windows machine, we must open the RDP port (3389) to be able to access the server remotely.

azure windows server 2019 virtual network resource groups install instalar grupo de recursos red virtual public ip aleson itc microsoft base de datos sql server mysql oracle postgresql bi business intelligence azure ssis ssas ssrs Azure SQL Database datawarehouse stretch databases managed instance elastic pool data factory

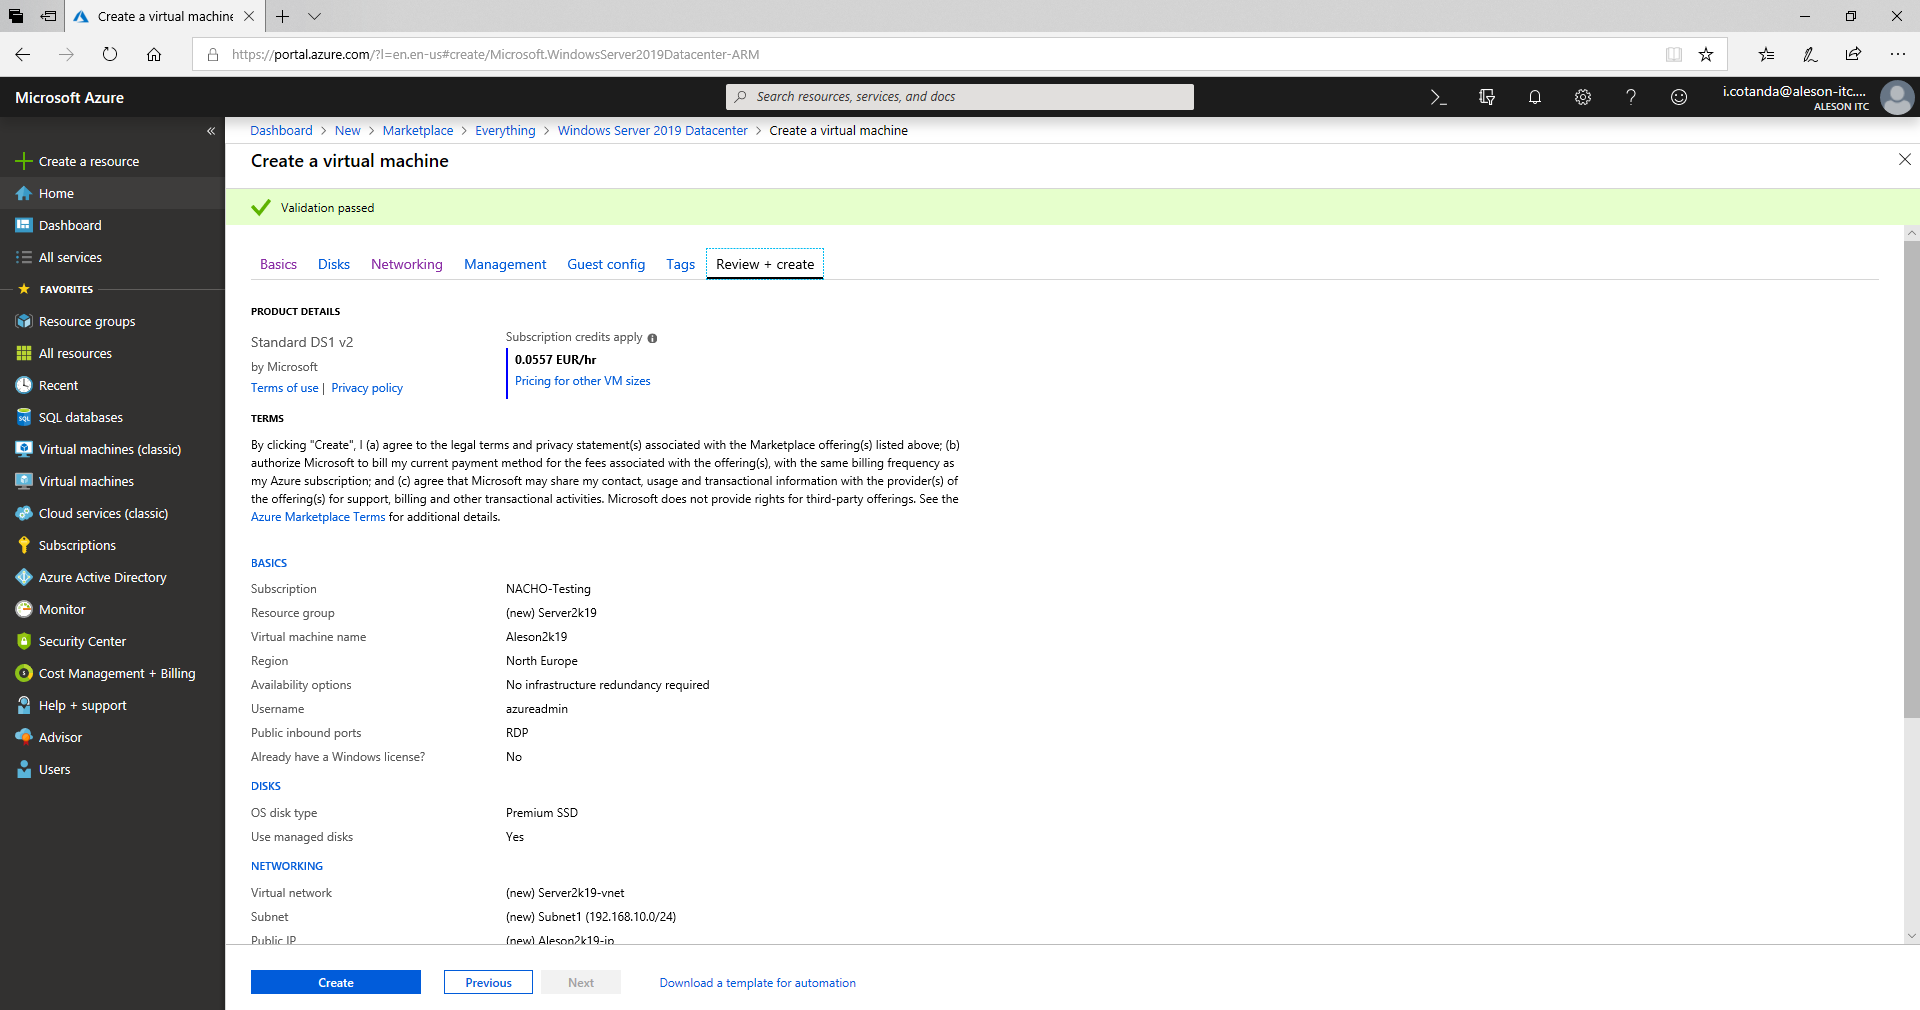
Once all the previous points are filled in, we can pass the “Review + Create” tab, here Azure performs an assessment of the machine and that of all the configured points are correctly. Once the validation is over we can start with the creation by clicking on “Create”:

azure windows server 2019 virtual network resource groups install instalar grupo de recursos red virtual public ip aleson itc microsoft base de datos sql server mysql oracle postgresql bi business intelligence azure ssis ssas ssrs Azure SQL Database datawarehouse stretch databases managed instance elastic pool data factory

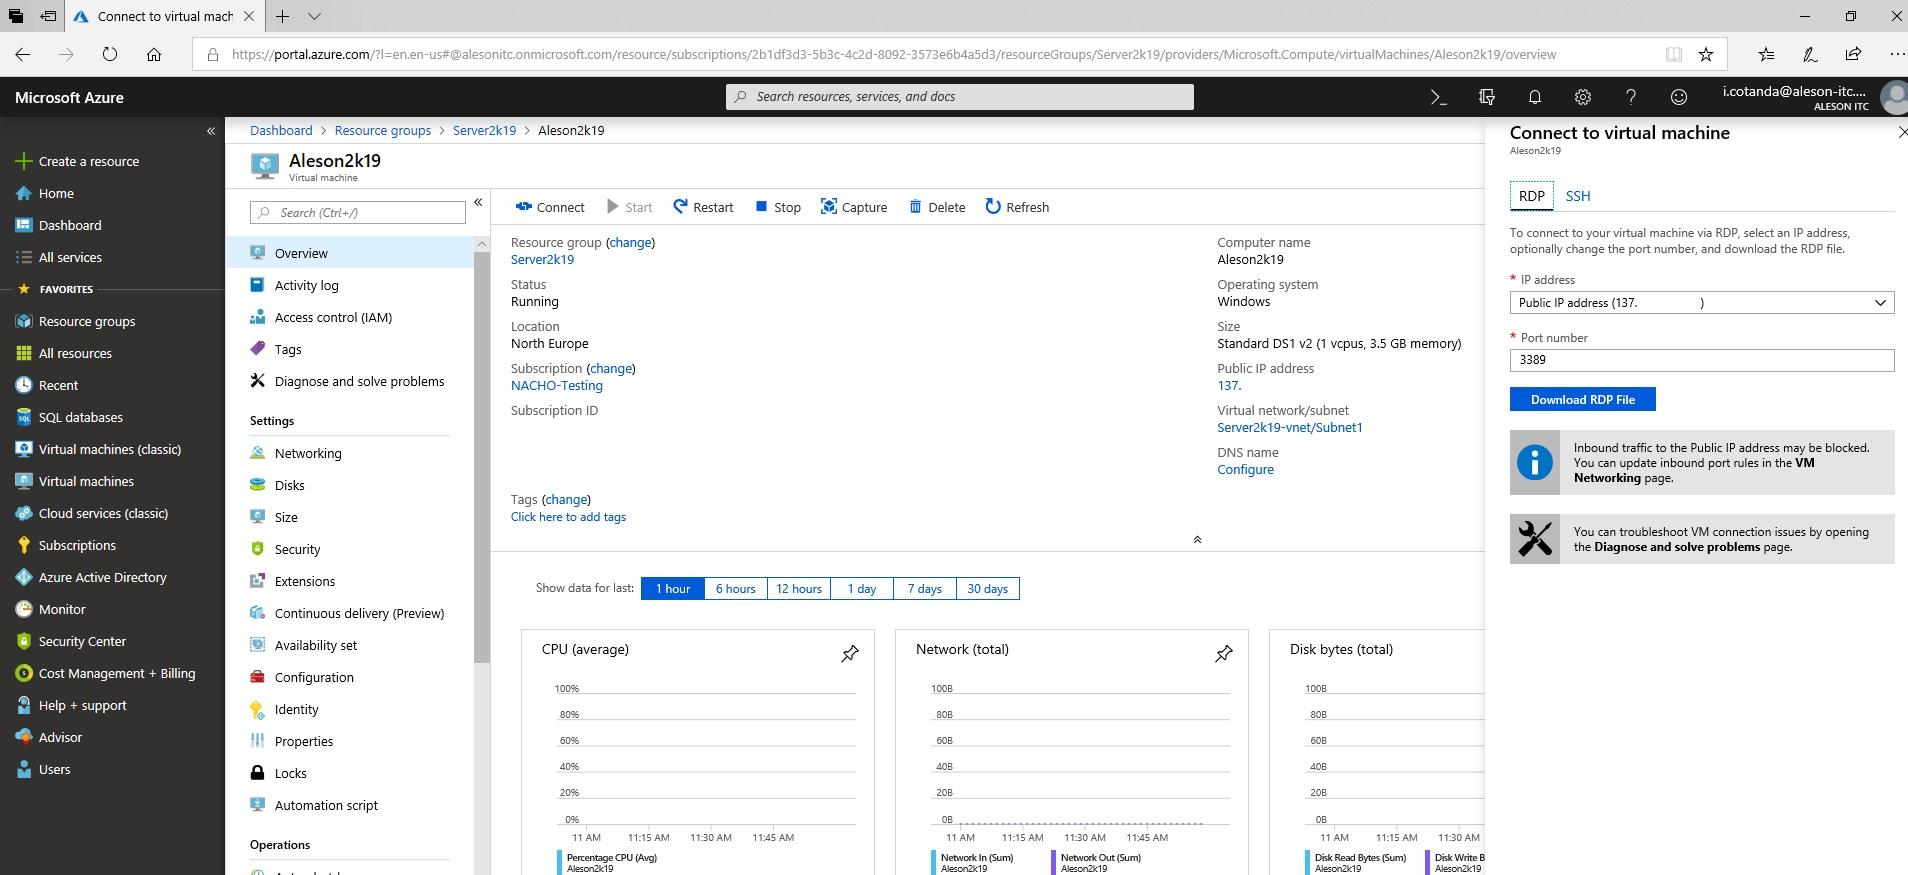
Once we have waited for the server to be created, we go to the resource group created and click on the virtual machine, once we are in the overview of the server and note that the state is “Running” we can access it in two ways :

  1. Downloading the .RDP file with the Public IP of our server to access directly.
  2. Copying our IP Public to our remote connections manager.

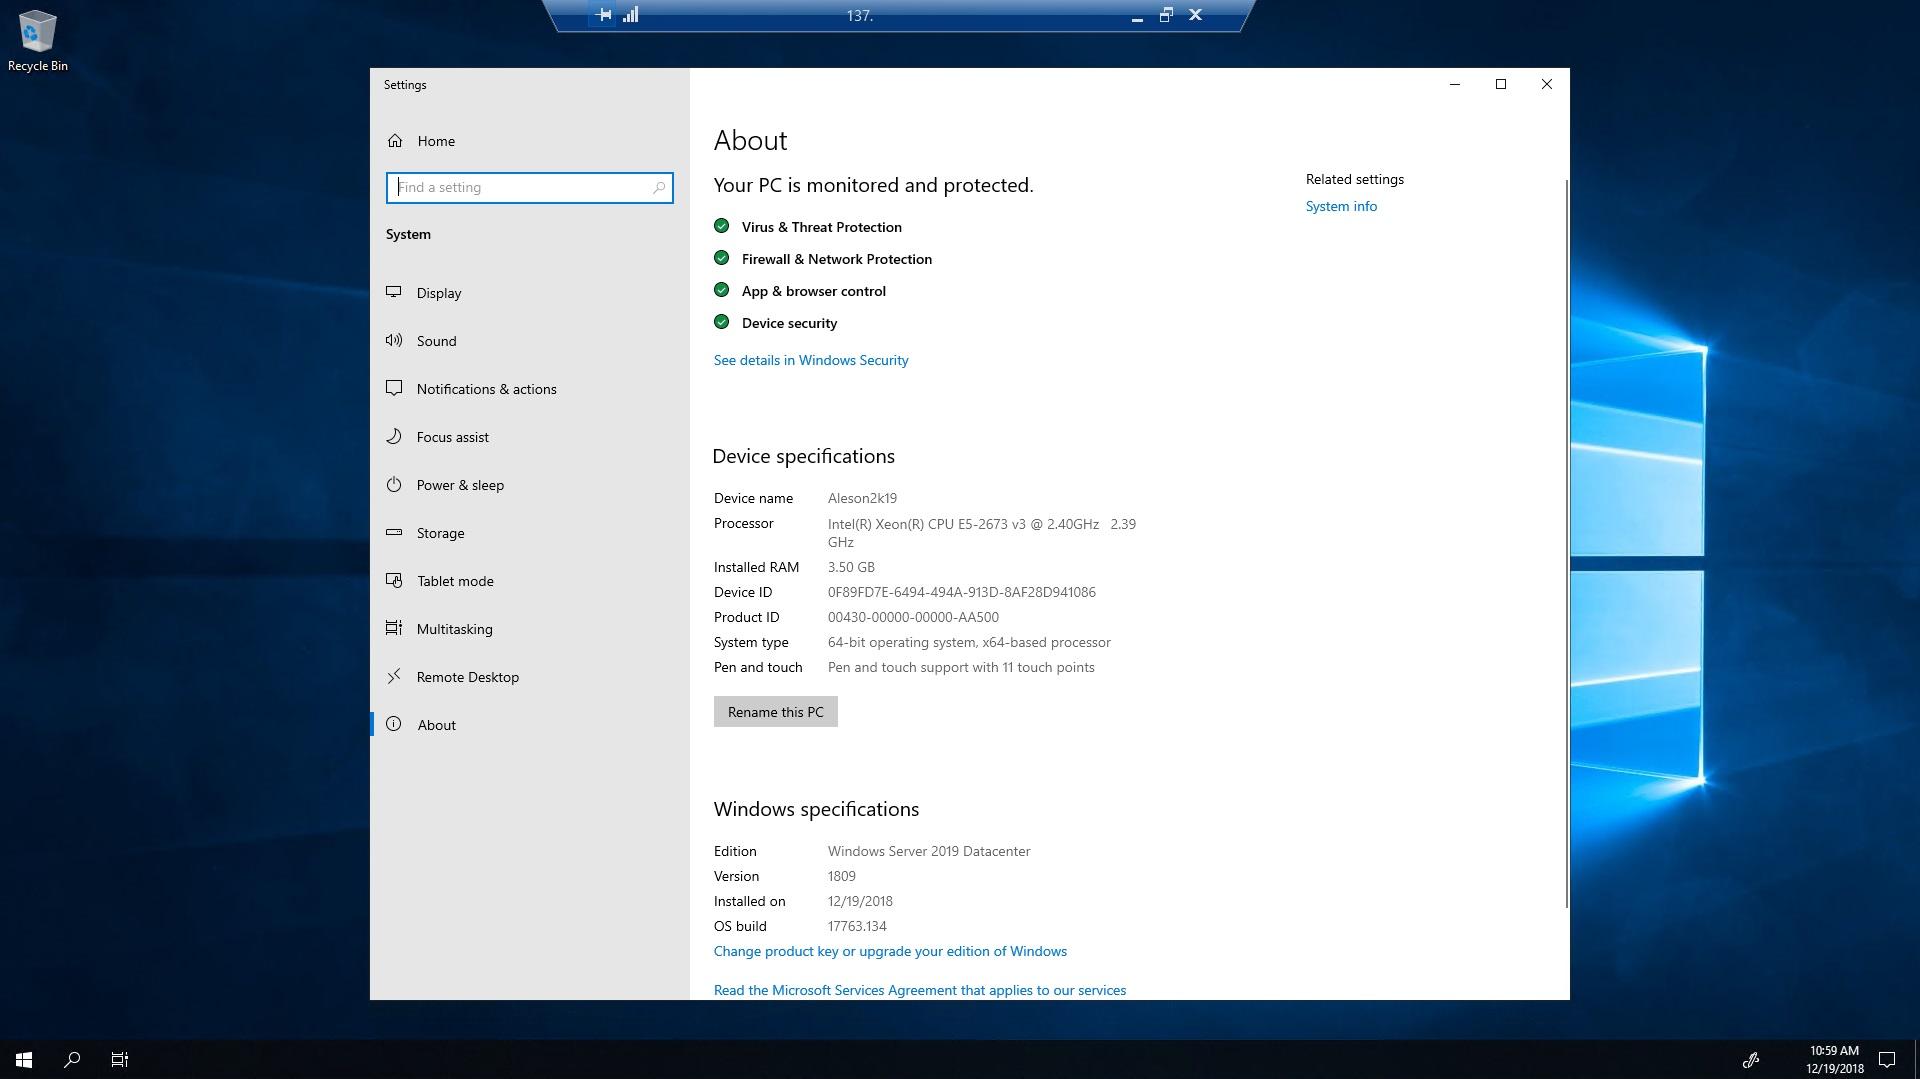
Once inside our server we check that all the previous configurations are correctly (Name of the server, CPU, RAM ..)

A perfect entry for the initiation into the world of Azure and Creation of Virtual Machines. In the next post we will continue uploading more content where we will show the Services offered by Azure.

Do you want to get the most out of Microsoft Azure? Contact us and we will tell you how.

Complete este formulario para recibir la guía de Windows Server en Azure
*Obligatorio
Complete este formulario para recibir la guía de Windows Server en Azure
Gracias por rellenar el formulario [name]. ¡Aquí tienes tu eBook Gratis!
Complete este formulario para recibir 4 best practices to implement a comprehensive Zero Trust security approach
*Obligatorio
Complete este formulario para recibir 4 best practices to implement a comprehensive Zero Trust security approach
Gracias por rellenar el formulario [name]. ¡Aquí tienes tu eBook Gratis!
Complete este formulario para recibir Cloud Migration Essentials
*Obligatorio
Complete este formulario para recibir Cloud Migration Essentials
Gracias por rellenar el formulario [name]. ¡Aquí tienes tu eBook Gratis!
Complete este formulario para recibir Cloud security Advice for Nonprofit Leaders
*Obligatorio
Complete este formulario para recibir Cloud security Advice for Nonprofit Leaders
Gracias por rellenar el formulario [name]. ¡Aquí tienes tu eBook Gratis!
Complete este formulario para recibir Prevent data leaks with Microsoft 365 Business Premium
*Obligatorio
Complete este formulario para recibir Prevent data leaks with Microsoft 365 Business Premium
Gracias por rellenar el formulario [name]. ¡Aquí tienes tu eBook Gratis!
Complete this form to recieve the guide of Windows Server on Azure
*Required
Complete this form to recieve the guide of Windows Server on Azure
Thank you for filling out the form [name]. Here's your Free eBook!
Complete this form to recieve 4 best practices to implement a comprehensive Zero Trust security approach
*Required
Complete this form to recieve 4 best practices to implement a comprehensive Zero Trust security approach
Thank you for filling out the form [name]. Here's your Free eBook!
Complete this form to recieve Cloud Migration Essentials
*Required
Complete this form to recieve Cloud Migration Essentials
Thank you for filling out the form [name]. Here's your Free eBook!
Complete this form to recieve Cloud security Advice for Nonprofit Leaders
*Required
Complete este formulario para recibir Cloud security Advice for Nonprofit Leaders
Thank you for filling out the form [name]. Here's your Free eBook!
Complete this form to recieve Prevent data leaks with Microsoft 365 Business Premium
*Obligatorio
Complete this form to recieve Prevent data leaks with Microsoft 365 Business Premium
Thank you for filling out the form [name]. Here's your Free eBook!
Complete this form to recieve Cloud Migration Simplified Ebook.
*Obligatorio
Complete this form to recieve Prevent data leaks with Microsoft 365 Business Premium
Thank you for filling out the form [name]. Here's your Free eBook!